Hope you had a great weekend, friends! There is a new vault release tomorrow at 10:00am ET. For those who may not know what a vault release is, it is a re-release of previously retired products from the MFT Stamps shop. Maybe you missed out on a favorite in the past or you’re ready to discover a new favorite, I think there is something for everyone in the new vault release.
I was part of a virtual, mixed media craft retreat hosted by Hero Arts this past weekend. I was in the mood to do more mixed media so I used a bunch of techniques in my card inspiration for today. I’m happy with how this card turned out!

STEP-BY-STEP INSTRUCTIONS
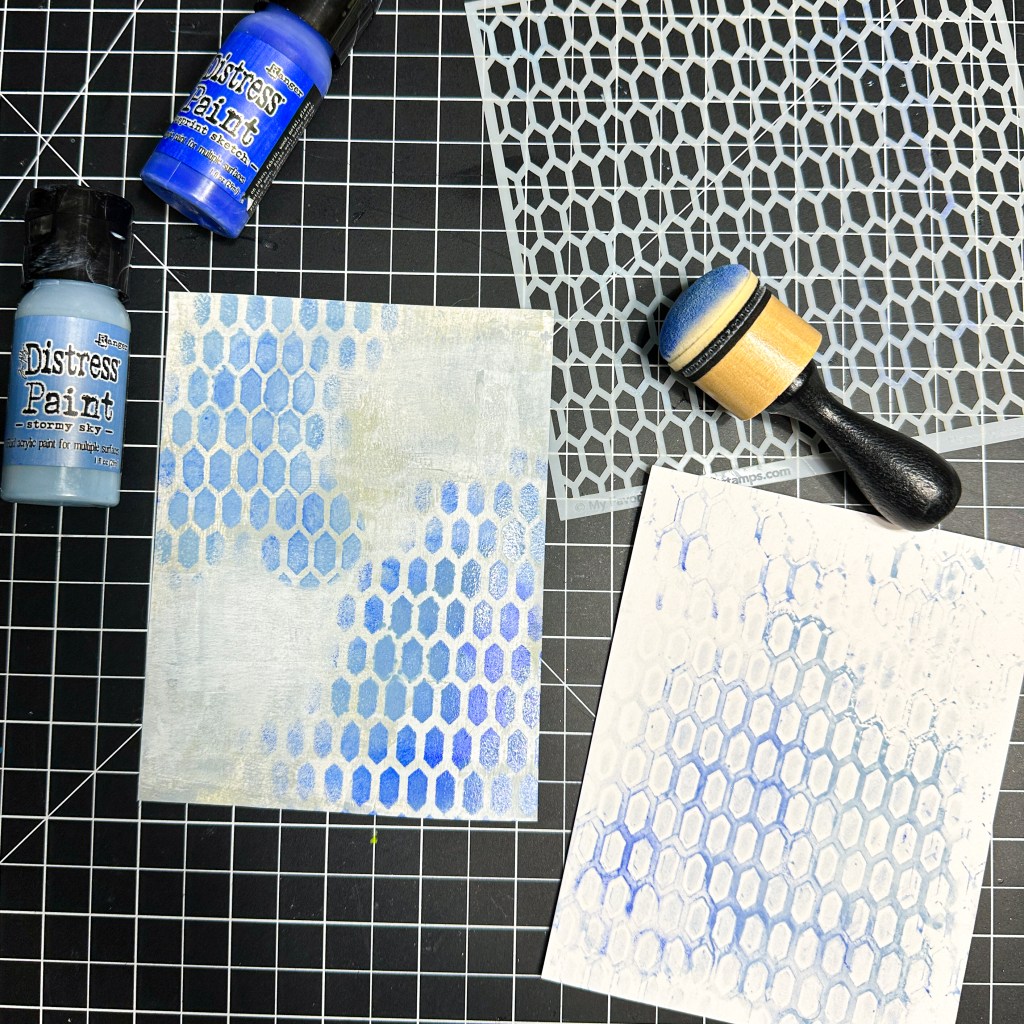
- On a piece of heavyweight cardstock, use a brayer to apply three acrylic paints. I used a greenish color, a gray, and white. Brayer back and forth in multiple directions with each color until your background is as you’d like.
- Using the Happy Hexagons stencil, use a sponge applicator to apply stormy sky and blueprint sketch distress paints through the stencil on opposite corners of the panel. Before cleaning your stencil and while it is still wet, spray the stencil with water and do a print on another piece of cardstock. This is the start of another background so it is a two for one technique. Set the panel aside to dry.

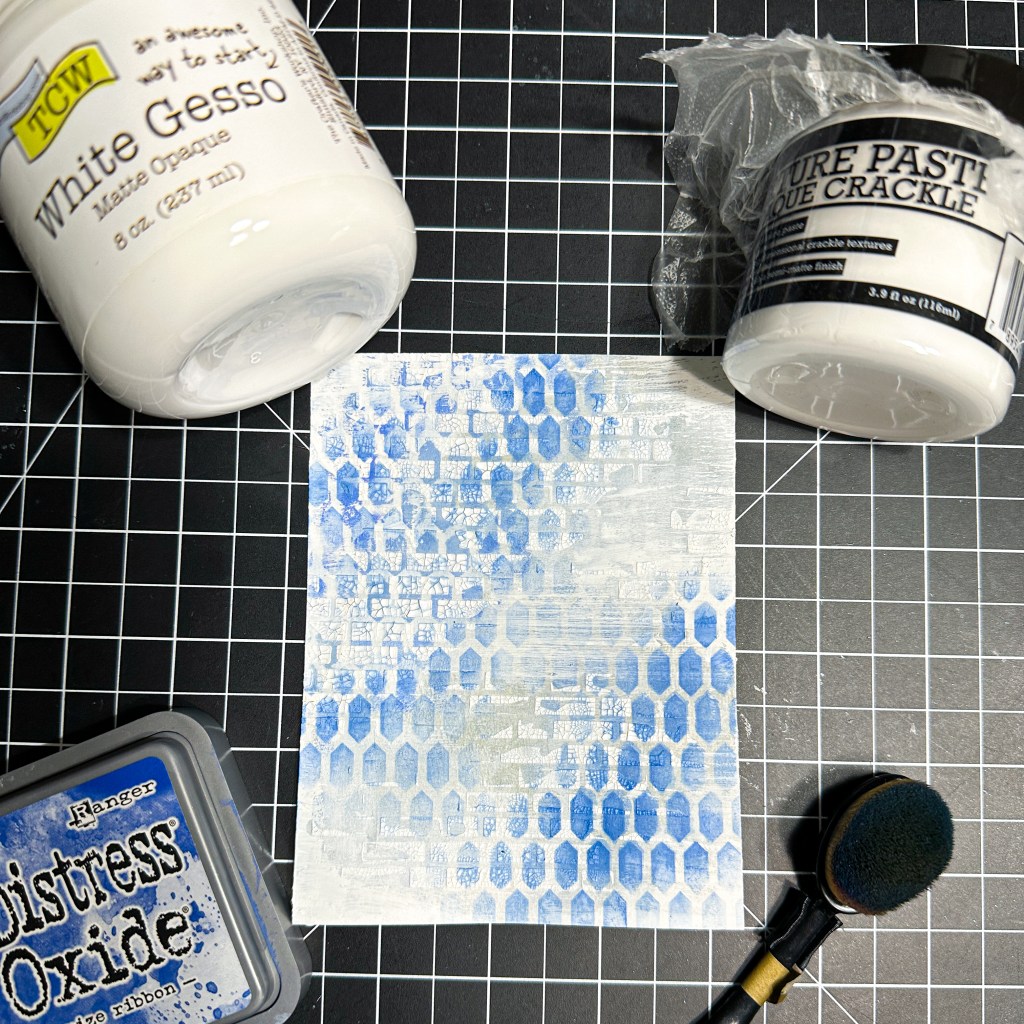
3. I wasn’t happy with the panel, so I with a flat paintbrush, I added opaque gesso to the panel to knock back the stenciling I did previously and add more texture. I wanted the edges to be more toned down and the white distress paint was too transparent.
4. Once the gesso was dry, I added back in some stenciling with prize ribbon distress oxide ink. I just placed the stencil back into place. The gesso knocked it back too much and I wanted a little punch of bright color. Then, I used the English Brick Wall stencil to apply some opaque crackle paste. Set the panel aside to air dry completely so the crackle texture can come through. It won’t work if you heat dry the crackle paste.
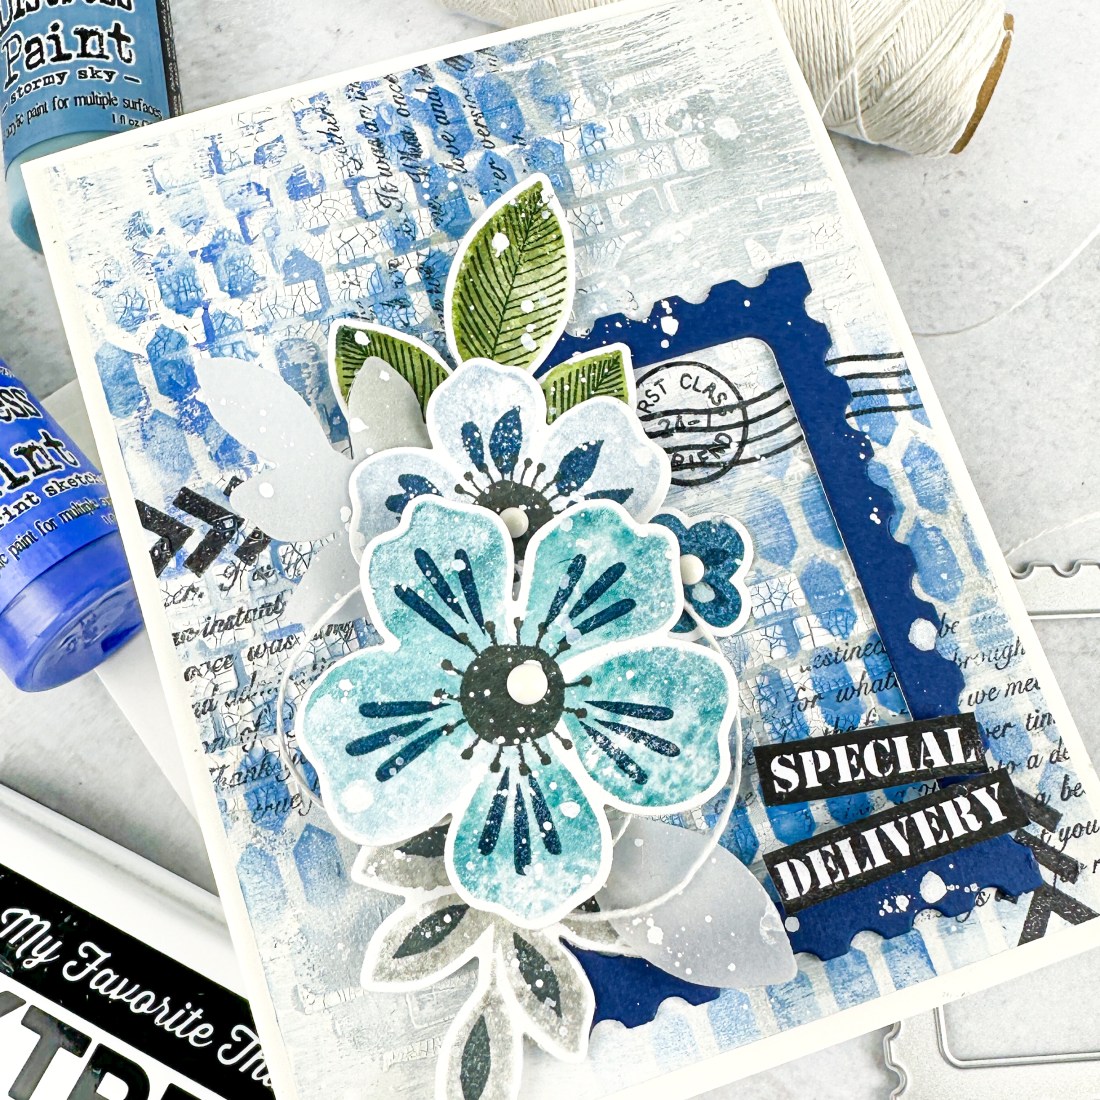
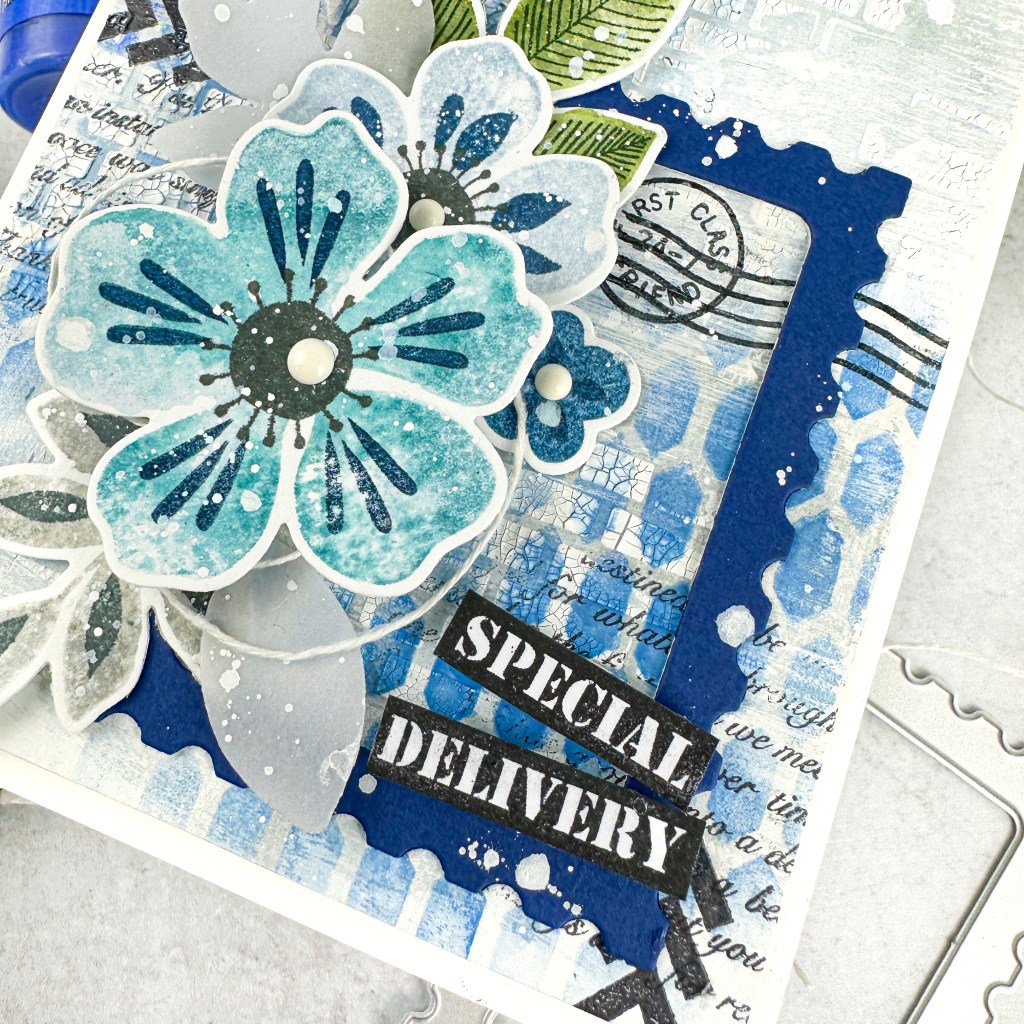
5. Use the First Class Friend stamp to add several stamps to the background. I used black soot archival ink and Versafine Clair black ink. By mixing different black inks, you can create another dimension of contrast because the blacks have varying intensity.
6. Die cut the larger postage stamp die in First Class Frame Die-namics. Die cut from white and Blue Beyond and glue the layers together.
7. Stamp several flowers and leaves from Flashy Florals with various blue, gray, and green inks. I applied the color to the stamps and then sprayed with water. I stamped on watercolor paper. Be sure to wait a few seconds to ensure the ink soaks into the paper. For the detail layer of the stamps, I did not use water to get a more crisp impression. Die cut the florals with the coordinating die-namics. Also, die cut a few solid leaves from vellum.
8. Arrange and adhere the leaves to the left side of the frame.
9. Stamp and trim a sentiment from First Class Friend.
10. Splatter the panel with white paint and add a few white enamel dots to the flower centers.

I hope this inspired you to try some mixed media in your next make! Stay tuned because there are three more days of vault blogs and inspiration coming. Thanks for reading!
For more inspiration, tutorials, and a closer look at MFT products, please stop by and subscribe to the MFT YouTube channel!
Happy crafting,
Tiffany
I’d love to connect with you! Please follow me on IG and my blog, and reach out and say hi!
@ink.therapy.designs

I am absolutely in love with this card. I did the HA mixed media classes this past weekend too and I wish this card was one of the classes! You have a new fan (and follower) in me. Thanks for sharing your process.
LikeLiked by 1 person
Oh goodness, Robin, thank you! That is the nicest compliment and totally made my day!!! If enough people are interested, I might go live on IG and walk through it. 🙂 So glad you stopped by and nice to meet you!
LikeLike
I would love to see a walk thru! I hope you will give a heads up on your blog if you’re going to do a live on IG. I’m not on social media that much, but I would make a point of watching.
LikeLiked by 1 person