
(*Affiliate links used whenever possible at no extra cost to you.)
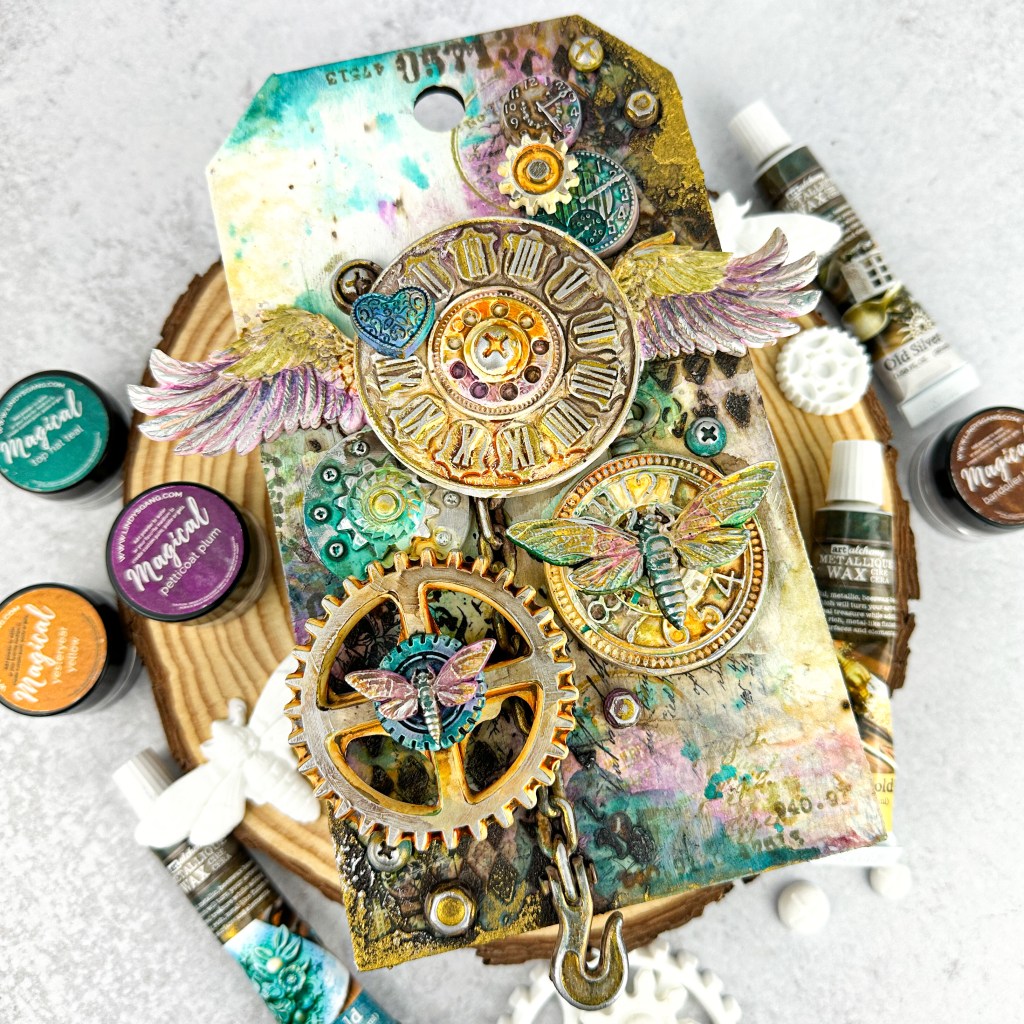
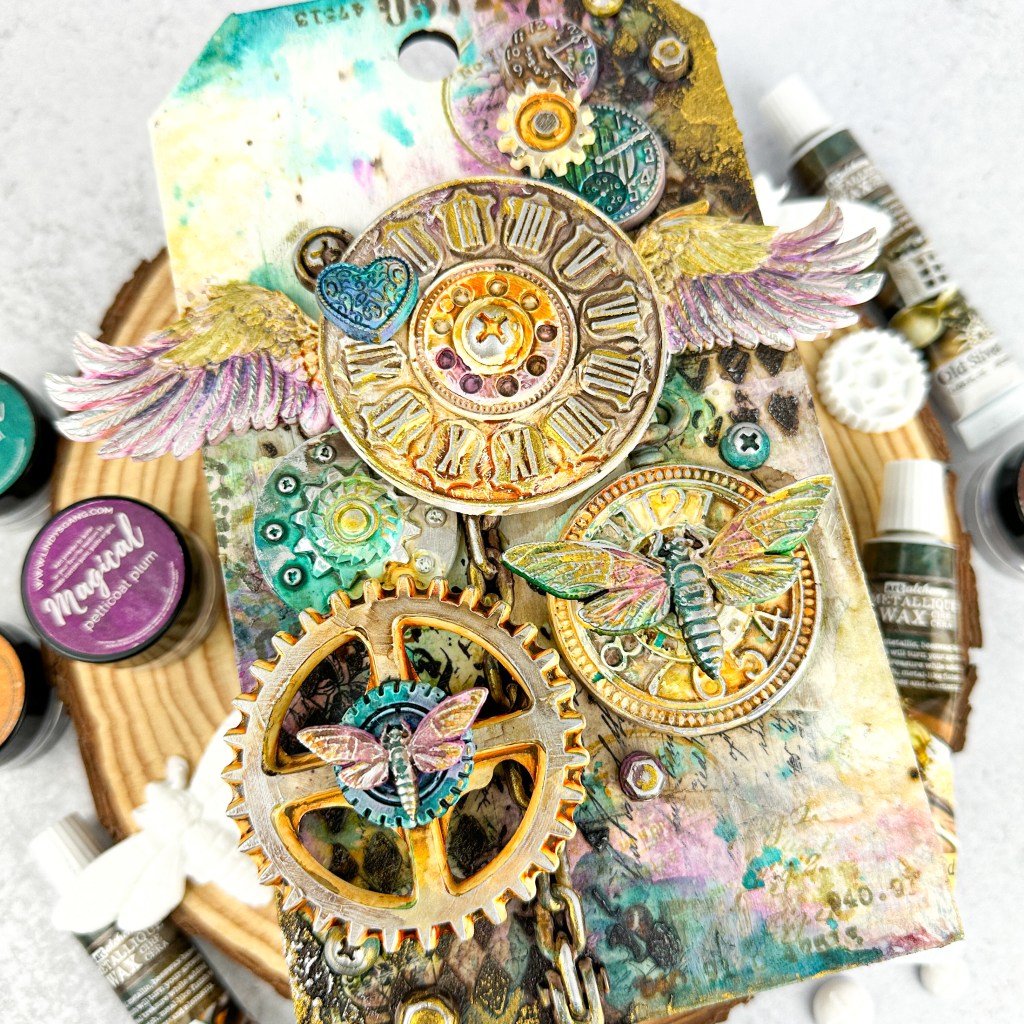
Hi friends! While I’ve been nursing my hand/wrist (unfortunately it still hurts, but I am carrying on with my life. I’ll go back to the doctor if it still hurts in a couple weeks), I have been watching a ton of mixed media videos. If you’ve been following me, you know that I love mixed media of all kinds. There are SO many fun techniques and mediums to play with. I created my very first tag using 3d resin moulds. It was SO MUCH FUN! My hands were stained with resin, ink, and wax for days, but it made me happy. I used a bunch of different products which I will list below. There is a lot of info below (and I am no expert), so grab a cuppa and follow along. Please let me know if you have questions!
STEP-BY-STEP INSTRUCTIONS
- I started by creating my moulds. I made them the night before I created the tag, but I don’t think it is necessary. I made a bunch of mistakes as this was my first time, but if you were to do it properly, you could make the moulds and create the tag within the same day.
You can use multiple things to create the moulds – craft clay, clear or white resin. I used white resin – Polyurethane Resin with Silicone Measuring Cups. The resin has two parts that you mix together in a 1:1 ratio, mix a bit with a silicone or plastic spoon, and then carefully pour into your moulds. I like using silicone because you can clean and reuse it easily vs plastic cups or stirrers that you would throw away. Make sure you are wearing gloves through this part and you are working in a well ventilated area.
The 1:1 ratio does not have to be exact, but it should be close. Even though the resin I used says it only takes 10 minutes to cure (it pours into the mould clear and will turn completely white once it is fully cured), I found that it took much longer. You want to work quickly so your solution does not cure inside of the cup. You do not have to fill the mould completely, but just enough to cover the design. Especially with the cogs or gears, if you overfill, the spaces in the middle of the gears won’t be open like they should be. Once fully cured, the moulds easily pop out. Here is a great video from Finnabair which helped a lot.
On my tag I used pieces from the following moulds:

2. Prep and create the tag. The base for my tag is a Stampers Anonymous Tim Holtz Etcetera Mini Tag. The tag measures 4.5 X 8 inches. I covered the tag with a thin layer of matte, opaque white gesso and let it dry. On top, I added ripped strips of washi tape. I made sure to tear both sides of the tape so I would have no straight edges. I added the washi on the bottom left and top right. Next, I covered the washi with clear gesso to ensure it was protected from moisture and additional mediums could be layered on top. I also added some white gesso to wash out the washi tape a little.
3. I added texture and color to the background using stamps, a stencil, and Lindy’s magical powders. I used the following Magical colors: Yesteryear Yellow, Petticoat Plum, Top Hat Teal, and Bandolier Brown. I mixed texture paste with Bandolier Brown to create my own brown paste. Using a palette knife, I used it through a Stamperia stencil, Around The World Double Texture in random places over the washi tape. I added the texture paste directly to the upper right and lower left sides of the tag. Let the paste dry.
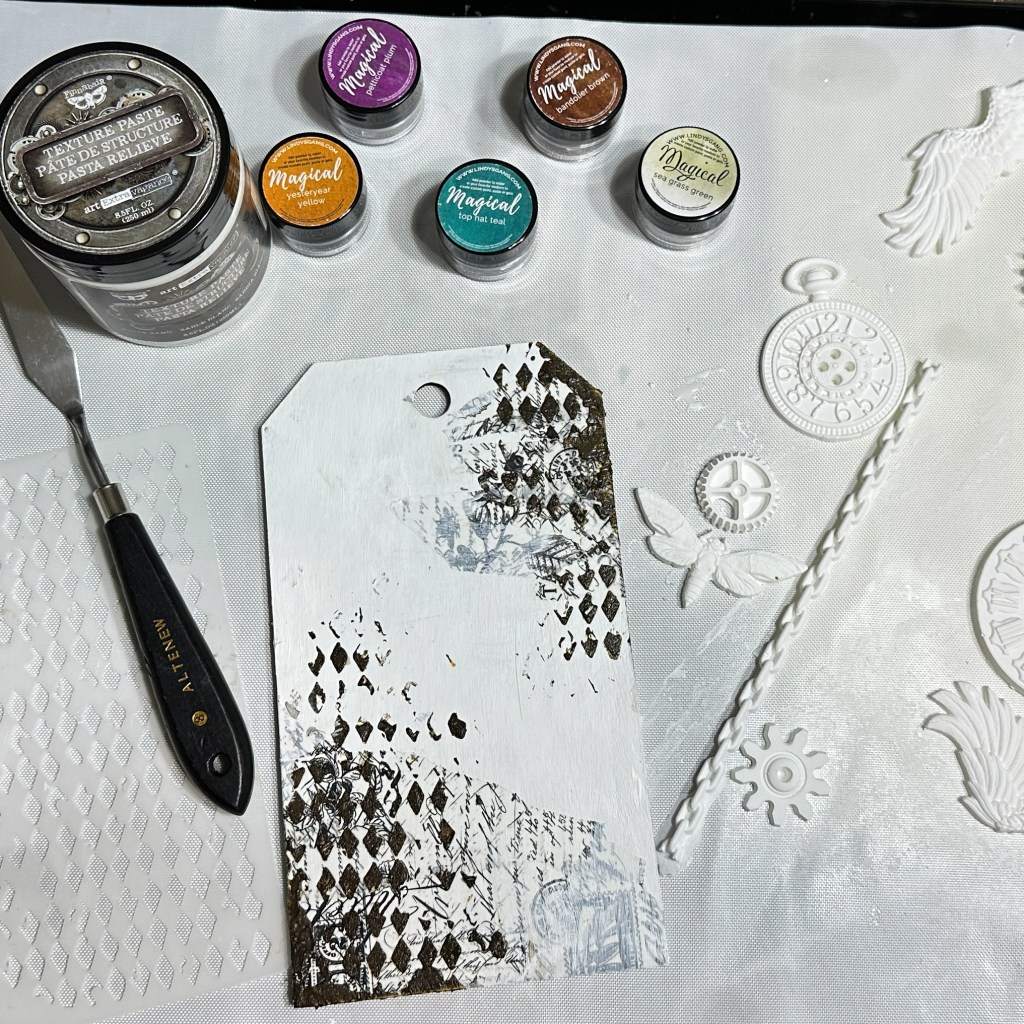
Add the magicals to a watercolor palette, and add to the tag with a watercolor brush. A little here and a little there, adding layers to deepen some colors and splatter. I encourage you to just go with the flow and paint.
4. After the magicals dried, I used vintage photo and ground espresso archival inks to stamp for more texture. I used multiple stamps from Field Notes. I used both browns for a variety of depth and overlapped my stamping. I made a couple mistakes stamping and to correct them, I covered the stamping with the same opaque, white gesso and re-stamped. Lastly, I added plain texture paste (the same paste I mixed with brown in step 3), directly to the tag with a metal palette knife. It dried more clear and picked up the color from the background and just adds a little more texture and grunge.
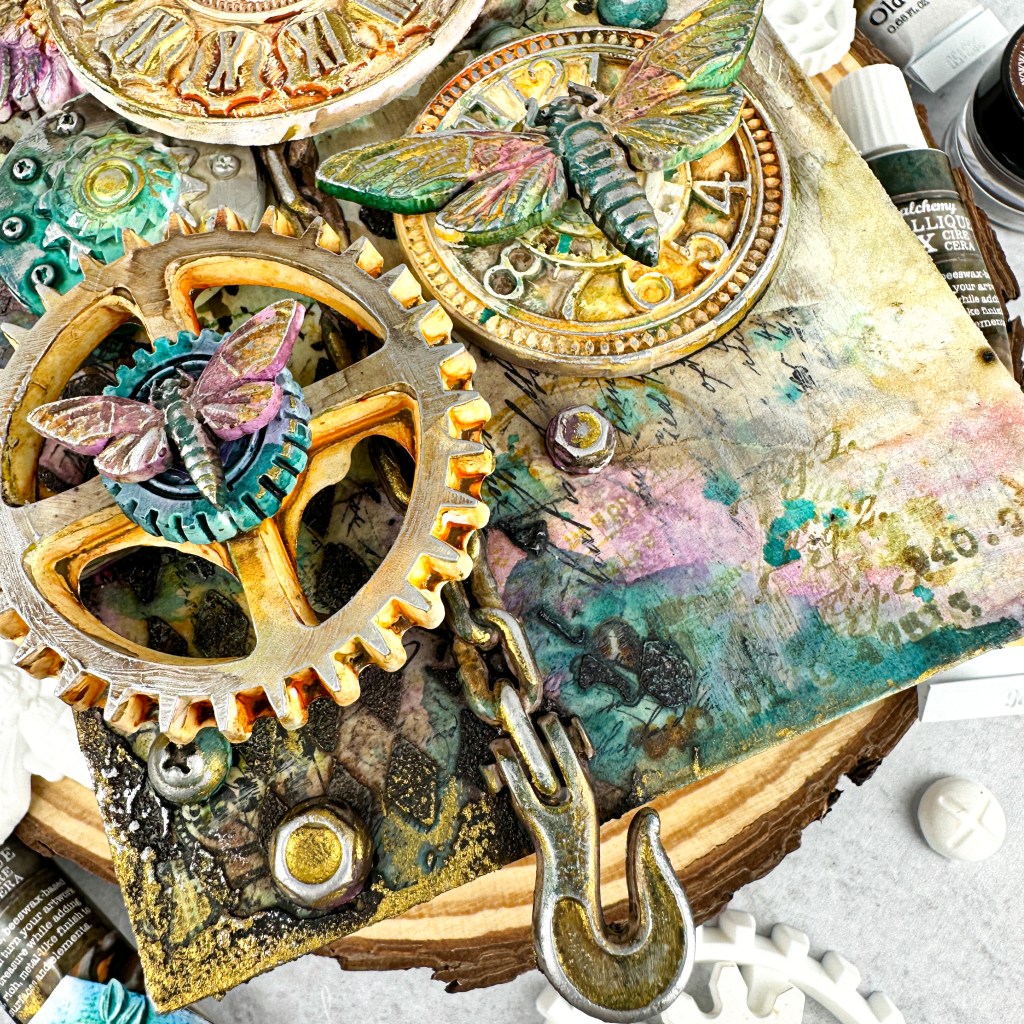
5. It’s time to work on the moulds. First, I decided how I wanted to arrange my composition. As this was my first time, I fiddled with this quite a lot. I ended up with this layout. Remember when I mentioned not overfilling your moulds especially the gears? You can see in the bottom left gear where the middle sections that should be hollow have a little resin poking out. This is because I overfilled them accidentally.

Once you are happy with the composition, take a picture so you can refer to it later. Add white gesso to every piece you want to add to the tag. Some people glue the pieces in place on the tag and then gesso, but I gesso’d each piece individually. The gesso makes a great base for additional mediums and seals the pieces. Next, paint all of the pieces with the same colors of magical powders. Again I painted each mould individually. Be mindful of how you’re using the colors so there is variation and interest.
6. After the pieces have dried, glue everything down using matte medium. You can use any that you have, but I used Multi Medium Matte. I also recommend Heavy Body Gel. The Multi Medium takes a while to dry to you can use your Heat tool to speed up drying. The Heat tool is better for these types of projects than your embossing gun because it diffuses the heat and won’t burn your project. An embossing gun has a more concentrated, narrow heat path. I added additional color to the background here and there as I thought I needed.
7. The last step is to really bring out those details with metallic wax. I used Vintage Gold, Emerald, and Old Silver. Seriously, these waxes are SO beautiful!! I added a little wax to my palm and used my fingers to dab colors here and there. It is hard to capture in photos, but in person you can see the beautiful, pearlescent colors. The wax really makes the elements look like real metal which adds to that fun steampunk feel.

Phew! If you’ve read all this, thank you! I wanted to add many details so you could try a similar craft and not feel so lost. It might look complicated, but it is actually pretty easy! Just takes several layers and drying time.


I really hope you liked this project and are inspired to try something new! It was fun to get out of my comfort zone and try some brand new mediums and a new color palette. Head over to my IG to see a little video of the tag. The video is on my profile page in the highlight section under ‘mixed media’. Please don’t hesitate to reach out to me if you have any questions at all.
You’ll still see clean and simple and artsy cards on my blog and IG, but you’ll also see much more mixed media. I appreciate you reading! ❤
Happy crafting,
Tiffany
I’d love to connect with you! Please follow me on IG and my blog, and reach out and say hi!
@ink.therapy.designs
*Affiliate disclosure: I only use, review, and blog about products/companies I actually like and will continue to use. Some of the products shown on my blog use affiliate links. These affiliate links allow me to earn a small commission when products are purchased through those links. *This is at no cost to you!* Please do not feel obligated to use my affiliate links. If you choose to use these links, thank you so much! It helps support my blog and bring new content to you. Read the full disclosure on the about page.

Fabulous, love it😍💖
LikeLiked by 1 person
Thank you so very much!!
LikeLiked by 1 person
What a gorgeous tag! You did an amazing job! I like mixed media, but already have too much stuff for card making & scrapbooking! I definitely do not need to collect more stuff! 😉
LikeLiked by 1 person
I totally understand that Kim! I just could not resist. I need to destash some cardmaking stuff to make more room for my mixed media stuff soon 😉 Hope you are well and thanks so much for your kind comment!!
LikeLike