Project Overview
- Technique(s): die cutting, heat embossing, ink smooshing
- Product list:
- Waffle Flower Crafts, Spring Leaves Die
- Waffle Flower Crafts, A2 Lacy Layers Die
- Waffle Flower Crafts, Label Greetings Combo
*affiliate links used whenever possible at *no additional cost to you*! Thanks for your support!

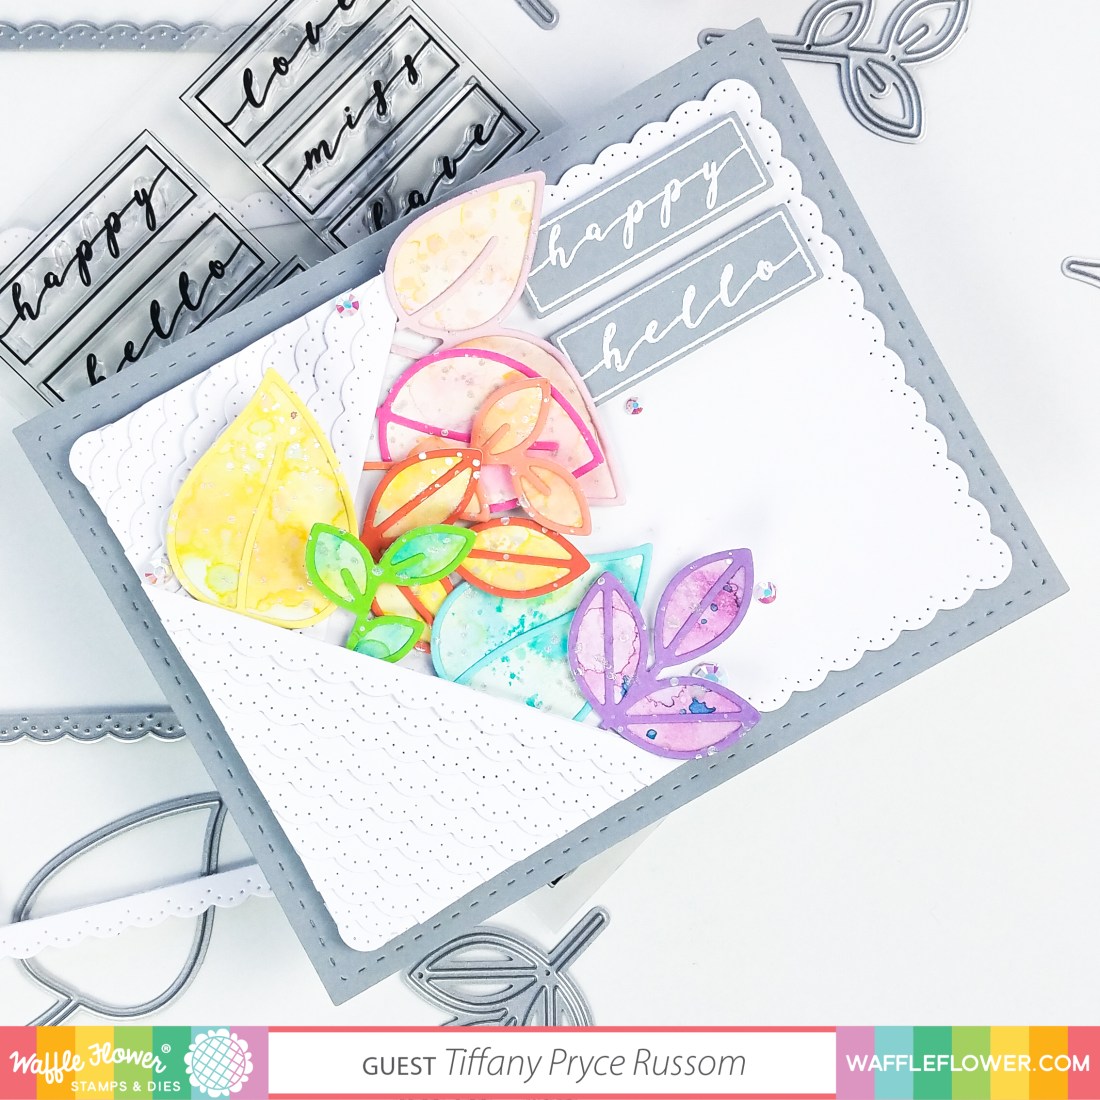
Hello, friends! Last week I announced that I am a guest designer this week for Waffle Flower’s first ever weekly challenge! The challenge asks participants to use leaves or greenery as the main focal point and runs from March 5 – March 11, 2021. I love Waffle Flower so I actually came up with several ideas! Please check my IG for some of the cards I created if you need additional inspiration! All of my ideas were an ode to spring and celebrating warmer weather. Let’s dive into how I made my official entry for this fun challenge!

Card base. Using heavyweight white cardstock, I created a top-folding, A2 sized notecard. On top, I adhered a piece of Dove cardstock from C9 (a medium gray) and die cut it with the largest layer of the A2 Lacy Layers Die. For another layer, I added a piece of white cardstock die cut with the second largest layer from the A2 Lacy Layers Die.
Leaves. To create the leaves, I started with a half a sheet of Strathmore multimedia paper. I needed to use paper that could withstand water and ink smooshing. I smooshed a rainbow of Distress Oxide inks on my Tonic craft mat and dragged my paper through it. I splattered color over the panel too with a paintbrush. Once dry, I die cut the base of my leaves strategically, so I would have a variety of leaves in rainbow colors. I die cut the leaf outline from cardstock in my stash in coordinating colors. Finally, I splattered the leaves with silver, metallic watercolor from my favorite watercolor palette, Gansai Tambi Watercolor Starry Colors.
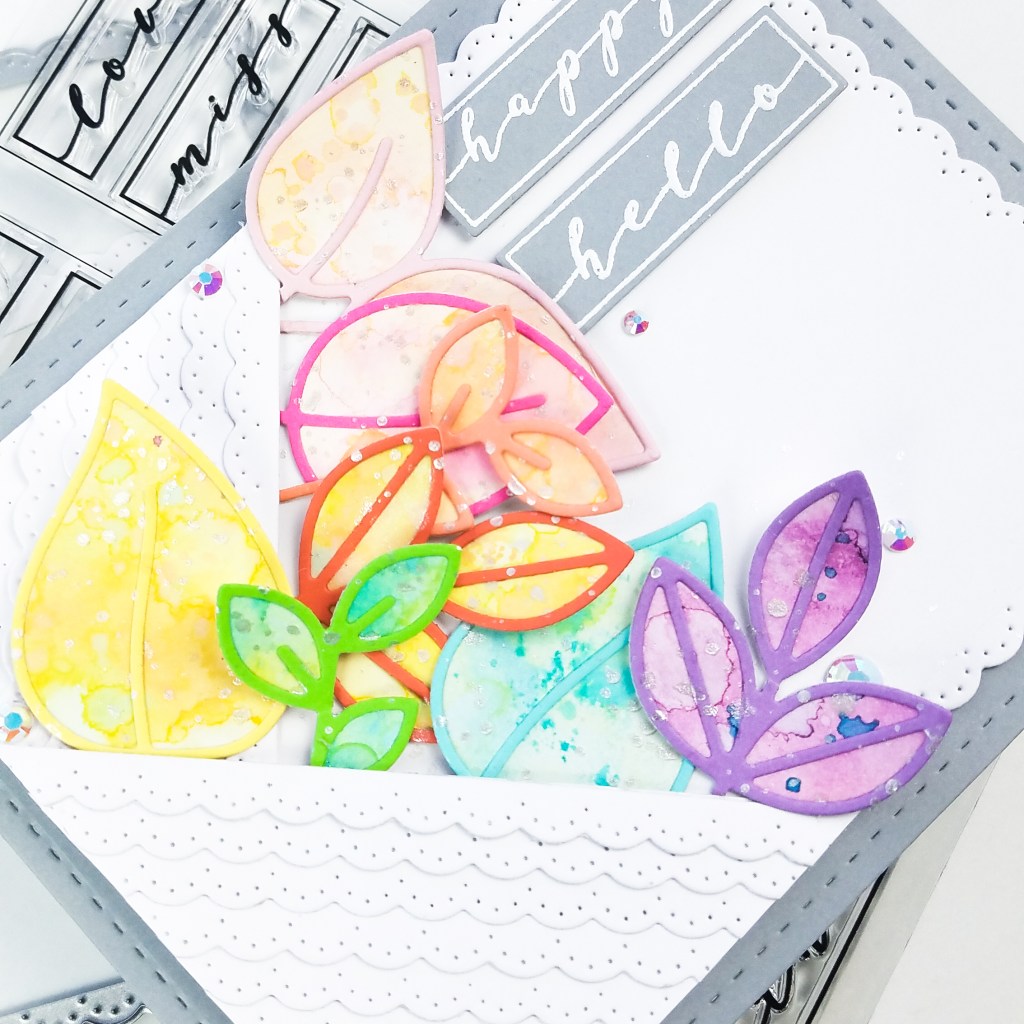
Leaf Pockets. I always love trying to find new ways to use my supplies so I was pretty happy when I created the scalloped pockets for my leaves. I die cut several frames using the second and third largest layers in the A2 Lacy Layers Die from white cardstock. I then cut a thin piece of copy paper into a 3 x 3 inch square and cut it in half diagonally to form triangles. I used this as the base layer to glue my frame rows together. I simply layered row after row until the entire triangle was covered. I used liquid glue to adhere the pockets to my card front. I made sure not to glue the tops of the pockets down because I still needed to arrange my leaves inside.
Sentiment. The sentiment, from the Label Greetings Combo, was stamped in Versamark ink and heat embossed using Ranger Ink, Super Fine white embossing powder on a piece of Dove cardstock from C9 (a medium gray). I die cut the words with the coordinating label dies. I love the Label Greetings set! The font is so pretty and the coordinating dies make for easy sentiment strips. The dies also slightly round the corners of the die cut strip which is a nice touch.

Finishing touches. I arranged my leaves in the pockets in rainbow order and carefully glued them down. I adhered my sentiment strips with foam tape for dimension, and added some holographic gems to pick up the soft pastel colors of the leaves.
I hope you liked my card and it inspired you to join us!! Remember that there will be multiple winners! The team will choose 1 challenge winner to win a $25 gift certificate to the Waffle Flower online shop. We will also draw 1 lucky winner from all entries on EACH platform to receive a $15 gift certificate! You can submit multiple projects or enter the same project at all 3 platforms! For more info and to enter, visit:
- Challenge Blog post/Link Party: https://waffleflower.com/blogs/challenges/2021-march-challenge1
- Waffle Flower Garden Facebook group: https://www.facebook.com/groups/127493411012764/
- Use #WFC2103W1 for your IG posts

.Tiffany.
IG: @ink.therapy.designs
