
Project Overview
- Technique(s): die cutting, stencil, mixed media
- Product list:
- Scrapbook.com, Floral Confetti Stencil
- Scrapbook.com, Slim Sunshine Die
- Scrapbook.com & Pinkfresh Studio, Thin Words Everyday Script
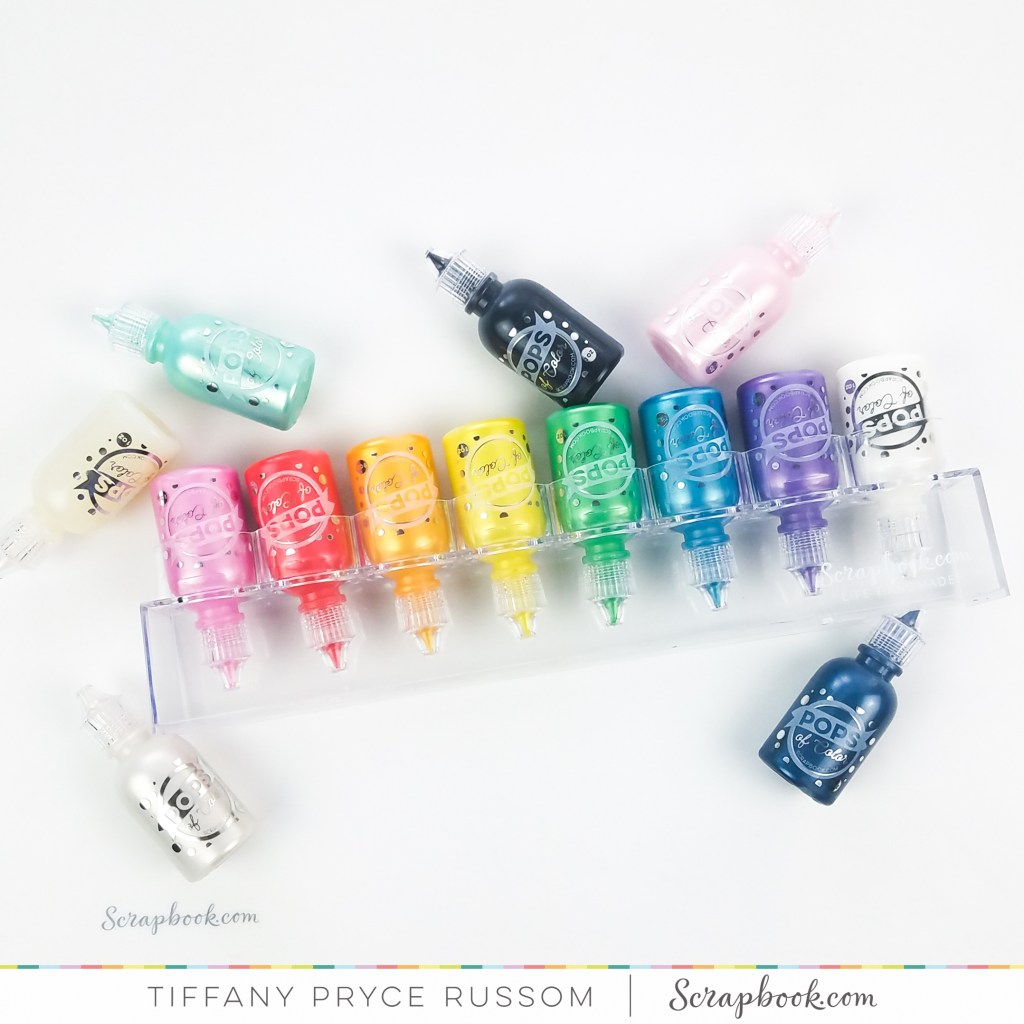
- Scrapbook.com, Pops of Color
- Scrapbook.com, Warms – Smooth Cardstock Paper Pad
- Scrapbook.com, Double Sided Adhesive Foam Strips
*affiliate links used whenever possible at *no additional cost to you*! Thanks for your support!

Hi friends! With today’s mini slimline card, I’m sharing two simple ways to use Scrapbook.com’s new product, Pops of Color. For those who may not know, Pops of Color are dimensional, vibrant liquid embellishment that are great to add to any projects. They come in a rainbow of pearlescent colors and can be used in a variety of ways. I matched my Pops of Color with the closest Copic marker and Catherine Pooler dye ink (my ink of choice) that I own – I’ll share those pairings in another blog soon.
Technique 1: Mix with paste
To start my card, I used the Floral Confetti stencil over white, heavyweight cardstock. I mixed the Lemon Chiffon Pops of Color with Ranger texture paste with a plastic palette knife and applied all over the stencil. The Pops of Color have a looser consistency than Nuvo drops and are easy to mix in with other mediums like paste or even water. Add more color and less white paste for a more vibrant color, and the reverse for a lighter color. After stenciling, I added a variety of Pops of Color to the center of many flowers. Because I mixed in texture paste, I let my stenciling dry overnight.
After the background was dry, I trimmed the panel down to a mini slimline size – 3.5 x 6 inches. Next, I die cut a panel of white cardstock with the Slimline Sunshine Die. I temporarily adhered it to the stenciled background and trimmed the excess so the sizes matched. Because I trimmed the die cut down, the sun was lost. So before adhering the sun back to the base of my card, I ink blended a couple yellow Catherine Pooler dye inks.

Technique 2: Create your own colored cardstock
For the sentiment, I created custom color cardstock with my Pops of Color. On a piece of heavyweight, white cardstock, I added some Pops in Cherry Pie, Orange Sherbet, and Lemon Chiffon in a line, and spread them with a palette knife. I slightly mixed the colors to soften harsh lines between the colors. While that was drying, I die cut the sentiment from two different colored cardstock from the Warm paper pad. I adhered them together with liquid glue and offset the layers. Finally, after the custom cardstock was dry (it did not take long to dry because I only added enough for a thin layer), I die cut the third and final layer for the sentiment. Again, I adhered with liquid glue and offset the die cut so each color peeked out. In real life, you can see that pearlescent shine on the sentiment which is really pretty. Lastly, I cut some gold sequins in half and nestled them randomly beneath the sun rays for a little extra shine.

Hope you enjoyed this card and learned some other ways to use the new Pops of Color from Scrapbook.com. Are there other techniques with this product that you’ve found and enjoyed? Please let me know in the comments or over on Instagram. Happy crafting y’all!
.Tiffany.
IG: @ink.therapy.designs


Absolutely “s(t)unning!” 😁
LikeLiked by 1 person
Haha, thank you!! I’m here for the all the puns 🙂
LikeLiked by 1 person