
Repost from the Poppystamps blog
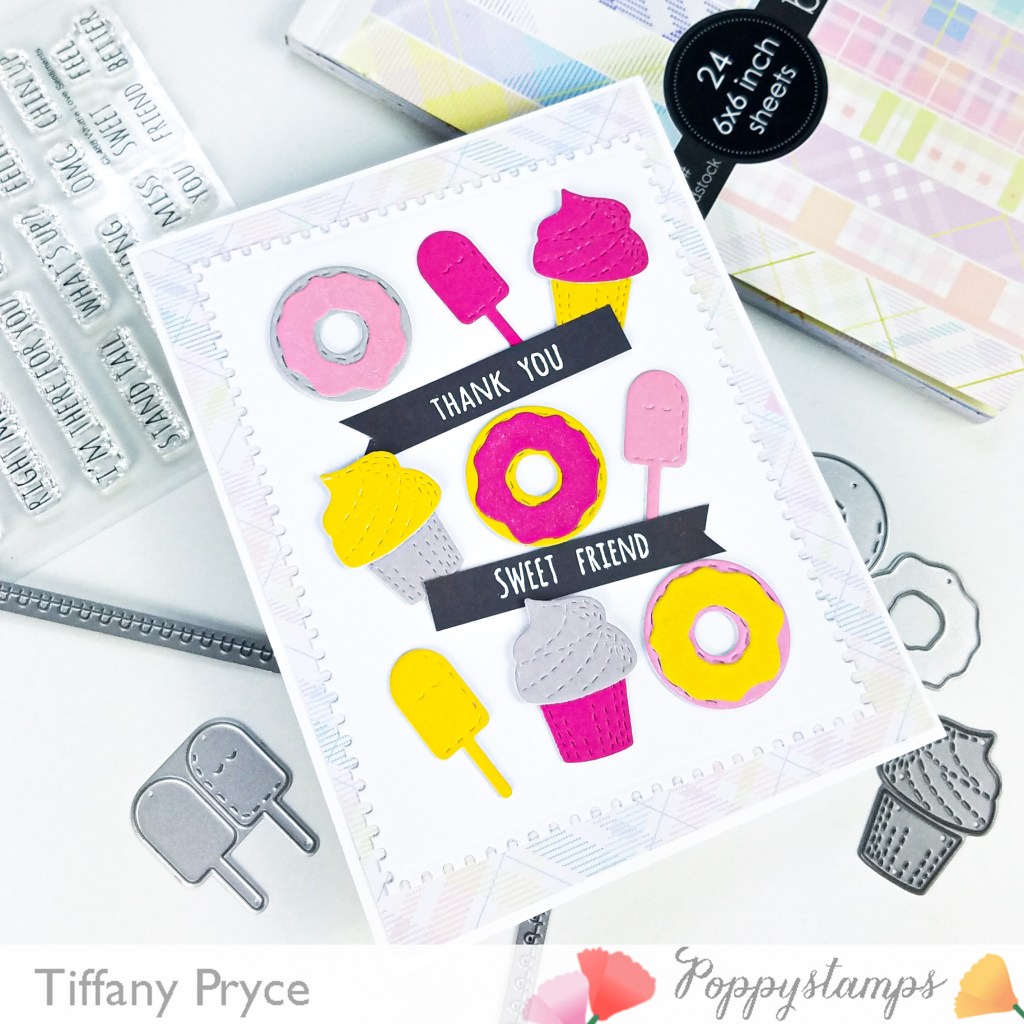
Hi friends! Sharing a sweet, thank you card featuring Whittles from the latest Poppystamps release. I played with the Whittle critters previously so I wanted to try incorporating some of the Whittle food into a card design. This one was simple and lays pretty flat, so it will be easy to mass produce and send through the mail. Win-win! And Poppystamps is having a site wide sale this weekend so now is a great time to shop! If you are interested in shopping, please consider using my affiliate link*.
I started with my base layers. On an A2-sized card base, I trimmed and added a piece of pattern paper from the Spring Plaid paper pack. For the last base layer, I die cut a piece of white cardstock with the largest layer from the Postage Rectangle Layers. I normally add a foam sheet to one or more of my base layers for dimension, but I wanted an easy to mail card. If you are missing dimension, but still want a fairly flat card, you could double or triple up any of the base layer panels.
Next, I worked on die cutting all my card elements. Out of multiple cardstock colors, I die cut the Whittle donut, popsicle, and cupcake several times. I also die cut everything from white cardstock so I could add an extra cardstock layer to each die cut for more stability. If you ever have trouble choosing a color palette, a safe formula that I like to follow is to choose two shades of the same color, a complementary/contrasting color, and a neutral. In my card, I used two shades of purple-pink, yellow as it is opposite the color wheel from purple, and gray as my neutral. Try this simple formula in your next card to see if it works, but don’t be afraid to break all the “rules” and play with colors however you see fit!
In a 3×3 grid pattern, I mixed and matched the die cuts in various color combinations. I adhered the die cuts askew so it did not have to align perfectly. I think it adds a bit more whimsy to the design. After everything was adhered, I added glitter highlights on each piece. I couldn’t make a sugary, sweet card without any glitter! For extra detail, you could add glossy accents to the icing or popsicles.
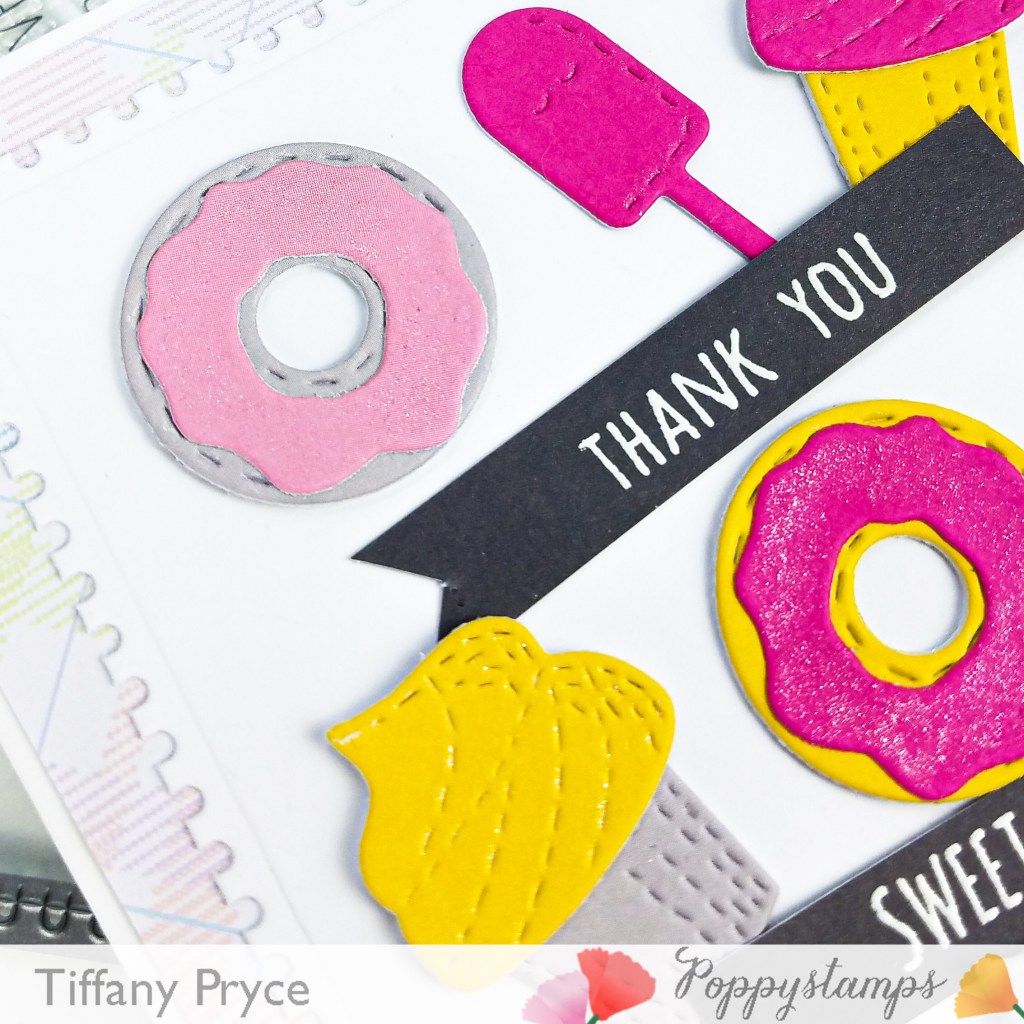
Lastly, I added my sentiment strips. From the Whittle Love Sentiments set, I performed stamp surgery on two sentiments to change their orientation. Don’t be afraid to carefully alter your stamps to make them work for you and your card designs. I stamped them in clear embossing ink and heat embossed in white on dark gray cardstock.


Hope you found some inspiration in this card and are enjoying your weekend. Take care!
*Affiliate disclosure: I only use, review, and blog about products/companies I actually like and will continue to use. Some of the products shown on my blog use affiliate links. These affiliate links allow me to earn a small commission when products are purchased through those links. *This is at no cost to you!* Please do not feel obligated to use my affiliate links. If you choose to use these links, thank you so much! It helps support my blog and bring new content to you. Read the full disclosure on the about page.
