
(*Affiliate links used whenever possible at no extra cost to you.)
Hey there friends! How are you doing? Can you believe Christmas is a mere 2 weeks away? It’s the beginning of the month so time to share new goodies from Spellbinders. The December club kits are really pretty and remind me of new beginnings. With lovely florals and delicate glimmer plates, I’m sure these products will help bring in a beautiful new year!
As always, the Spellbinders Club is a subscription program, and there are 7 Clubs to choose from, including several value options which combines clubs for a discount. By popular request, there is a new club where you get the Clear Stamp of the Month with the coordinating dies. The Total Package Club includes ALL 7 Clubs and has the best value. But feel free to try one or two out to get a feel for the products. There is no minimum commitment, you can join and cancel at any time. Club members also get a perk of an additional 10% off all Spellbinders products.
December Glimmer of the Month

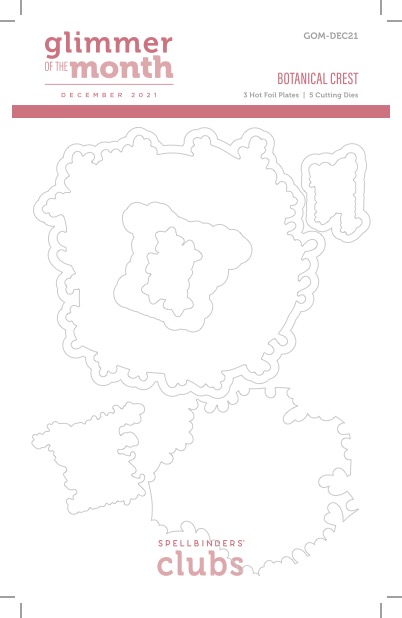
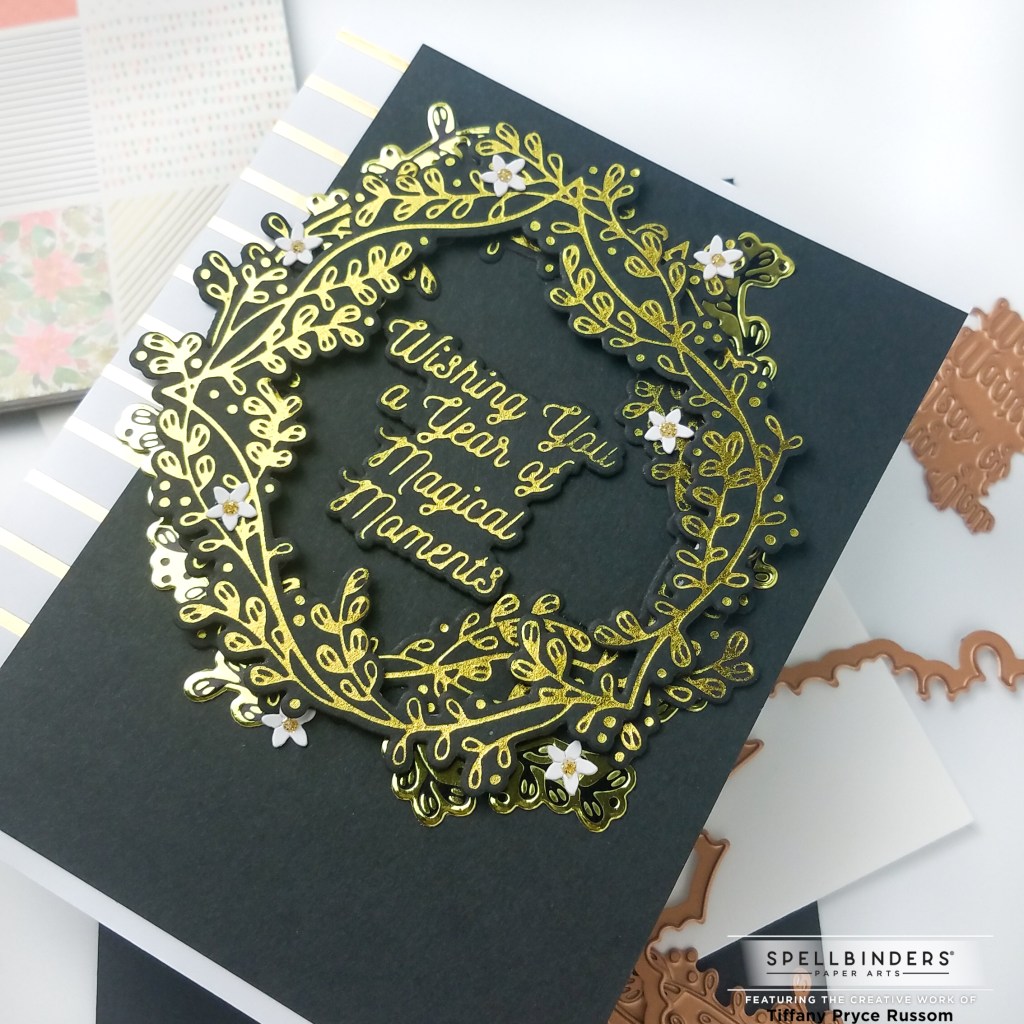
This month’s GOM kit features a floral wreath and two sentiment foil plates. The plates come with coordinating dies. I decided to make a CAS new year’s card for a friend.
STEP BY STEP INSTRUCTIONS:
- Using gold glimmer foil, foil the wreath twice on black cardstock.
- Die cut the wreaths with the inner and outer die cuts.
- Foil another wreath on gold mirror cardstock (I found some on Amazon) using black foil. This was my first time trying to glimmer foil on gold mirror cardstock. It worked ok for my purposes. I don’t think the mirror cardstock loves heat, so some spots you could see were “burnt”. But I cut this wreath apart to add as accents behind the two black wreaths, so I trimmed away the burn spots, and it turned out well!
- Foil the sentiment in gold glimmer foil on black cardstock. Die cut the sentiment and 2 layers behind the sentiment for dimension.
- Trim a piece of pattern paper from the Christmas Traditions paper pad and adhere to an A2 sized card base.
- Adhere the card front elements (wreaths and sentiment) using foam tape and liquid glue.
- Die cut the tiny flowers from white cardstock.
- Adhere the flowers around the panel using liquid glue.
- Embellish with gold drops in the flower centers.


December Clear Stamp of the Month
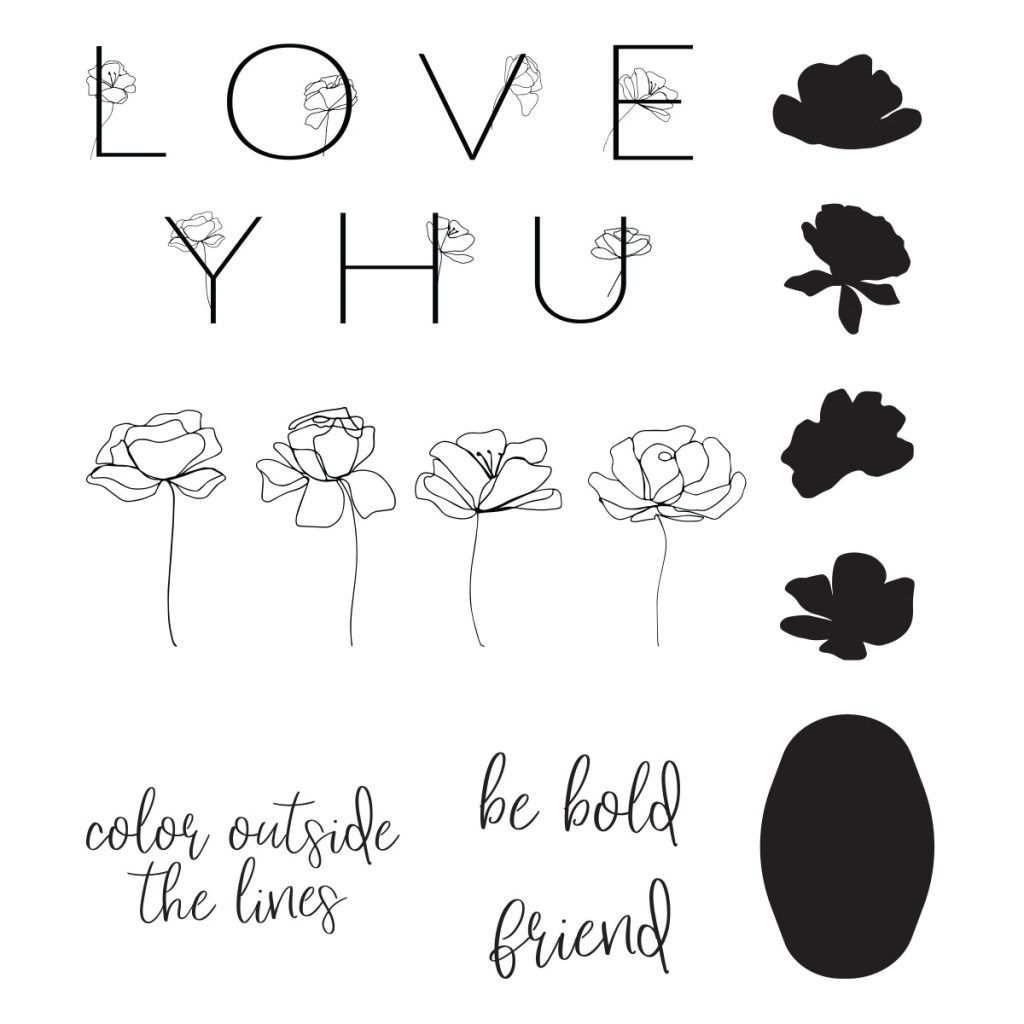

This month’s CSOM kit features several floral stamps, stamps to color in the flowers, and sentiments. I did not receive the dies this month, but with the Clear Stamp and Die of the Month subscription, you will receive the coordinating dies. The dies cut out the letters and the oval shape stamp. For my sample, I again decided to keep it simple.

STEP BY STEP INSTRUCTIONS:
- On an A2 sized panel of white cardstock, stamp several flowers in light gray ink along the left and bottom edges of the panel.
- Using pewter glimmer foil, foil the Skinny Stripe Background on red cardstock.
- Align and stamp the sentiment in embossing ink on another piece of white cardstock. Heat emboss with red embossing powder.
- Adhere the red, foiled panel on top of the stamped panel and trim the excess.
- Adhere the red panel with extra layers of cardstock for dimension.
- Trim a thin stripe of gray cardstock to adhere as a border between the red panel and the stamped panel.
- Affix card front to the card base.
- Embellish with silver fashion pearls.


Hope you found some inspiration in my makes this month! Happy crafting!
*Affiliate disclosure: I only use, review, and blog about products/companies I actually like and will continue to use. Some of the products shown on my blog use affiliate links. These affiliate links allow me to earn a small commission when products are purchased through those links. *This is at no cost to you!* Please do not feel obligated to use my affiliate links. If you choose to use these links, thank you so much! It helps support my blog and bring new content to you. Read the full disclosure on the about page.
