
The new card kit, Gingerbread Greetings, is live in the shop! It contains the Gingerbread House Die-namics, the Gingerbread Greetings stamp set, and card stock. The purchase price of the Gingerbread Greetings Card Kit is 30% off the cost of purchasing the elements separately. Card Stock colors include: Cotton Candy, Razzle Berry, Red Hot, Sour Apple, Sno Cone, Berrylicious, Grapesicle, Solar White, Kraft, and Milk Chocolate. There are a couple new cardstock colors listed that MFT will offer as supplies last. These colors may be available separately later.
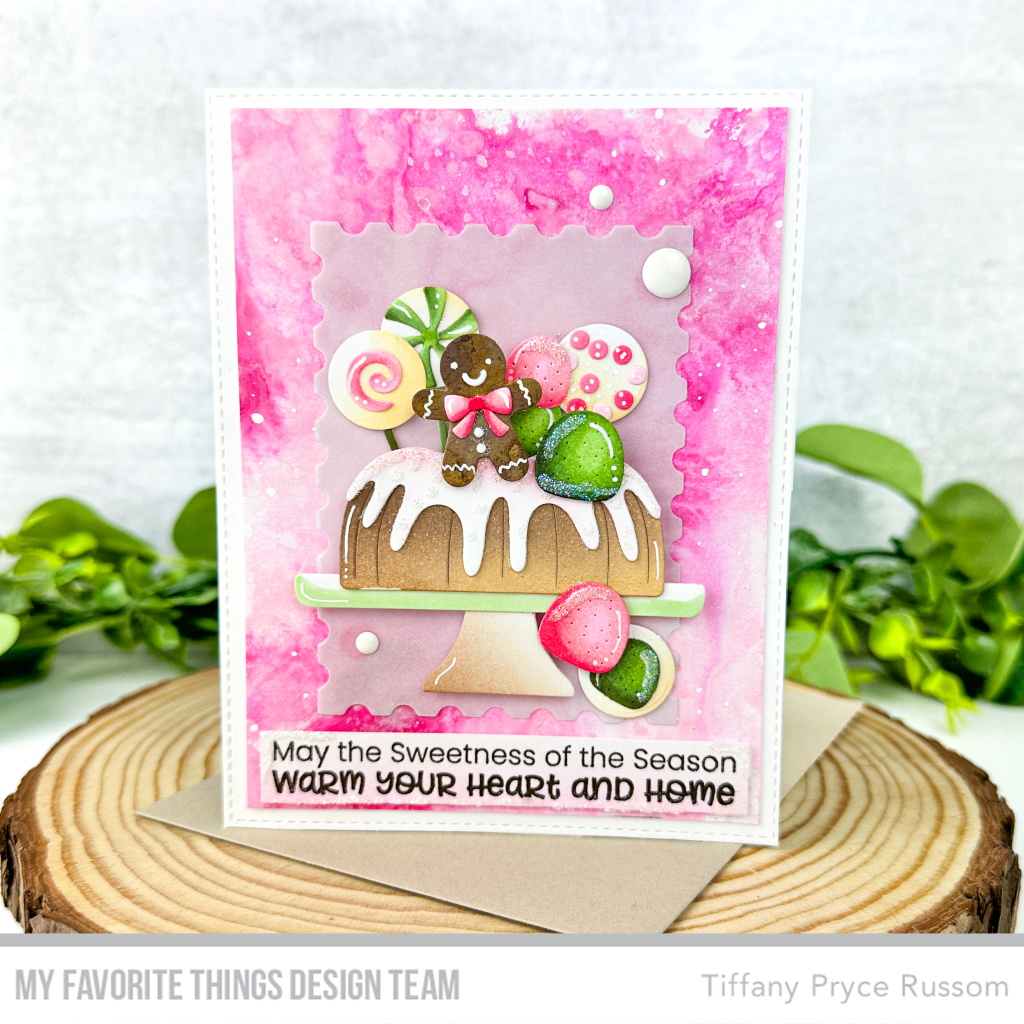
Yesterday, I featured the whole kit by creating a gingerbread house scene. For today’s sample, I wanted to just use the gingerbread man and candy to create a holiday baked good. I’m mixing the new products with previously released products as I very much enjoy doing.
STEP-BY-STEP INSTRUCTIONS
- Die cut a panel of white cardstock with the largest die in Blueprints 25 Die-namics. Adhere to an A2 card base and set aside.
- Add small drop of distress paints – Spun Sugar, Kitsch Flamingo, and Ripe Raspberry – to a silicone mat. Spray with water. Spray a panel of watercolor paper with water and smoosh it into the distress paint. Once dry, add some white distress paint – Picket Fence – on the mat and pick up some white drops to create additional texture.
- While the panel dries, die cut all of the pieces for the focal point. Die cut the gingerbread and candies from Gingerbread House Die-namics. Die cut the bundt cake and cake stand from Dessert on Display Die-namics.
- Color the elements with copic markers or ink blending. The gingerbread man was die cut from the inked kraft cardstock that I made yesterday. Instead of fiddling with the teeny tiny white icing bits to decorate the gingerbread, I just used a white pen to squiggle on the decorations. Assemble all of the sweets with liquid glue. Refer to the MFT website to see how the items are meant to be assembled. I also took some liberties to create my own versions of the candies.
- Die cut vellum with the Postage Stamp STAX Die-namics. Adhere the cake and sweets on top. The adhere to the card front.
- Add liquid glue around the sweets to add glitter on the cake frosting and candies.
- Stamp a sentiment from Gingerbread Greetings and add glue around the perimeter to adhere more glitter.
- embellish with three white enamel dots.

I can’t wait to see what you make if you decide to purchase this kit. Thanks for being here!
For more inspiration, tutorials, and a closer look at MFT products, please stop by and subscribe to the MFT YouTube channel!
Happy crafting,
Tiffany
I’d love to connect with you! Please follow me on IG and my blog, and reach out and say hi!
@ink.therapy.designs

This is adorable, love it😍💖
LikeLike
thank you!!
LikeLiked by 1 person