Welcome to another day of spotlights! Today, I am featuring a new stamp set illustrated by YUZU called Micest Friend. I’m not into rodents, but these mice are just adorable and the punny sentiments are great too.

STEP-BY-STEP INSTRUCTIONS
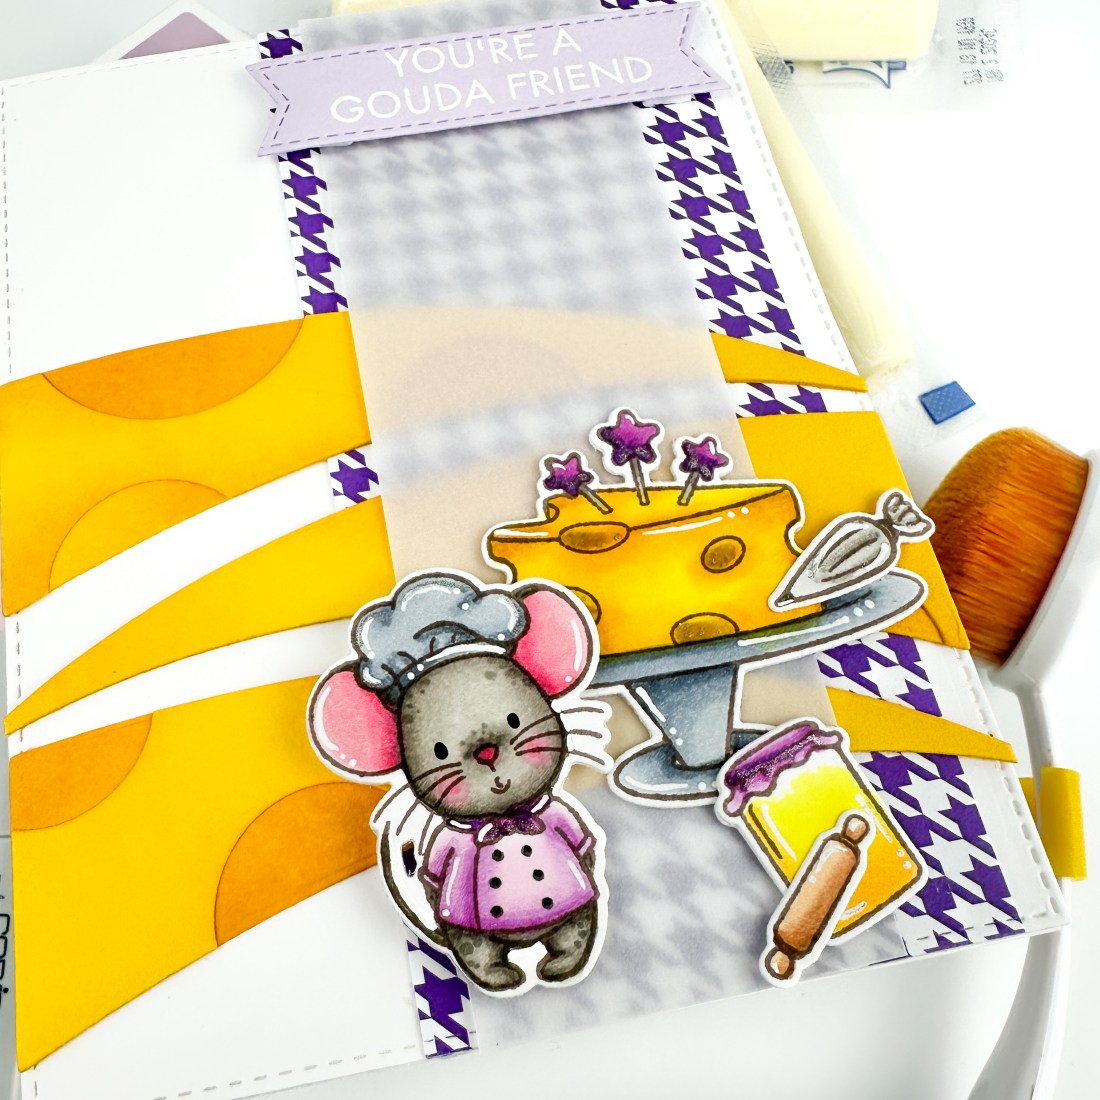
- Die cut a background panel using Blueprints 25. Layer with a piece of patterned paper from Houndstooth Bright.
- To create the “cheese” in the background:
Die cut 6 layers of the curved die in Blueprints 25 from yellow cardstock. Ink blend 3 layers with a darker yellow. On the other 3 layers, use the Circle STAX Die-namics to cut cheese holes from each layer. Then adhere the layers together and adhere on the card front. - White heat emboss a sentiment on a piece of Grapesicle cardstock and die cut it with a banner die.
- Layer a piece of vellum on top to give a little separation between the colored image and the background.
- Stamp and copic color several images from Micest Friend. Die cut with the coordinating dies. Adhere with foam tape.

Hope you liked this fun layout and a fun way to make “cheese”. Come back tomorrow for the last day of spotlights. Thanks for being here!
For more inspiration, tutorials, and a closer look at MFT products, please stop by and subscribe to the MFT YouTube channel!
Happy crafting,
Tiffany
I’d love to connect with you! Please follow me on IG and my blog, and reach out and say hi!
@ink.therapy.designs

Okay, so you know I love all of the cards you make, but these past several cards on this latest release have been my “love language”!!!! The colors, the sentiments, the designs, I love them all. Gouda is one of my favorite cheeses and your little mouse is just beyond cute (so round and squishy!!). Makes me wish I had lots of storage space and lots of money for all these cute things! Thanks for sharing your talent.~Kim
LikeLiked by 1 person
You’re so sweet, thank you so much! Your comments always make my day!! I agree, these mice are super cute and Yan, who illustrates the YUZU line, is so talented!
LikeLike