The newest card kit, Friendship and Flowers, is live in the MFT shop! I’m using a new-to-me craft supply for the first time, acrylic markers, through the stencil for a different look. I love how bright these markers are even on dark cardstock. The card kit contains:
- Essential Friendship Messages stamp set
- Smart Mask – Diagonal High/Low Strip Stencil
- Smart Mask – Diagonal Center Strip Stencil
- Card Stock (12 sheets) Moroccan Spice, Candied Yam, Lemon Drop, Limelight, Jalapeño Popper, Sno Cone, Summer Splash, Cornflower, Grapesicle, Boysenberry, Porcelain White, and Black Licorice.

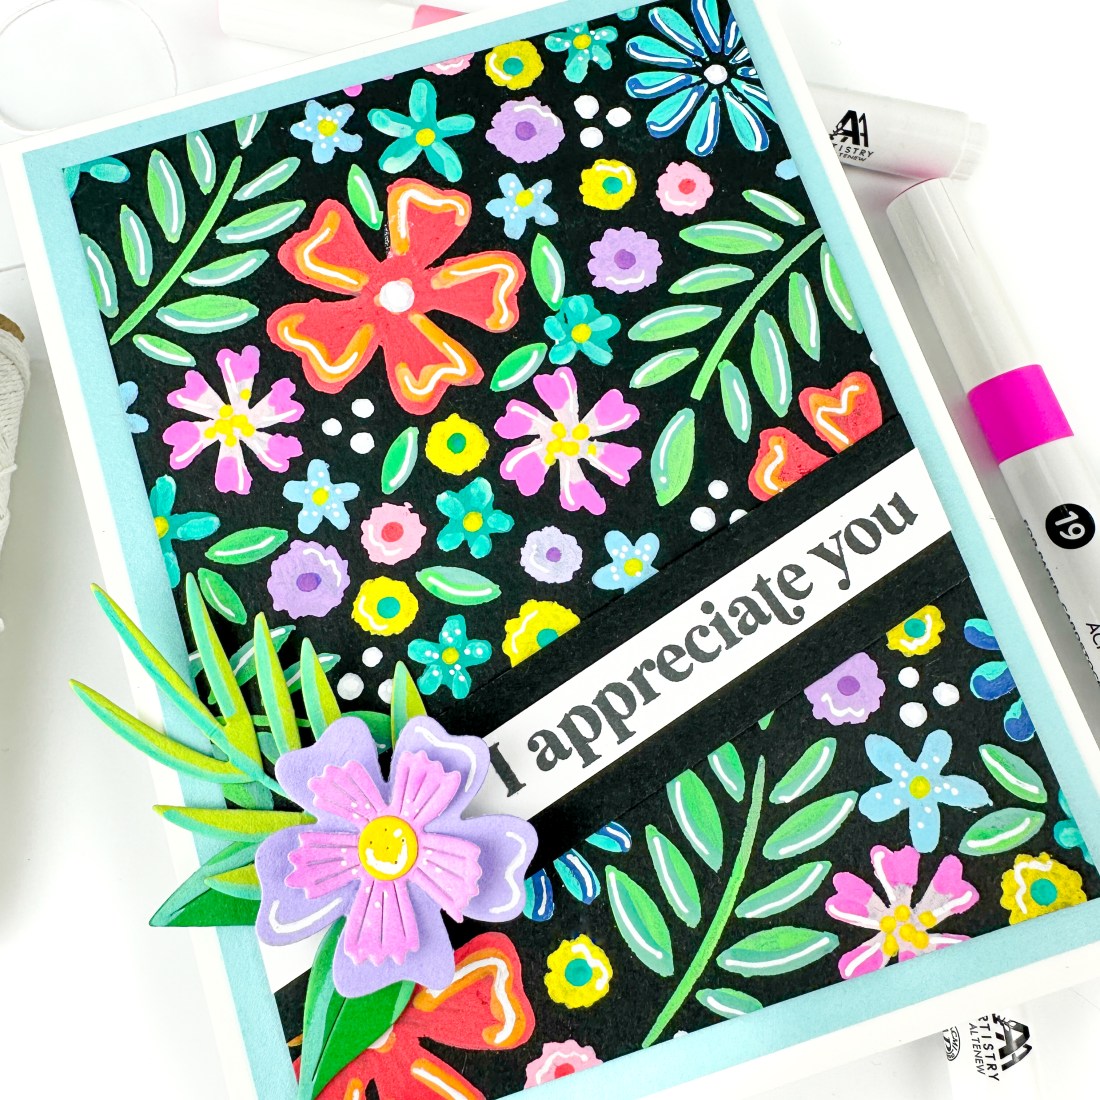
To create this card, I used the new Altenew acrylic markers in a variety of colors. I used black licorice cardstock as the base and the Diagonal High/Low Stencil. I placed the masking stencil down first and then each added and removed each subsequent stencil. I used a different color marker for each stencil, sometimes multiple colors for one stencil. These opaque markers do not blend so laying color on top of each other gives a cool look. I added interest to the blooms with varying color and white pen details. After I finished stenciling, I trimmed down the panel and matted it with Summer Splash cardstock and added it to an A2 card base. For the sentiment, I stamped a sentiment from Essential Messages on a strip of white cardstock and adhered it in place. I accented the card with a flower and some leaves from the Bold Blooms Die-namics and Bold Greenery Die-namics. I added color to the leaves with the same green acrylic markers.

Hope you’re inspired to check out the card kit. Thanks for stopping by!
For more inspiration, tutorials, and a closer look at MFT products, please stop by and subscribe to the MFT YouTube channel!
Happy crafting,
Tiffany
I’d love to connect with you! Please follow me on IG and my blog, and reach out and say hi!
@ink.therapy.designs

Hi Tiffany, oh I love this card!!! What is your opinion on the Altenew acrylic markers? I have them. I love the colors, the coverage and ease of use, but I am not a fan of that big nib. I am so used to using my brush nib on my copics that I really struggled with that large tip and coloring smaller areas. I bought the bundle (paint markers and paint-by-number cards) and my first card looks horrible because I struggled staying in the lines in the tiny areas. Maybe I would do better if I use a stencil. ~Kim
LikeLiked by 1 person
Thank you so much, Kim! This was my first time using them and like you, I love the color and opacity, but I did not love the large nibs. The nibs stopped me from getting into tight corners in the stencil, though with this design it isn’t too too noticeable. I bought the same paint by number cards too because I wanted something that I could mindlessly color without blending and just chill out. I haven’t used them yet, but I plan to very soon. I would definitely try them with a stencil! I’ll try the coloring panels and see if I come up with any tips or tricks if I can’t stay in the lines. Maybe try angling the marker and just using the edge as lightly as you can for tight lines? Not sure. Sorry I can’t be more helpful right now. I also wonder how long they will last. I don’t think they can be refilled, right?
LikeLike
I used a really light hand with the markers and tried all kinds of ways to get into the tiny areas but wasn’t all that successful (could be a short from the hand to the marker!). From what I understand, these markers are not refillable.
Your card is still gorgeous and I am going to try the markers with some of my stencils and see what happens.
LikeLiked by 1 person
Yeah, I tried them tonight on the panels. I colored two of the panels. I don’t think the paper is thick enough because if I went over an area too many times, the paper started to pill. Also I found it hard to get an even coat. It’s not as noticeable through the stencil since the openings are small, but with the bigger areas on the flowers, it is more noticeable. I guess that’s a “look”. I don’t know. I still like the color and opacity, but I don’t love them as much as I do through a stencil with small openings/surface area. But yes, you’re right about getting in tight areas. I managed ok, but it does take a little getting used to plus resignation that it won’t be perfect or totally sharp. I’m gonna watch some videos on them to see if I can pick up any more tips or tricks. ❤
LikeLike