
It’s time for another great MFT Stamps monthly release so we’re kicking off the countdown! Today, I am sharing two cards as our countdown this month was truncated to 3 days. The second card will be up later this evening.
As soon as I saw this new stamp set, I knew it would pair nicely with JB Game On. I had fun creating this as I love Pokemon and Nintendo.

STEP-BY-STEP INSTRUCTIONS
- Stamp a critter holding a Nintendo Switch from JB Game On! onto Strathmore Toned Tan paper using light brown dye ink. Color the critter with prisma colored pencils. I started out my lightly shading my shadow areas with Sepia, PC 948. Then blended out with additional colors to fill in the rest of the image.
Bear- Light Umber, PC 941; Burnt Ochre, PC 943; Beige, PC 997; Sepia
Switch- Crimson Lake, PC 925; Crimson Red, PC 924; Carmine Red, PC 926/ Copenhagen Blue, PC 906; Ultramarine, PC 902; Non-Photo Blue, PC 919/ Black, PC 935; 70% Cool Gray, PC 1065; 50% Cool Gray, PC 1063
After coloring each section, I blended the colors together using the Prisma colorless blending pencil. And added white pencil, PC 938 for additional highlights. - Die cut the bear with the coordinating die-namics.
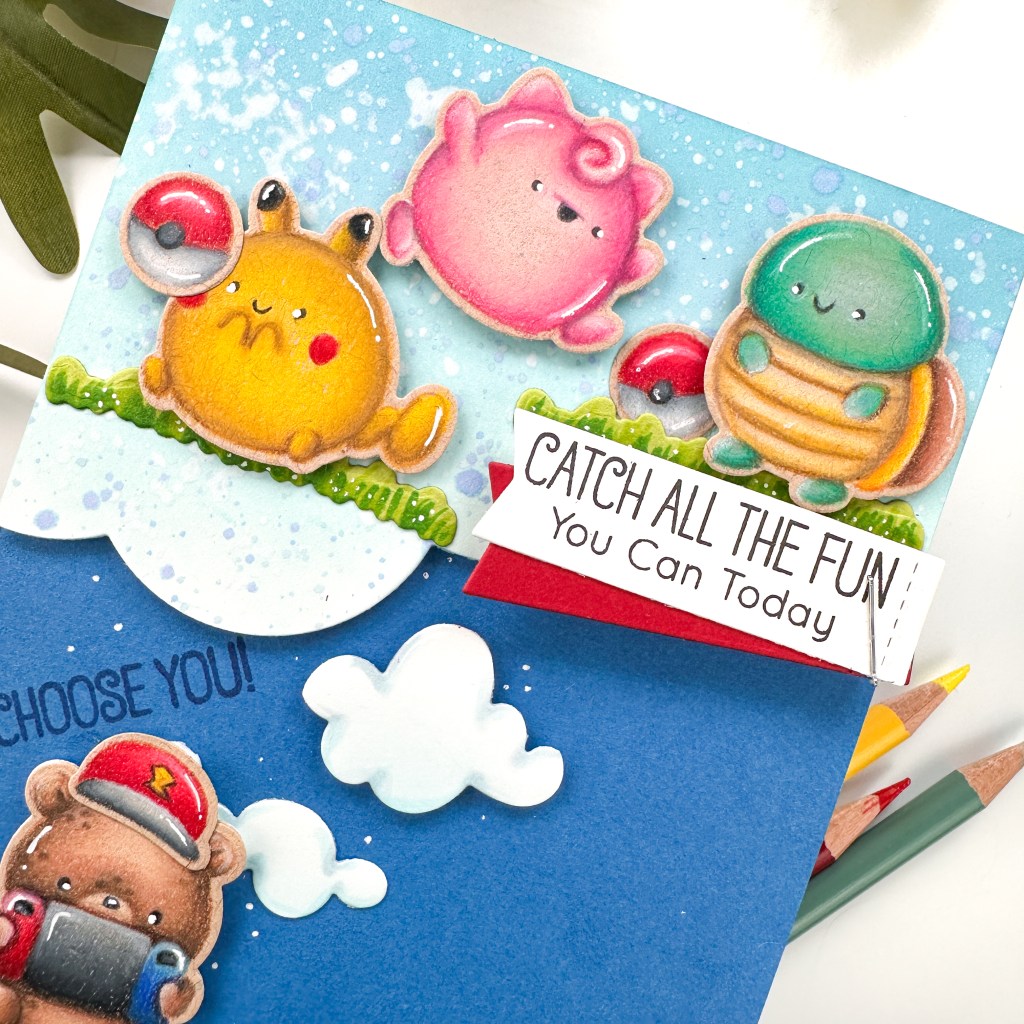
- Stamp several images from JB Evolving Friends onto Strathmore Toned Tan paper using light brown dye ink and color with prisma colored pencils. I did not keep track of the colors I used for these images. Die cut the images with the coordinating die-namics.
- Using the Stitched Triple Peek-a-Boo Window & Edge Die-namics, die cut a portion of a white A2 panel of cardstock.
- Blend blue inks on the resulting die cut and splatter with blue ink and water. Pop up with foam tape.
- Adhere to an A2 panel of Cornflower cardstock.
- Die cut the thought bubble clouds from white cardstock using the All-Seasons Tree Die-namics. Add shading with copics and dye ink.
- Die a few grass pieces from JB Evolving Friends with green cardstock. Add copic markers to mimic blades of grass instead of stamping the coordinating stamp.
- Stamp the sentiments and use a banner for one of them.
- Adhere the card front pieces together with foam tape and liquid glue for varied dimension.
- Add white gel pen details around the card.
Thanks for stopping by!
For more inspiration, tutorials, and a closer look at MFT products, please stop by and subscribe to the MFT YouTube channel!
Happy crafting,
Tiffany
I’d love to connect with you! Please follow me on IG and my blog, and reach out and say hi!
@ink.therapy.designs
