
(*Affiliate links used whenever possible at no extra cost to you.)
Hey friends! Spellbinders was kind enough to send me a few products from their new collaboration with Carissa Wiley – the Shine Bright collection. These products are sure to put a smile on anybody’s face! I created two cards to inspire you.

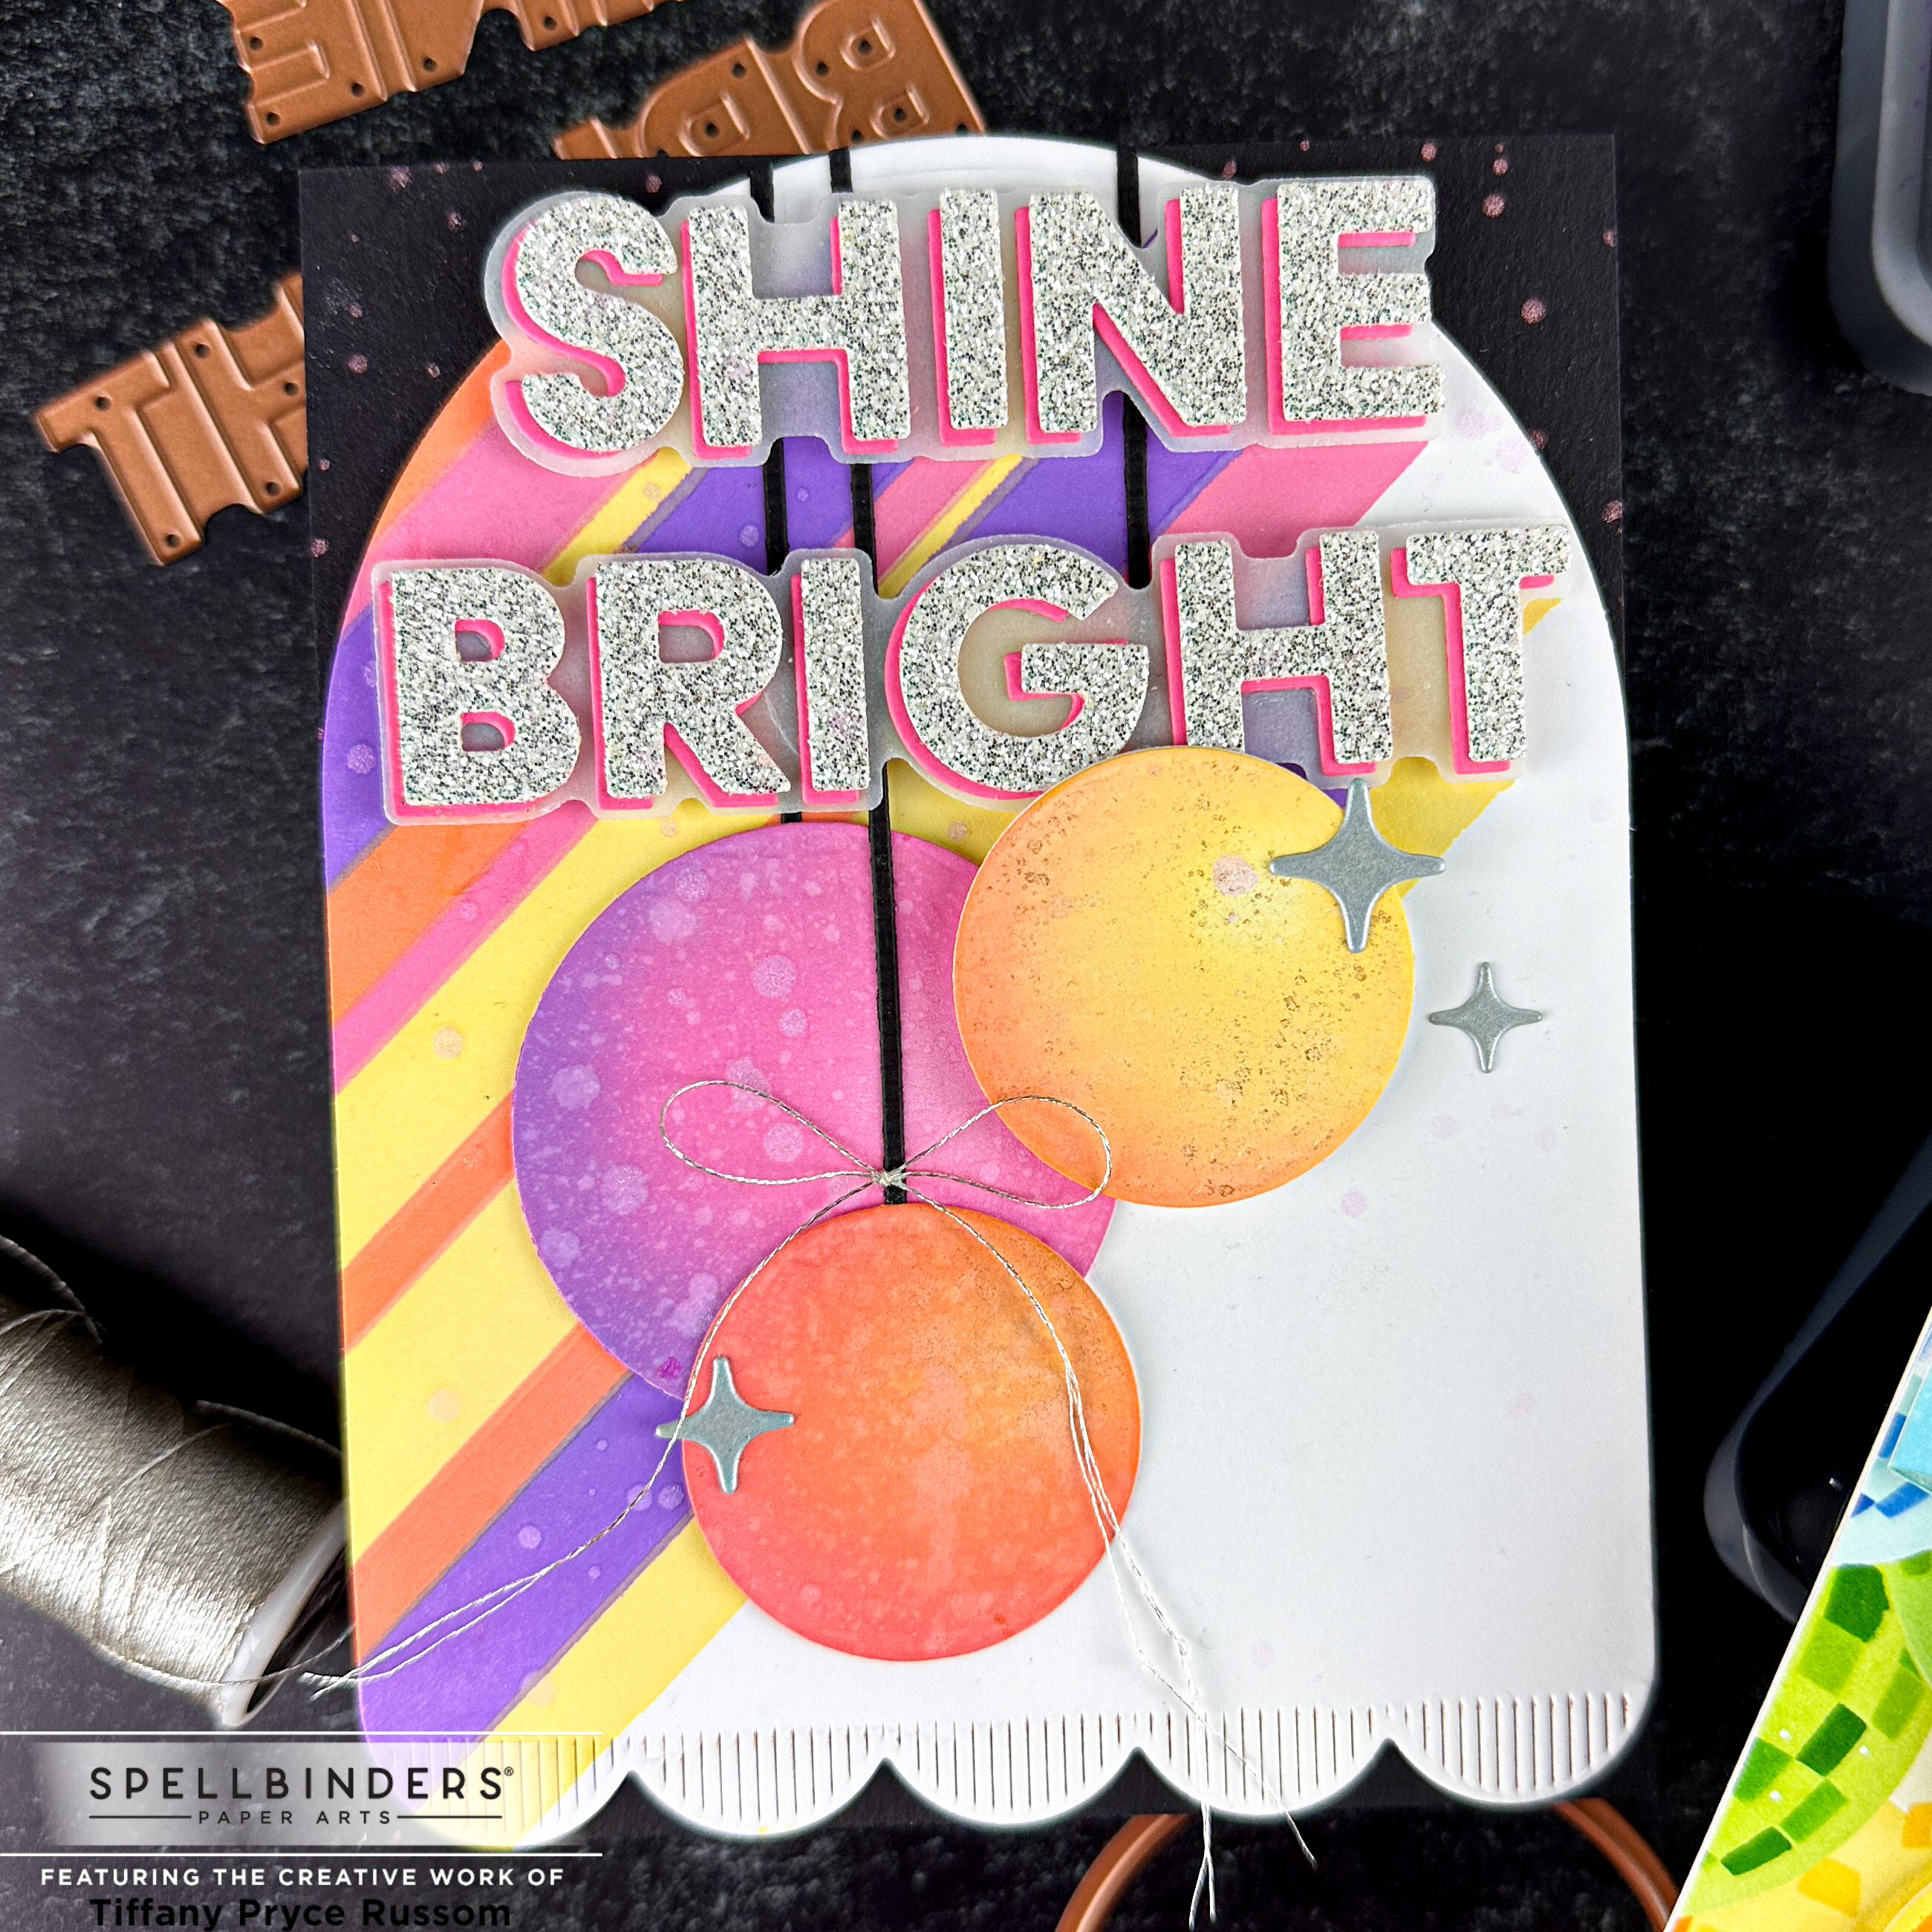
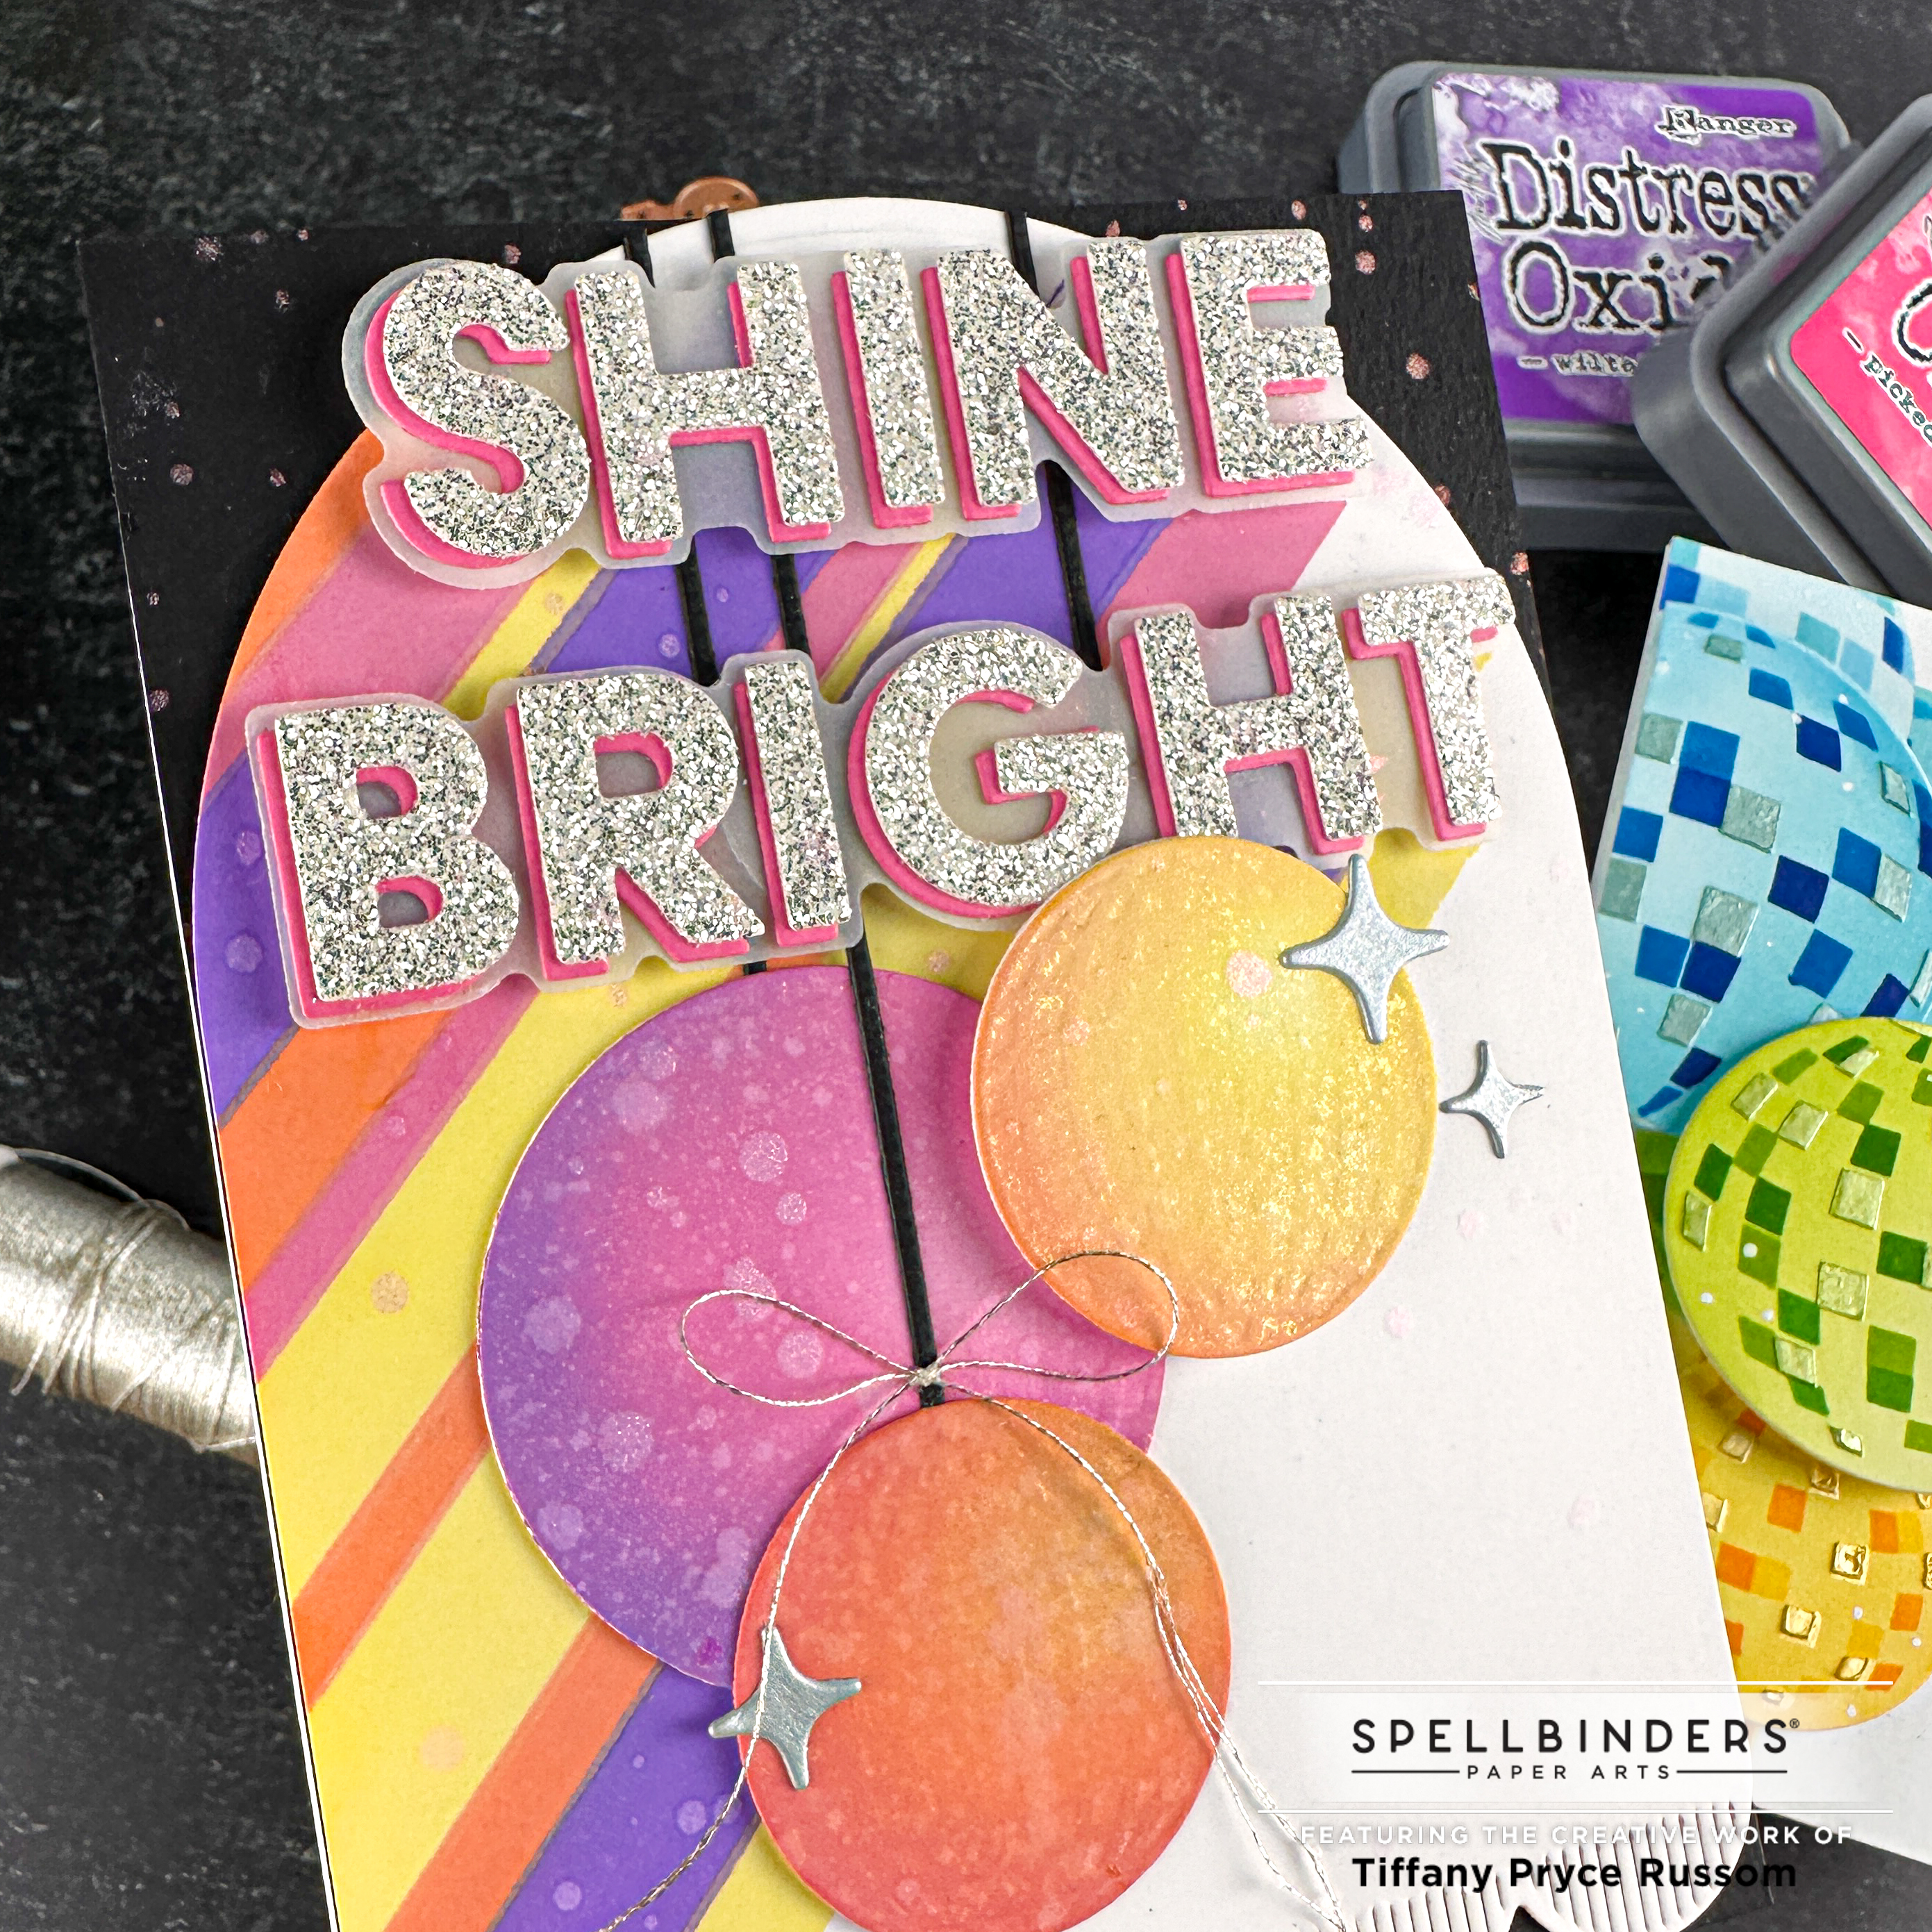
Card 1: Disco Balls Dies and stencil
- On an A2 card base, add a panel of black cardstock. Set aside.
- On an A2 panel of white cardstock, use the Layered Shine Bright Die and Stencil Bundle. Stencil using distress oxide inks – wilted violet, picked raspberry, carved pumpkin, and squeezed lemonade.
- Die cut the stenciled panel with the Make a Wish Arched Label Dies.
- Die cut the sentiment using the Layered Shine Bright Die and Stencil Bundle from pink and silver glitter cardstock. The shadow die was cut from vellum. I added foam tape between the layers in the sentiment for added dimension.
- Die cut the Disco Balls Die from white cardstock and ink blend with the same distress oxide inks. Adhere with liquid glue and foam tape and add thin strips of black to act as the disco hangers.
- Splatter the panel with picked raspberry distress spritz for more shine.
- Embellish with the little sparkle die cuts from the Disco Balls Die using brushed silver cardstock and a silver, twine bow.
- It would be fun to add an encouraging or birthday sentiment inside the card. The Shine Bright Sentiment Strips have amazing and unique sentiments that pair perfectly with the theme. I did not have these on hand which is why I did not use them.
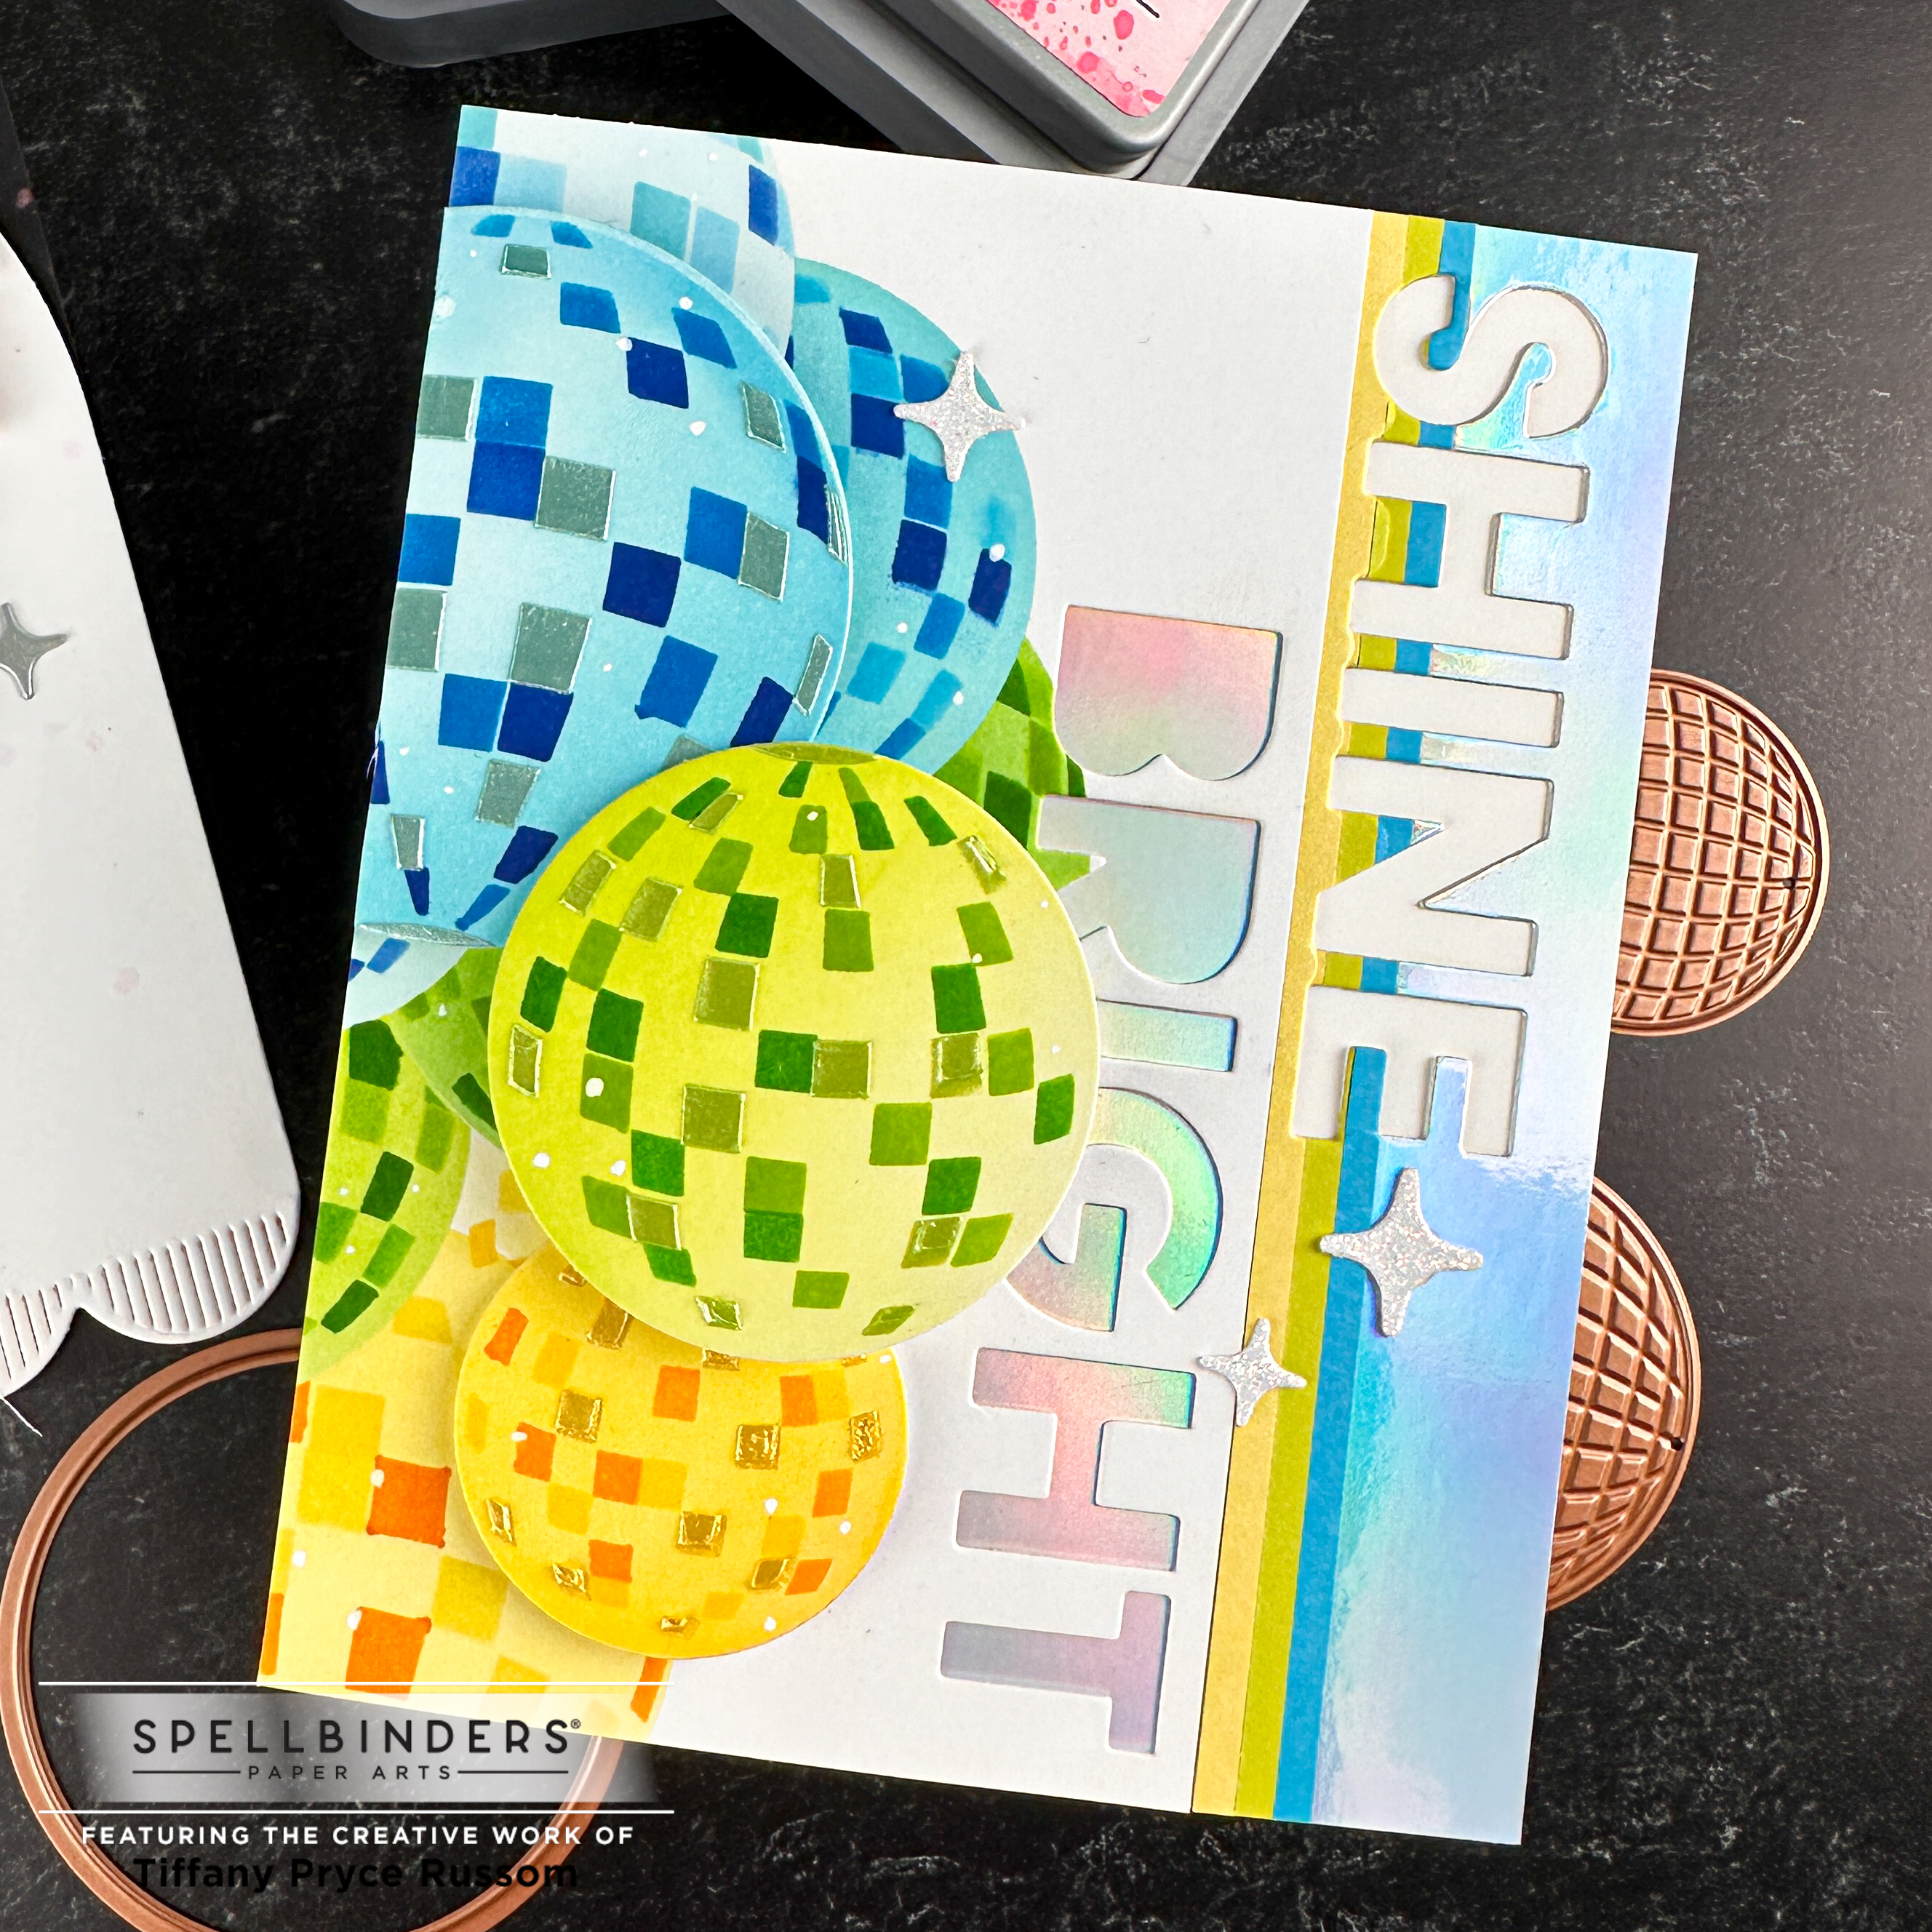
Card 2: Shine Bright Holo
- Using the circle dies from Disco Balls Die, die cut three masks (one of each size) from masking paper.
- On an A2 panel, use the Layered Disco Impressions Stencil. I stenciled the disco balls in blue, green, and yellow, using different shades of ink for the various stencil layers.
- As I stenciled an overlapping disco ball, I used the masking paper to cover the previous disco ball so at the end I would have a bunch of overlapping disco balls.
- On the last layer of each disco ball, I used TCW stencil butter in coordinating colors for some dimension and shine.
- For three disco balls, I stenciled them on a separate piece of paper so I could die cut them out and pop them up for dimension on the panel.
- Use the sentiment from the Layered Shine Bright Die and Stencil Bundle to die cut vertically into the panel with the stenciled disco balls and another layer of holographic cardstock that I layered underneath.
- For the holographic layer, I added three thin strips of cardstock before die cutting ‘shine’.
- Embellish with faux white splatter and the little sparkle die cuts from the Disco Balls Die using a holographic glitter cardstock.

Thanks so much for stopping by! If you have any questions, please reach out. I’d love to know which card you liked more. Keep shining, friends!
Happy crafting,
Tiffany
I’d love to connect with you! Please follow me on IG and my blog, and reach out and say hi!
@ink.therapy.designs
*Affiliate disclosure: I only use, review, and blog about products/companies I actually like and will continue to use. Some of the products shown on my blog use affiliate links. These affiliate links allow me to earn a small commission when products are purchased through those links. *This is at no cost to you!* Please do not feel obligated to use my affiliate links. If you choose to use these links, thank you so much! It helps support my blog and bring new content to you. Read the full disclosure on the about page.

Hi Tiffany, I love these cards! They are so bright and happy. You are really coming a long way, I am so proud of you! Your artistic creativity is growing by leaps and bounds! I have always loved your creations but you are really stepping it up. 😉 Kim in Tx
LikeLiked by 1 person
Wow! That is the sweetest thing to say, Kim! Thank you so very much!! I definitely feel like I’ve grown since I’ve first started cardmaking, and I am proud of myself for that growth, for sure. I love our hobby as you can always learn new things and try fun techniques; I am a forever student. I hope you are having a wonderful week! ❤
LikeLiked by 1 person
Hi Tiffany, You should be proud of yourself. You are super talented and I have seen you get better and better. I used to think that I wanted to have followers in the crafting community and be on design teams, but personal & work life really got in the way. I have a few good friends who were on design teams years ago. I saw everything they were required to do and the deadlines they had to meet. That is when I decided that I am so much happier being friends with people on design teams and learning from them and other creators. I would much rather cheer people on, provide encouragement and leverage their creations than try to create something new on my own! I love to craft to relieve stress. I am such a perfectionist that I would totally stress if I had to present something for others to see, then the joy of puttering in my craft room would be gone! I get asked if I would sell my cards and I always say no. I would much rather make them for fun and give them away, that way there is no pressure on my side. I also love to learn new techniques, but want to learn at my pace (which is super slow!).
Hope you have a great weekend. I am off to a 4-day (in person) crafty retreat! It is the only in person retreat I do each year.
LikeLiked by 1 person
I totally understand what you mean and am glad that you’ve stayed true to yourself and what makes you happy in crafting! I so appreciate all of your love and encouragement. It helps to keep me going, and I’m sure your other crafty friends feel similar. So thank you for your light! I wish I could see more of your designs. Where do you post what you make, if you do? I enjoy being on teams where I am inspired by the product. As long as I am having fun and learning new things, that is my North Star. I work full-time and have other commitments so crafting must be joyful. Are you going to Stamp Joy in Iowa? If so, I went last year and had a great time. I hope you enjoy and get lots of amazing crafting in!! Sending hugs 🙂
LikeLike