
(*Affiliate links used whenever possible at no extra cost to you.)
Happy November! Can you believe how fast the year is flying by?! Honey Bee Stamps recently released their brand new Christmas release, called Cozy Christmas, and it is incredible! So many fun and nostalgic designs to get you in the holiday spirit. Have you started your holiday cards yet? I have to start early or I will never finish on time (and by on time I mean at least by end of Jan 2025 lol).
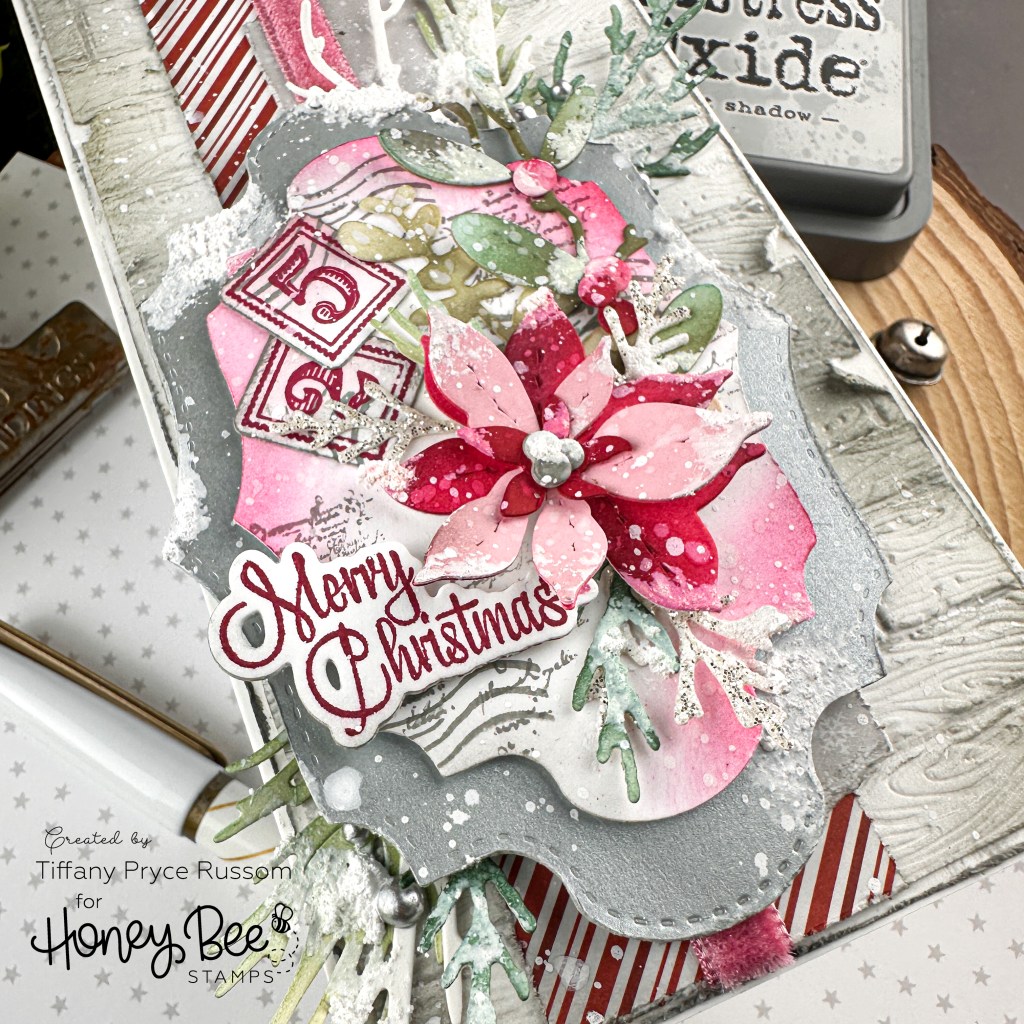
Today, the DT is doing an IG hop featuring inspiration using the new release. I hope you’ll hop along and leave comments for a chance to win a prize! For my card, I used a mash up of new and previously release products. I always love mixing and matching my stash and getting more use out of older products. The main products I used are:
Lovely Layers: Mini Holiday Florals
Postmarked: Holiday Rubber Cling Stamp Set
Postmarked: Holiday Die Set
Wood Planks – 3D Embossing Folder
North Pole Paper Pad
North Pole – Pearl Stickers
Layering Vintage Labels
Lovely Layers: Winter Greenery
Snow Tex

STEP-BY-STEP INSTRUCTIONS
- Create a mini slimline card base measuring 3.5 x 6.5 inches from heavyweight white cardstock.
- Trim a panel of white cardstock a little smaller (I didn’t really do the dimensions). Distress the edges with scissors and ink the edges with gray ink. Adhere to the card base.
- Using the Wood Planks embossing folder, ink up the side with the lines in between the wood planks with lost shadow distress oxide ink. Run it through the die cut machine with a panel of white cardstock cut to 3.25 x 6.25 inches. Further distress the panel with additional ink blending, small tears, and rough up the edges.
- Trim two pieces of patterned paper from the North Pole paper pad. Distress the edges and lightly ink blend the edges with gray ink. Adhere to the embossed background.
- Adhere a piece of pink velvet trim and wrap it around the panels. Adhere to the card base.
- Using the Layering Vintage Labels, die cut the largest shape from brushed silver cardstock. Die cut the next smallest layer from white cardstock.
- Stamp with layer with stamps from Postmarked: Holiday in gray ink. Ink blend the edges with red and pink ink. Stamp and die cut the ’25’ and the sentiment using the coordinating Postmarked: Holiday dies.
- Die cut several greenery pieces and a poinsettia from Lovely Layers: Mini Holiday Florals. Ink blend with various color and splatter with water. I added more vintage flair on the florals and leaves by ink blending the edges lightly with gray ink. Die cut some branches using sliver glitter cardstock.
- Adhere all of the card elements together, popping up the focal point with foam tape.
- Splatter the entire card with white acrylic ink. And add Snow Tex for additional texture and interest. If you haven’t seen Snow Tex, it is super cool! It gives that realistic feel of snow.
- Embellish with North Pole pearls in silver.


Thanks so much for stopping by! I hope this inspires you to check out the new release. If you have any questions, please feel free to reach out.
Happy crafting,
Tiffany
I’d love to connect with you! Please follow me on IG and my blog, and reach out and say hi!
@ink.therapy.designs
*Affiliate disclosure: I only use, review, and blog about products/companies I actually like and will continue to use. Some of the products shown on my blog use affiliate links. These affiliate links allow me to earn a small commission when products are purchased through those links. *This is at no cost to you!* Please do not feel obligated to use my affiliate links. If you choose to use these links, thank you so much! It helps support my blog and bring new content to you. Read the full disclosure on the about page.

Gorgeous card! Love the vintage vibes.
LikeLiked by 1 person
Thank you so much!!
LikeLike