
Project overview
- Technique(s): die cutting, spotlight, DIY pattern making
- Product list:
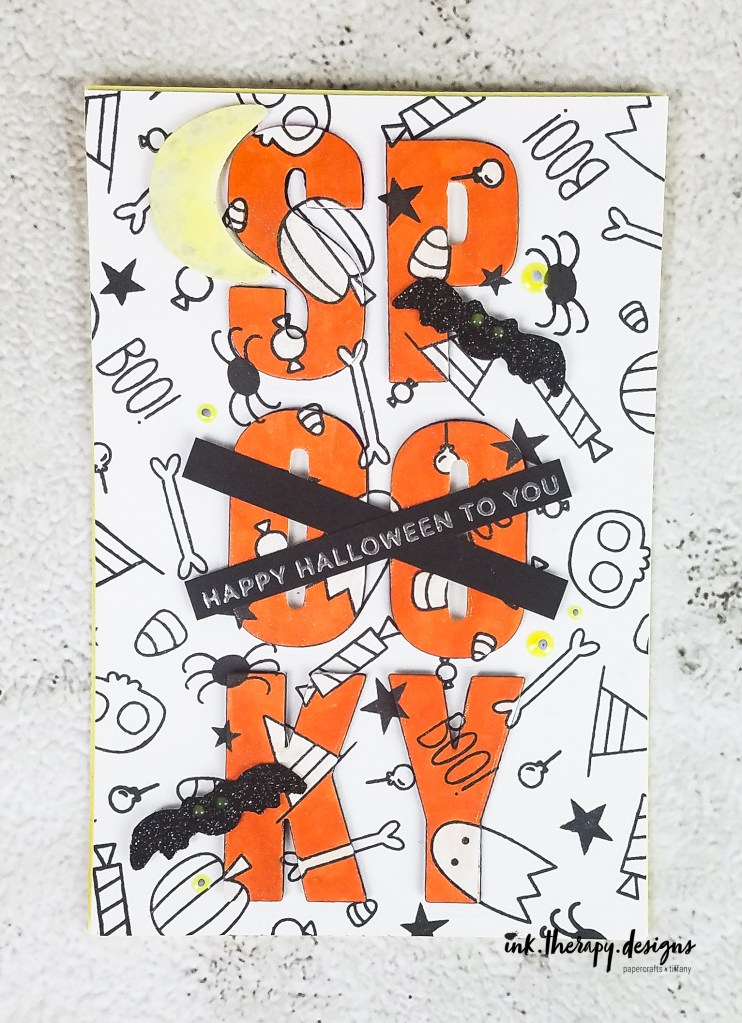
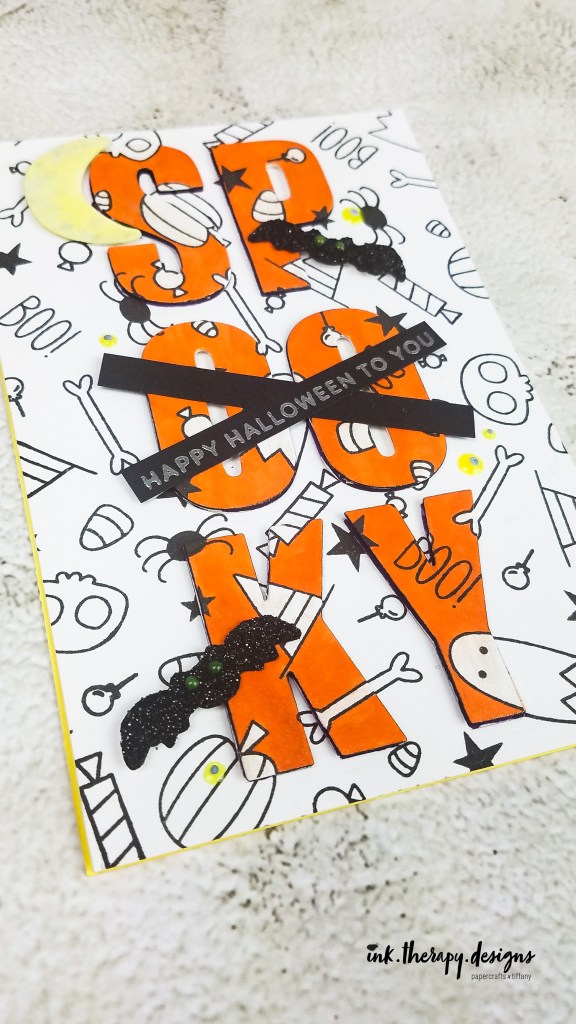
This one is for my fellow Halloween lovers! From the costumes to the candy, the scary stories to the primo Netflix content, Halloween is such a fun holiday. If you celebrate, what’s your favorite part of Halloween? Please let me know in the comments!
I wanted to make a Halloween card, but did not have any Halloween themed pattern paper. Instead of buying something new, I decided to make my own. Making patterns with the small stamps that often come in stamp sets is a great way to stretch your supplies, and your creativity. Here’s a look at all my supplies.
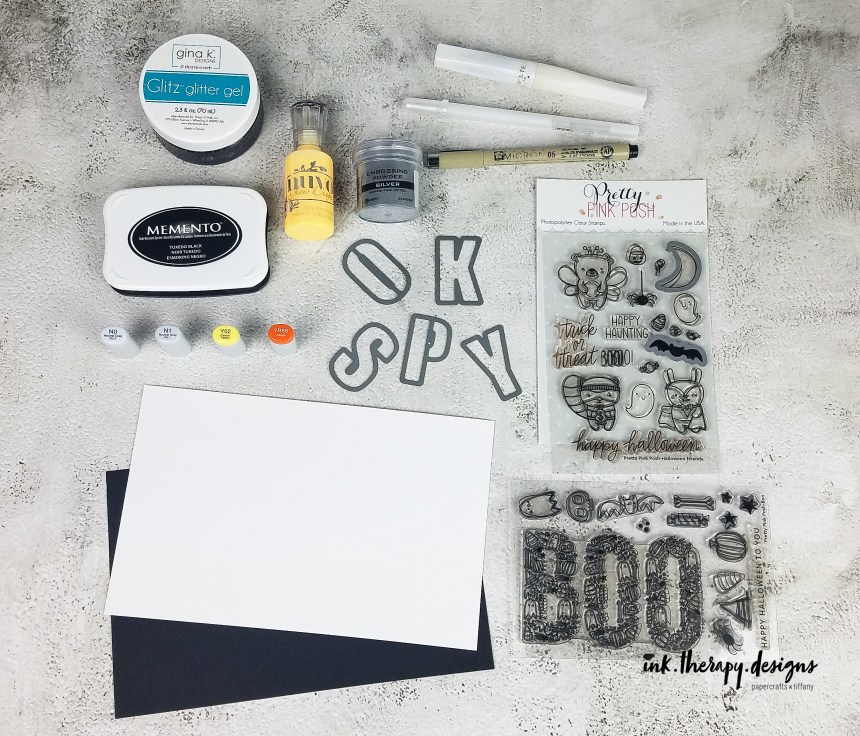

The background. For the background, I used arranged 5 of the small stamps from the Pretty Pink Posh Boo stamp set in my MISTI (confession – I am really bad at using the acrylic block. I have not mastered the right pressure and angle to get the best impression. So the MISTI is a must have for me and another of my favorite crafting supplies). The rule of odds works when arranging flowers or small stamps for pattern making! I just arranged them in a way that I liked the most and stamped repeatedly, moving my paper around in my MISTI for new positions. this was particularly helpful if I did not get a good impression the first time. This process does not have to be precise – just have fun with it! At times, I would switch out the stamps so it better fit the space on the paper and to ensure I did not have identical stamps too close to one another. Keep going until you cover the whole panel, it goes quickly.
The letters. After finishing the background, I wanted to use the spotlight technique where you die cut from a pattern/stamp and then piece the die cuts back in to reform the image. Using the Altenew Caps Bold dies, I carefully positioned the letters for ‘spooky’ on the panel, securing with painter’s tape (confession – I only use painter’s tape because it’s what I have. I know everyone loves their purple tape, but my trusty blue tape is a work horse. I make sure to stick the tape to my clothes a few times to decrease its stickiness). I die cut the letters 4 times from white card stock too and stacked them for extra dimension. For some interest, I decided to color the background of each letter orange to contrast with the white base. Lastly, you know I’ve gotta have some sparkle, so I added Wink of Stella to each letter. *Pro tip: wait until the ink is completely dry or you may transfer some of the orange pigment to the white stamp, as I did. Oops!*
The details. I cut out the moon and bats from Pretty Pink Posh Halloween Friends. I added color/texture to the moon with copic markers and a clear gel pen. I also added a thin layer of Gina K Glitz glitter gel on the bats for more texture. I used Nuvo Glow Drops in Banana Split for the eyes on the bats and around the panel (tbh, these drops do not have much ‘glow’, so if there is something special I need to do, please let me know in the comments!). For a little more spook, I added white and black gel pen to make them look like little eyeballs 👀. Lastly, I heat embossed the sentiment from the PPP Boo stamp set on black cardstock. Another confession – I noticed that my ‘OO’ were a tad askew, but instead of starting over, I just went leaned into the Halloween theme. Adding two black strips in an ‘x’ helped mask the crooked letters and fit perfectly into my card design. Win-win!
If you liked this card or have any feedback, please let me know on here or on IG! If you’re inspired by my piece, please tag me so I can see what you create. Thanks & happy crafting!
.Tiffany.

