- Technique(s): die cutting, watercoloring, pattern play, heat embossing
- Product list:
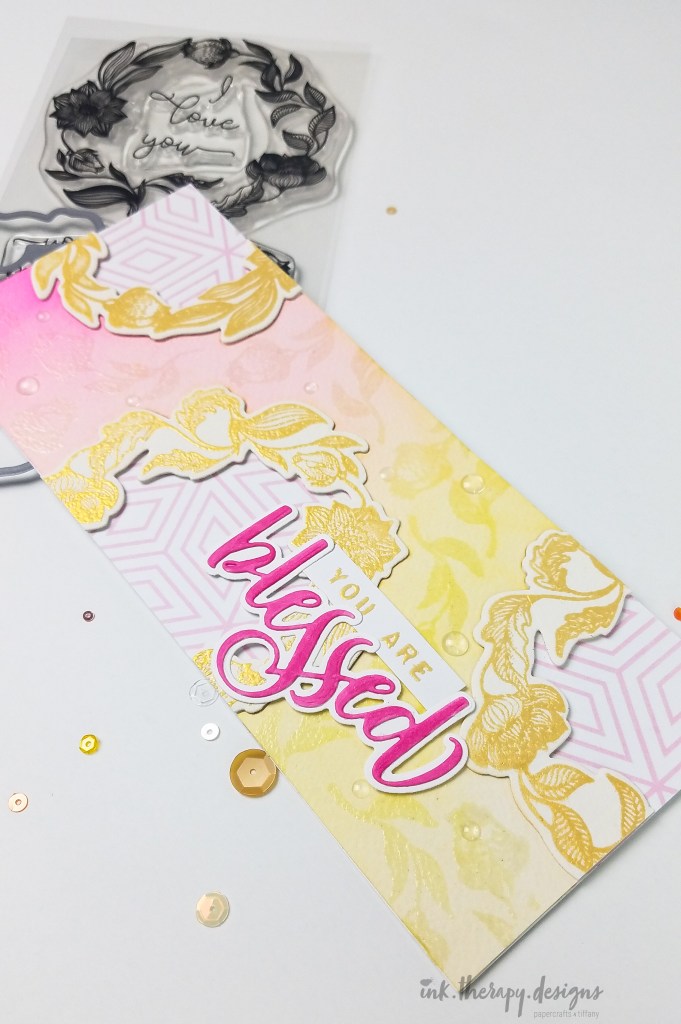
- Erin Lee Creative Love Wreath Stamp Set and Coordinating Die
- Marker Forte & Alex Syberia Rosey Days Patterned Paper Pack
- Honey Bee Stamps Blessed Honey Cuts
- Erin Lee Creative Stripe Sentiments Stamp
- Wow! Embossing Powder, Gold Pearl
- Altenew Watercolor Essential 12 Pan Set
- Waffleflower Clean & Clear Enamel Dots
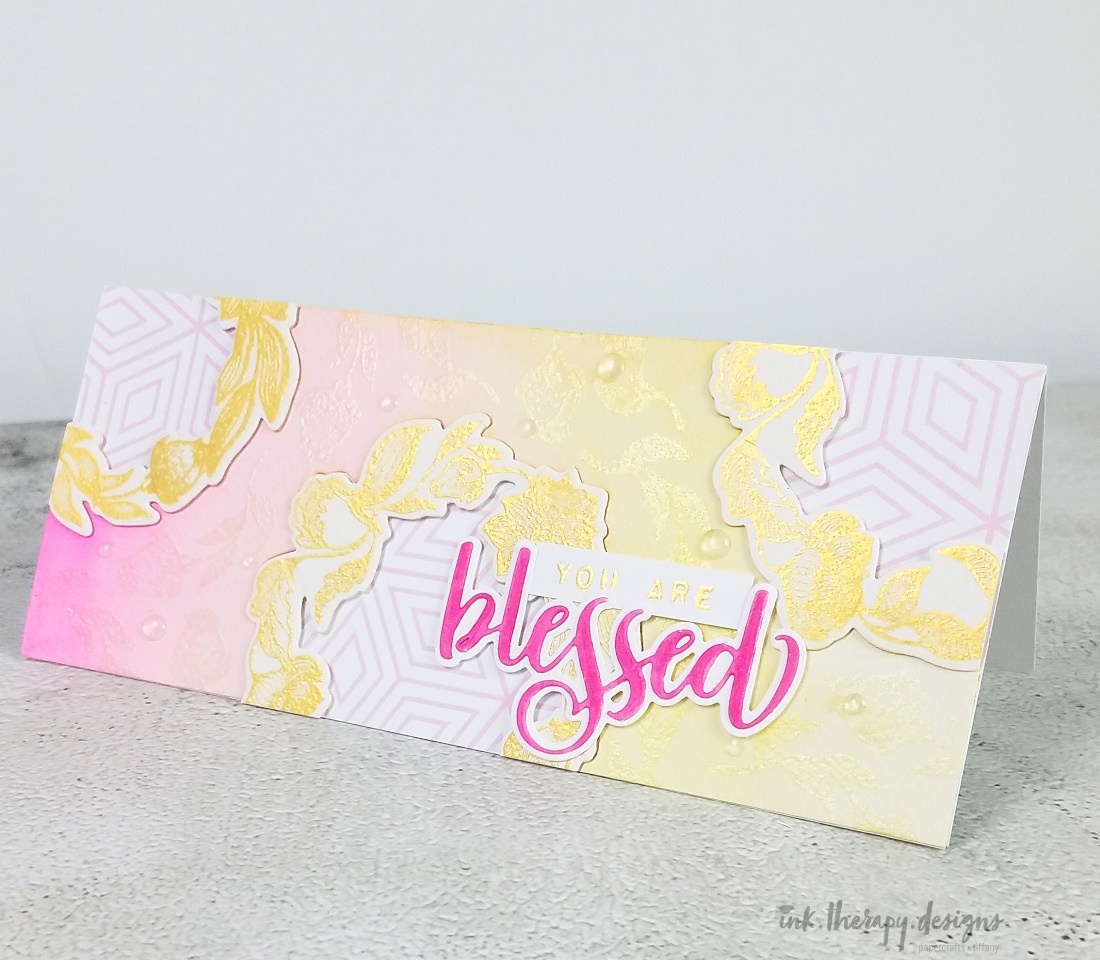
Can you believe Thanksgiving is upon us!? It was a mere 7 months ago when our lives changed completely (and probably forever). In many ways, I am still wrapping my head around the state of our country and managing the ebbs and flows of my anxiety. No matter what you’ve endured this last year, know that you are strong, capable, and yes – blessed. You know the saying “the only way out is through”? I pray that on the other side of this, we emerge more compassionate, present, and grateful. With gratitude on my mind, I made this card for a friend, who is going through a lot, to remind her that she’s got this and everything will be ok. Maybe you too need this reminder.
Have you ever hit a creative roadblock? Well, in making this card, I ran into roadblocks repeatedly. It’s times like this that I am thankful for my talented, crafty friends. With their advice and a little time, I’m happy with the final result. I’d love to hear your tips on overcoming these blocks.
Background. I started by cutting a slimline sized panel of Arches cold press watercolor paper. I usually make my slimline cards around 8.5×3.5 inches. It fits nicely in a business sized envelope and no extra postage is required (depending on your card weight and thickness). Following the rule of odd numbers, I stamped the love wreath three times in Versamark ink and heat embossed. I wanted to stamp partial wreaths for more visual interest.
*Pro tip* A stamp positioner, like the MISTI, is essential for cardmaking. I know some people swear by their acrylic blocks, and they’re cool. But trust me, you need a stamp positioner. Especially with a card like this. Stamping on watercolor paper almost always requires multiple takes to get a crisp impression. If the cost is a deterrent, wait for a sale at one of your favorite craft suppliers and treat yo’self!
After heat embossing, I die cut the partial wreaths. This left me with a really wonky shaped piece of paper, but stay with me. Because I knew I wanted to watercolor the background, I die cut first so I would not waste my paint on portions of the card that would not be used. Using the Altenew watercolor set, I painted a simple gradient with bright pink, light orange, and yellow. I made a gradient by varying how much water I introduced onto my brush and in the paint pan.
While the background dried, I cut a slimline sized panel of Neenah 110lb cardstock to use as a base. I also selected the pattern paper that I wanted to pair with the floral wreath. I adore florals and geometric shapes/lines so the beautiful pink pattern was perfect (side note – It was so hard to cut into the paper because it was so pretty, but I resisted the temptation to hoard paper. If you buy something, please use it! It brings no joy just sitting on a shelf.)
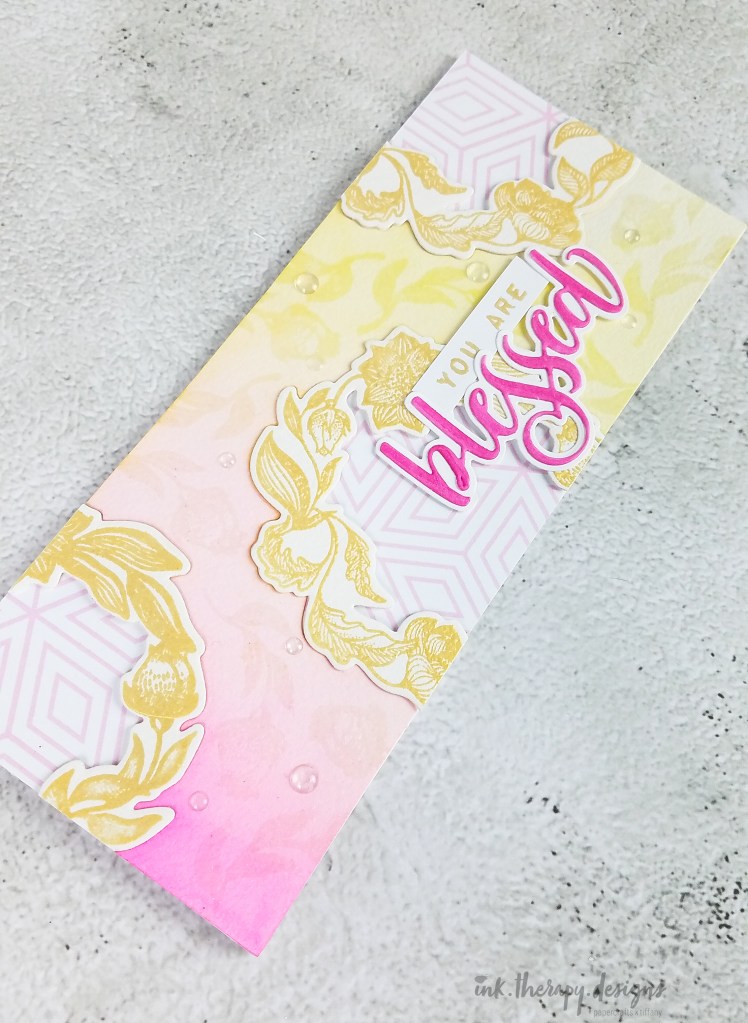
Once the background was completely dry, I used the negative spaces in the panel to roughly estimate how much pattern paper I needed to cut out to cover the interior of each wreath. With the colored background, heat embossed wreaths, and pattern paper pieces all complete, I glued everything together and popped up the wreaths with foam tape for dimension – #dimensionislife! I felt good once the panel was together, but the more I looked at it, the more I thought it looked incomplete. Hello, roadblock #1. After much consternation, a lightbulb went off. There is a single flower included with the stamp set, so of course I needed to make my own pattern. I carefully clear heat embossed the flower stamp in between each wreath. It gave the card just the right amount of added detail. When in doubt, go back to what you know and love and for me, it’s patterns!
*Pro tip* Take care when using and cleaning up your clear embossing powder. I usually pour the powder over a scratch piece of paper and put the excess back in the jar. I did not realize that little specks of dust or other colored powders got mixed in. So when I embossed with it, I could see the flecks of dust – womp, womp.

Sentiment. Ok, so in my excitement to use this stamp, I did not properly plan where my sentiment would go. What’s up, roadblock #2? I could not heat emboss a sentiment because I already covered the background in flowers. Y’all know embossing resists ink. I also could not decide on the best size/scale for the sentiment. Eventually, I decided on ‘blessed’ and was thankful that the die cut had a shadow layer. I colored the top layer in a matching copic marker – RV25, and cut the shadow layer from white cardstock. I heat embossed a sub-sentiment ‘you are’ in the same gold pearl as the wreathes to help balance out the large word die cut.
*Pro tip* I used the Stripe Sentiments stamp set and it does not have a stand alone ‘you are’ stamp. Don’t be afraid to perform stamp surgery with your clear stamps. Just carefully snip your desired word with scissors. It is easy to fit the pieces back together if you want to use your cut sentiment stamp later. Or you can mask off the unwanted words – just mask the unwanted words with a piece of tape or a post-it, ink up the stamp, carefully remove mask, then stamp as normal.

Final assembly. My original intent was to orient this card vertically, but the sentiment and its placement did not look right. Actually, no matter where I placed it on the card, it did not look right. Oh hey, roadblock #3. Luckily, I accidentally dropped my card on the floor and it landed in a horizontal orientation. Duh! Why I didn’t try that is beyond me, but when I did, all was right with the world. I love it when a plan, or the no-plan plan, comes together, ha! The final touch was adding a few clear enamel dots. The dots also helped hide those pesky dark flecks in my clear embossing.
Phew! Thanks for reading to the end friends! When I craft, I spend a lot of time making mistakes so I hope this detail helps other beginners avoid them in the future. If you’re inspired by my piece, please tag me so I can see what you create. Thanks & happy crafting!!
.Tiffany.

Thank you for sharing thiis
LikeLike
Thank you for taking a look!
LikeLike