Project Overview
- Technique(s): die cutting, interactive card – spinner
- Product list:

It spins, it’s sparkly, it’s pretty! Is it an Olympic ice skater or my first spinner card?! Ok, backing up a bit. I’m still in full on Christmas mode. I have, I don’t know, about 8 cards left to make – eek. I will most likely not finish and send them all before next Friday, but it’s the thought that counts right?
I recently purchased the Birch Press Floral Star layering dies and I wanted to try something different. I was actually inspired to try a spinner from my friend @debbycards. She made a cute spinner card with a bunny against a cloudy, blue sky. I’ve never used the infamous BP layering dies before and I’ve never made a spinner so I gave it a whirl (pun intended) and it turned out (another intended pun, ha) great!
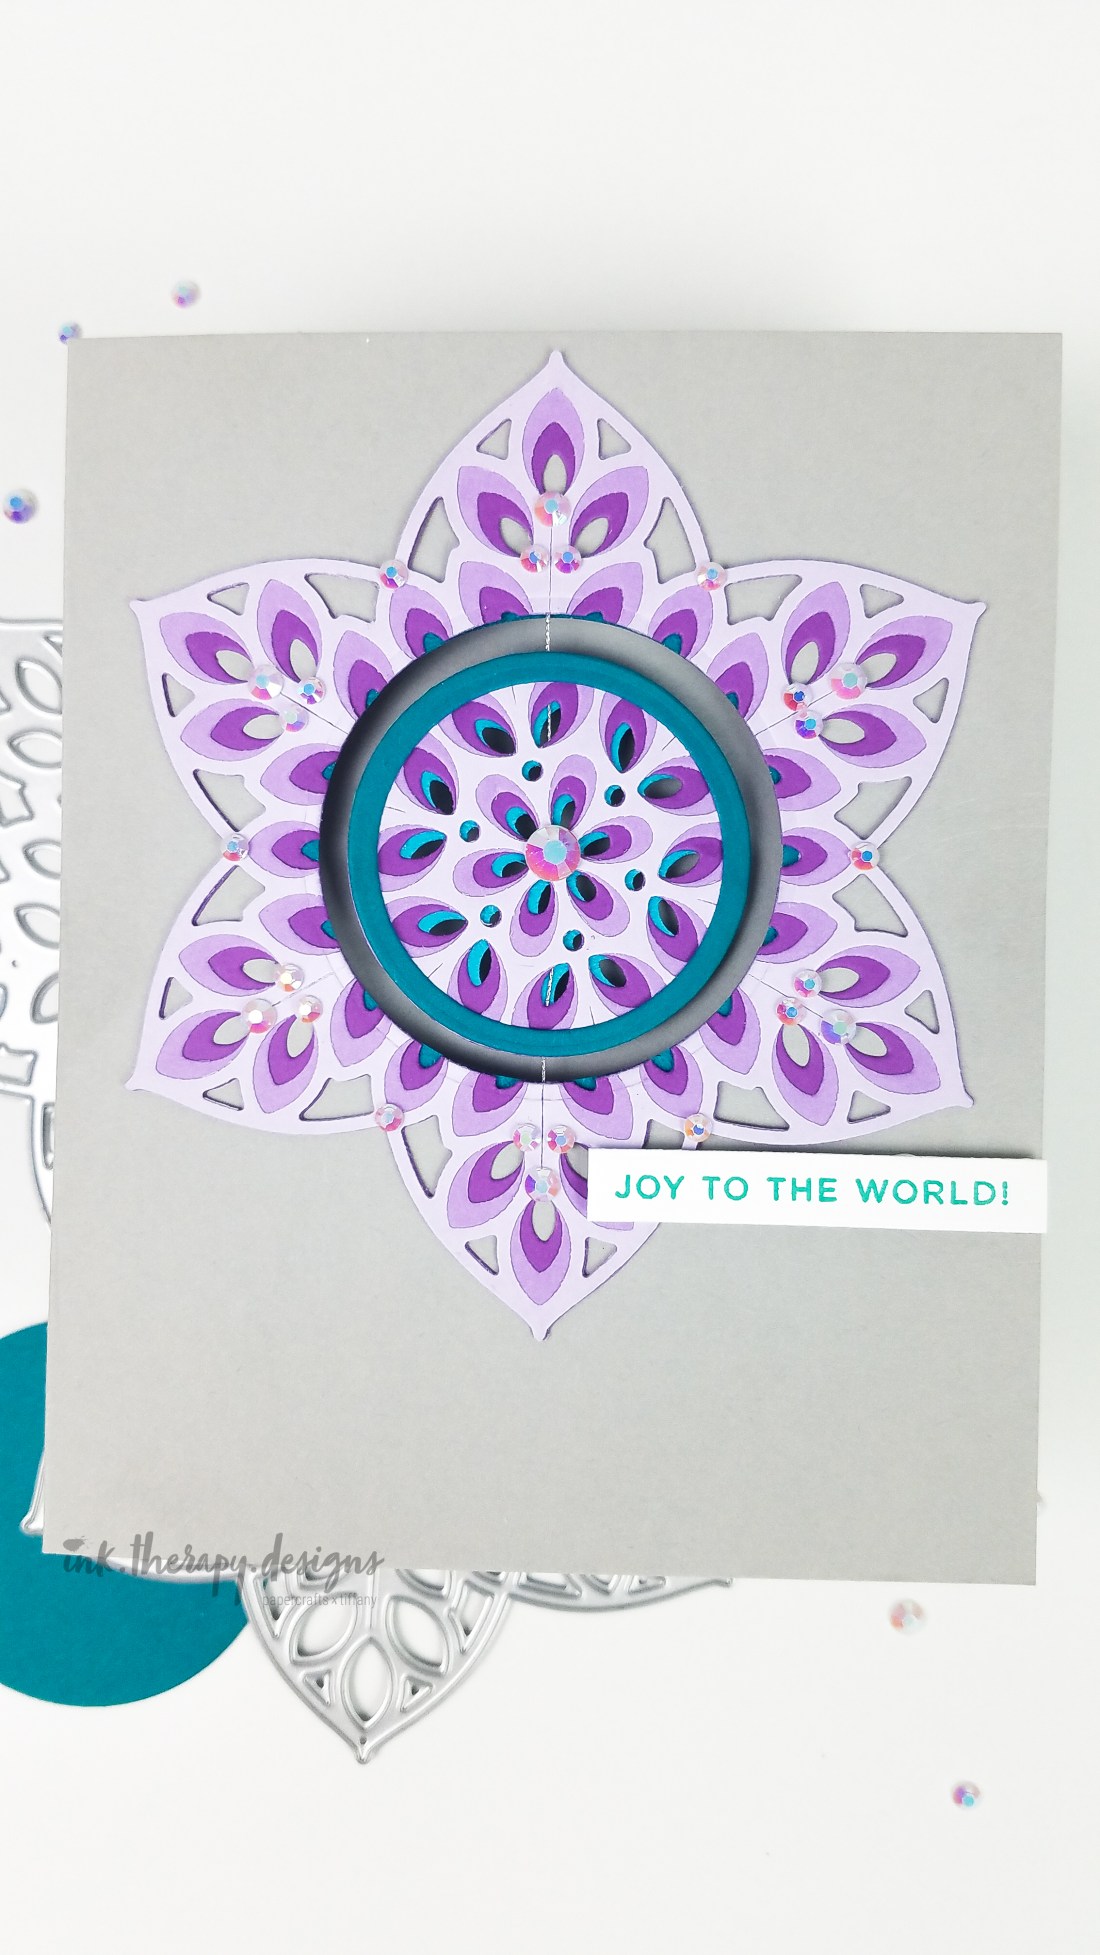
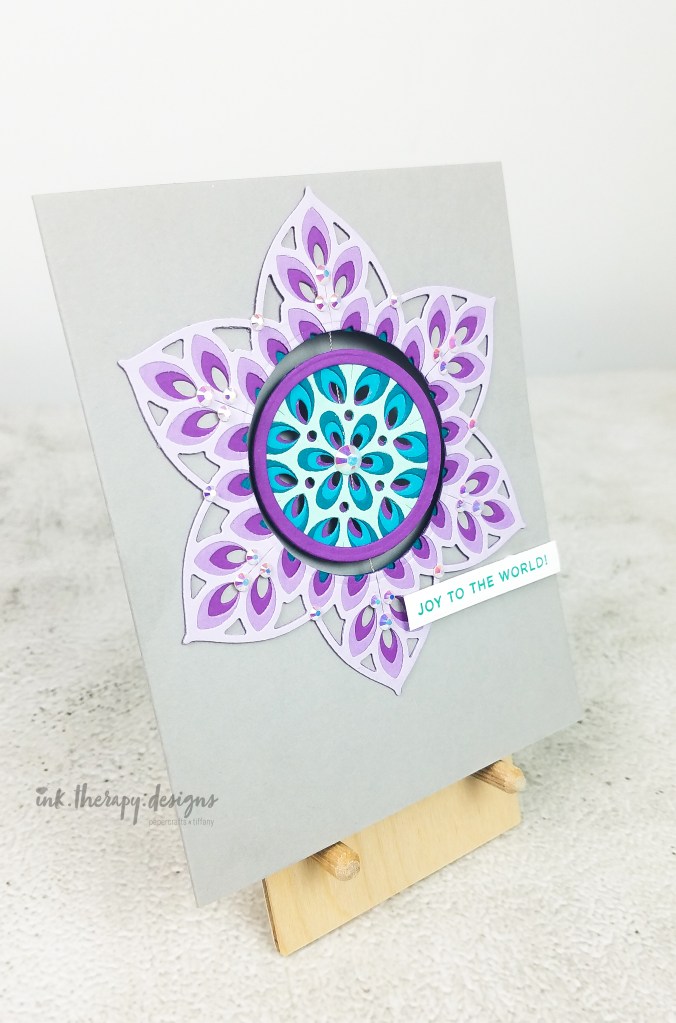
Floral Star. This beautiful die comes with three layering dies – Layers A, B, and C. From three different shades of purple, I die cut the layers starting with the darkest shade as the bottom most layer. It is not difficult to tell in which order the dies go because the most solid layer is at the bottom and the least solid as the top layer.
Pro tip: I made a rookie mistake when gluing the layers together. If I was gluing Layer A to Layer B, I put glue on Layer B instead of on the back of Layer A. It’s important to remember to add glue to the top layer because of the open pattern. You don’t want glue peeking through.
Spinner element. After adhering all of the floral layers, I cut a circle from the middle of my floral star. With the Hero Arts Circle Infinity dies, I taped two circles that were close in size together, positioned them on my floral star, and ran it through my die cutting machine. I was worried that it would not make a clean cut through the three layers, but a back and forth pass cut the circle cleanly. I used two circles so I would have the positive die cut for my spinning disk, and I would ensure I had the right amount of clearance around my spinner element.
For the back of spinner element, there are multiple things I could have done. I could have cut a plain circle and pasted it in the back or added my sentiment to the back, but I wanted another fancy floral design. Following the same steps as above, I die cut another floral star out of a trio of teal colored cardstock. Before gluing the disks back to back, I cut a piece of thin silver thread and sandwiched it between both halves of the spinner disk. I also glued the thread to opposite ends of the floral star. You want to make sure your thread is taut and secure for the spinner to work properly. For a cleaner finish, I cut and adhered thin circular borders in matching colors for each side of the spinner disk.
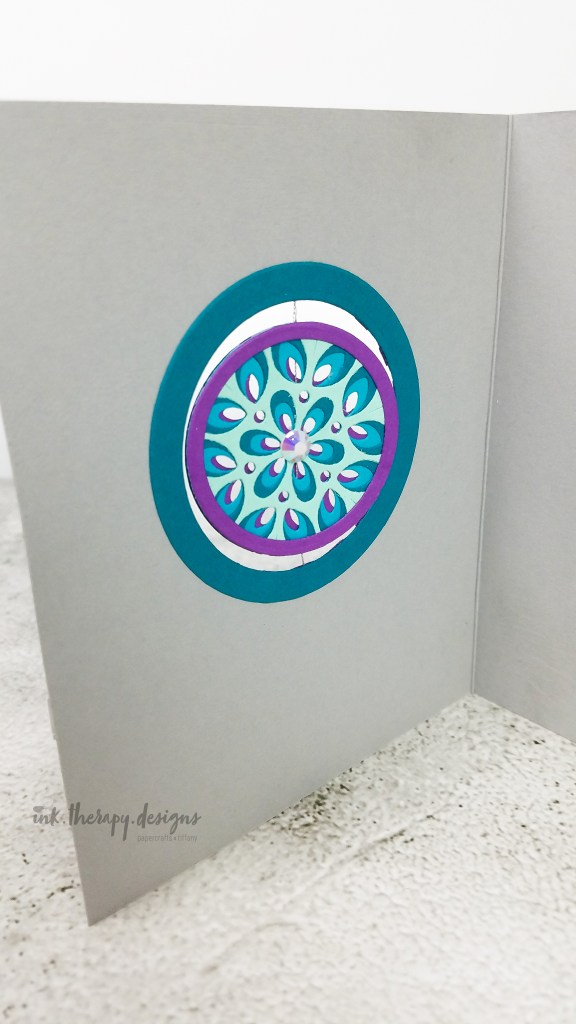


Card base. Using Simon Says Stamp Fog cardstock, I made an A2 sized card base. A note about this cardstock – make sure your hands are clean because any oil on your fingers may smudge the paper. I had to cut my card base down to get rid of an oil smudge at the bottom. Using a slightly larger circle die than my opening in the floral star, I cut a circle from the front flap of the card base. I adhered my floral star with the spinner directly to the card base with liquid glue. On the inside of the card, I cut another thin circular border to hide imperfections showing from the other side.
Finishing touches. I added several iridescent jewels from Pretty Pink Posh around the floral design to pick up the purple and teal color. Finally, I stamped my sentiment from the Good Cheer stamp set on a strip of white cardstock in CP ink, Aquatini, and popped it up with foam dots.

I love this fun color combo and I can’t stop playing with my card like a fidget spinner. Be sure to check my IG post if you want to see a short video of it spinning. If you want more tips and tricks on interactive cards, I highly recommend watching a few Jennifer McGuire videos on spinner cards. If you’re inspired by my design, please tag me on IG, I’d love to see what you create. Thanks for stopping by and happy crafting!
.Tiffany.

