(*Affiliate links used whenever possible.)
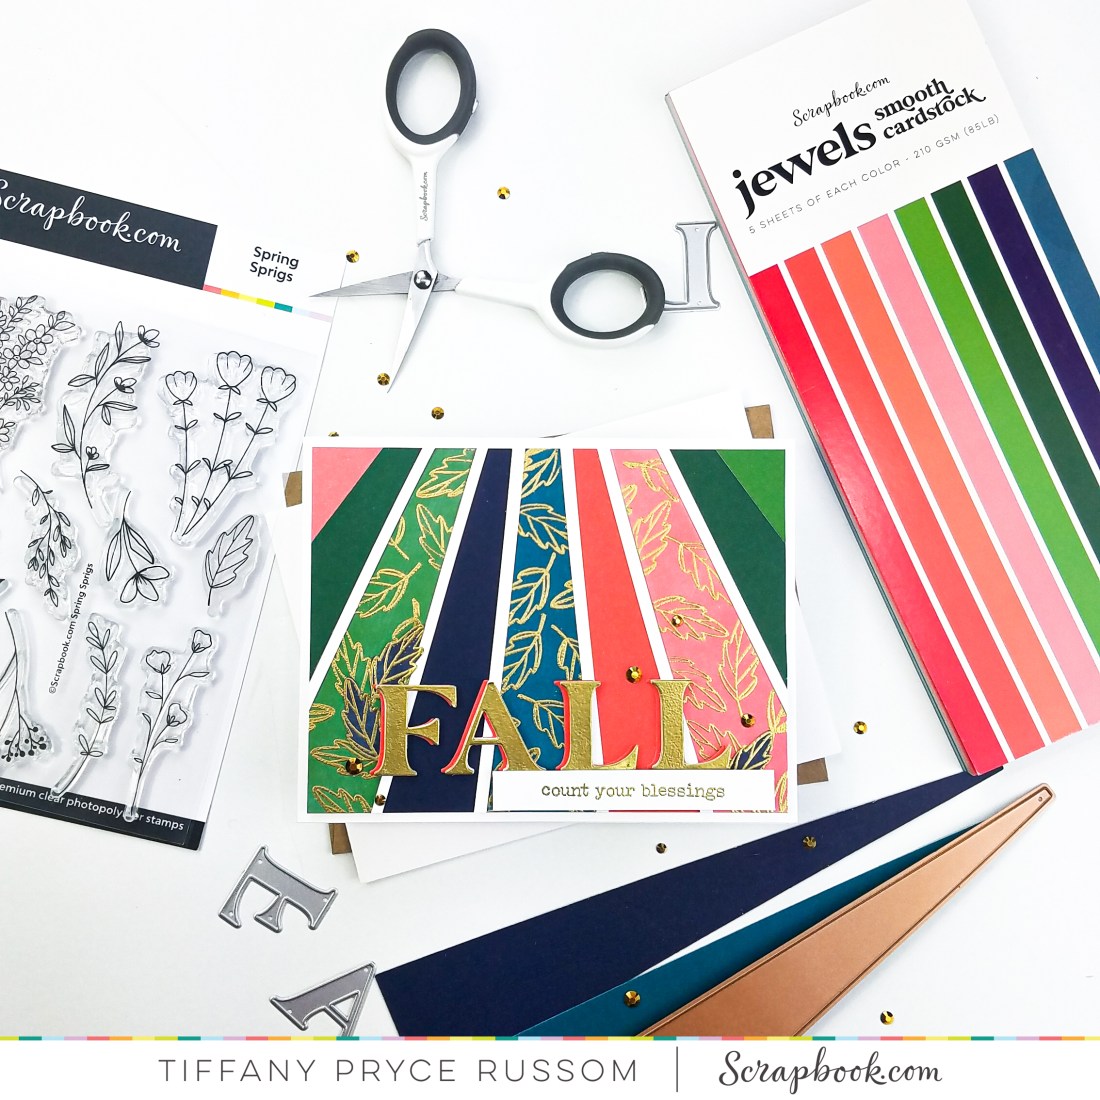
Hey crafty friends! I am currently taking a class from OnlineCardClasses.com all about cardstock, and it has been really inspirational so far! I decided to try the technique Yana Smakula taught using the Spellbinders Color Block Slices die. I decided to step it up a little and try something different and I like the results! Do you ever just want to play with your supplies in new ways and try new looks to see if you like it?
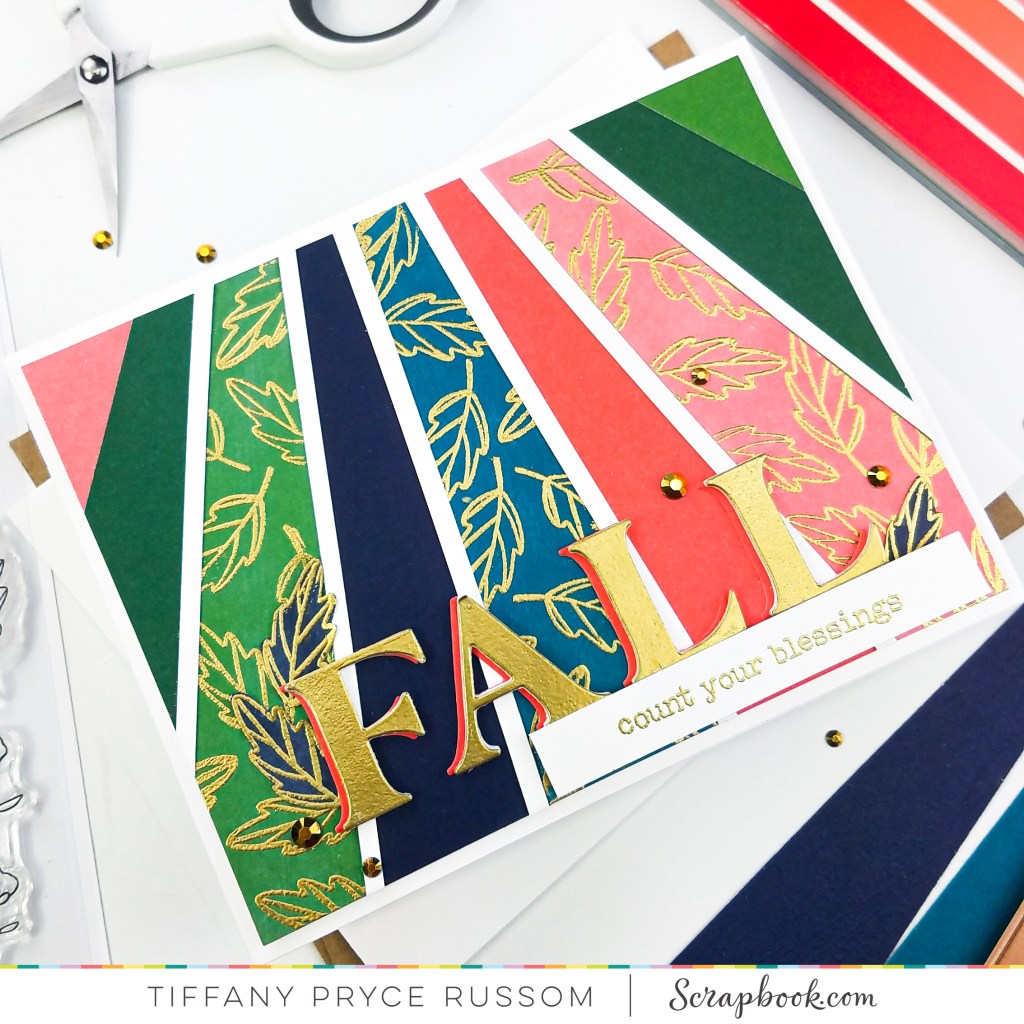
To start, I die cut my color block slices from several colors in the Jewels paper pad. I cut each color twice using the smaller of the two color block dies. On a 4×5.25 inch panel of heavyweight, white cardstock, I covered it with tape runner and adhered my die cuts. Start with the die cut in the center and work your way out. After adhering all of my pieces, I trimmed off the excess.
Now, you could leave your trimmed panel as is, but I decided to add a few more bells and whistles. First, I stamped the small oak leaf from the Spring Sprigs set randomly with embossing ink and gold heat embossed. For each slice that I stamped on, I masked off the edges with 4 inch mint tape that I cut in half (shown below). Mint tape is great, low-tack tape for masking or die cutting. As long as I have been using it, it has never torn my paper.

Next, I cut thin, 1/8 inch strips of white cardstock and glued several of them where the slices touched. I did not like how the slices did not line up perfectly showing the white card panel beneath. I also heat embossed and fussy cut a few leaves as embellishment.

Lastly, I worked on my sentiment. I die cut the word ‘FALL’ from the SBC Classic Type alpha die set. I die cut each letter twice from white cardstock, once from the same poppy color in the Jewels paper pad, and once from cardstock I covered in embossing ink and gold heat embossed. I adhered the layers together with liquid adhesive, offsetting the poppy and gold for a little contrast. I gold heat embossed the subsentiment in the same gold embossing powder. It is from the Wordfetti- Best Day Ever stamp set. I added some gold jewels from Studio Katia for a little extra sparkle.
I mounted the finished panel, with a couple layers of cardstock for added dimension, on an A2 card base.

Even if this card isn’t your cup of coffee (my husband said it was “nice” which is never a good thing haha), I hope it inspired you to pull out your supplies and just try new combinations. You never know where you may land! Until next time, happy crafting!
*Affiliate disclosure: I only use, review, and blog about products/companies I actually like and will continue to use. Some of the products shown on my blog use affiliate links. These affiliate links allow me to earn a small commission when products are purchased through those links. *This is at no cost to you!* Please do not feel obligated to use my affiliate links. If you choose to use these links, thank you so much! It helps support my blog and bring new content to you. Read the full disclosure on the about page.
