(*Affiliate links used whenever possible at no extra cost to you.)
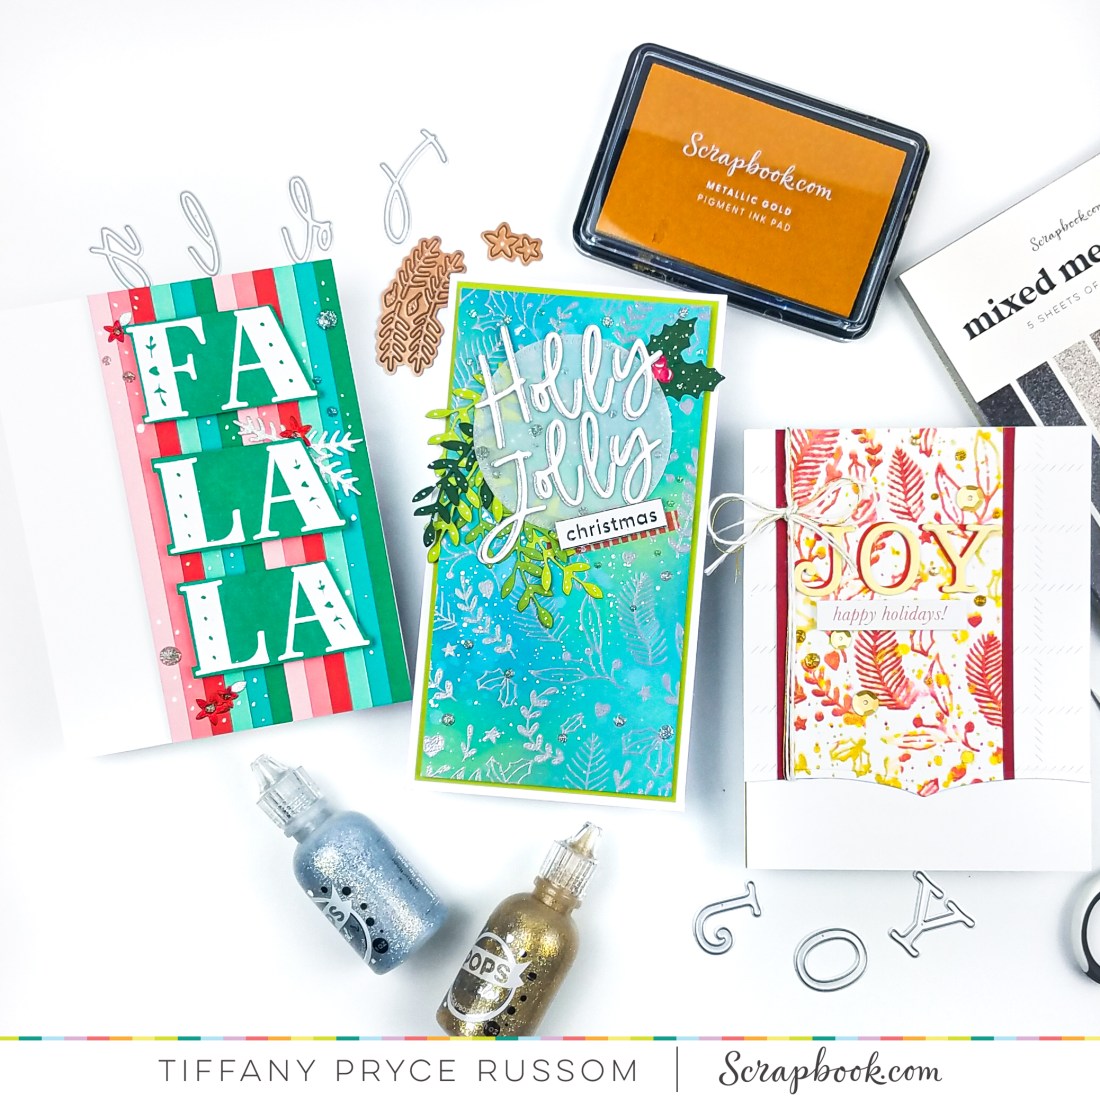
I recently received a new package from Scrapbook.com with products from their latest release. It was full of new paper pads, stamps, stickers, and alpha dies. I’m sure there is something in this new release that you will love in your craft room! I decided to use one of my favorite stamps from the new release called Slimline Christmas Foliage in three different ways. It’s a gorgeous holly, berry, and winter leaf pattern that is perfect for the holidays. The stamp set also comes with a holiday sentiment. I love stretching my supplies, so I thought I’d show you three ways to use the same set. I have all the links below, but if you have something similar in your stash, use what you have!
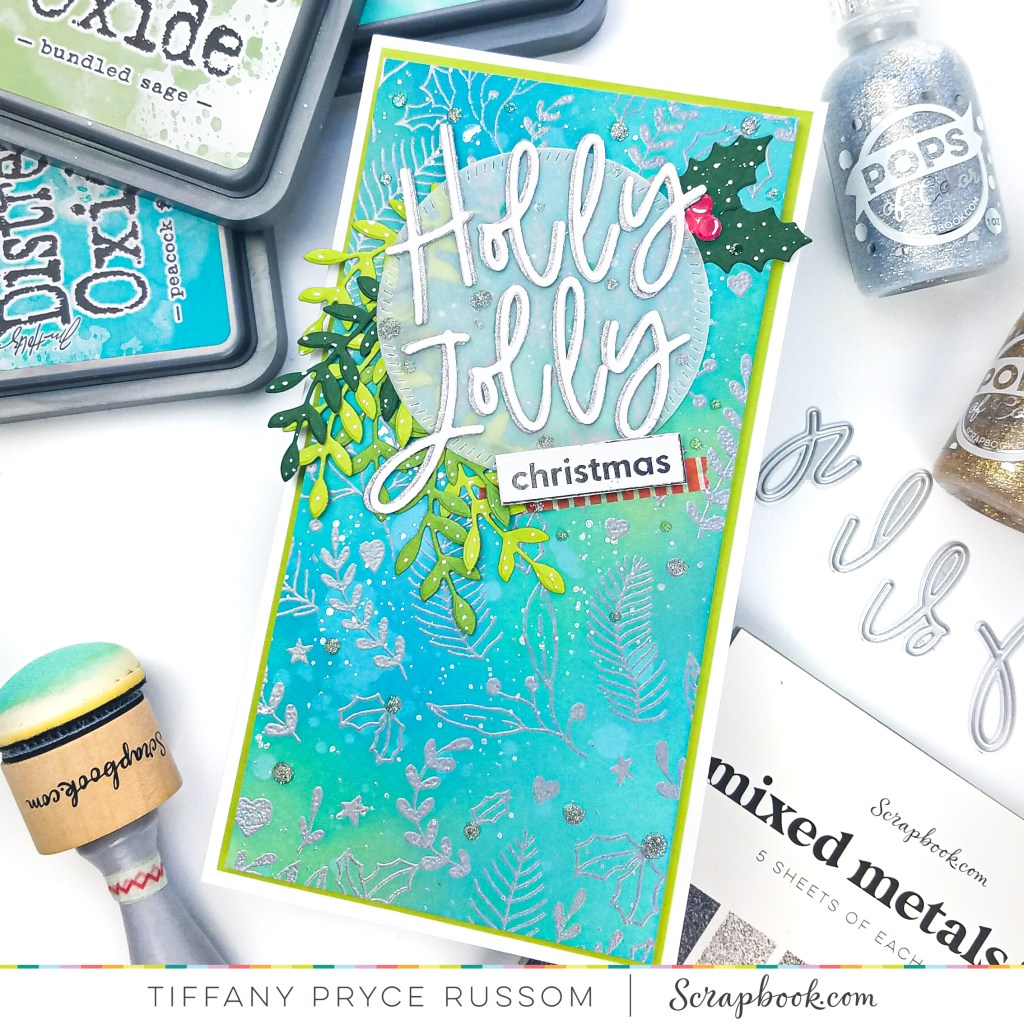
Holly Jolly Christmas

STEP BY STEP INSTRUCTIONS:
- Stamp the SBC Slimline Christmas Foliage stamp in versamark ink and heat emboss in silver on a mini slimline-sized panel.
- Ink blend distress oxide inks – salvaged patina, peacock feathers, bundled sage – randomly all over panel.
- Spritz panel with clean water and splatter with silver, metallic watercolor.
- Adhere a panel of green cardstock behind the inked panel.
- Die cut leaves and foliage from the Honey Bee Stamps Country Christmas Wreath from various colors of cardstock. Color and splatter with white paint.
- Die cut the sentiment from the SBC Uptown Alpha die set three times from white cardstock and once from silver cardstock in the SBC Mixed Metals glitter paper pad.
- Adhere the alpha die cuts with liquid glue.
- Adhere the sentiment onto a vellum circle die cut with one of the dies from the Pinkfresh Studio Mini Slimline Bundle.
- Arrange the die cut leaves behind the vellum circle.
- Add the sub-sentiment from the SBC Sticker Book, Peppermint Christmas with foam tape and a little Washi tape.
- Add final embellishments with the Pops of color, silver glitter all over panel.


Joy & Happy Holidays!

For this card, I used the watercolor stamping technique for a different look.
STEP BY STEP INSTRUCTIONS:
- Ink the SBC Slimline Christmas Foliage stamp with Concord and 9th ink cubes – cranberry, stardust, and poppy.
- Spritz the stamp with clean water and stamp on watercolor paper. Press the stamp into the paper and let it sit for a few seconds to absorb into the paper.
- Spritz the stamp with clean water once more and stamp again.
- Clean the stamp and ink with SBC metallic gold pigment ink.
- Before stamping, shift the paper a little bit to get an offset look with the pigment ink.
- Splatter with Tim Holtz flickering candle mica spray.
- While the panel is drying, die cut the sentiment with the SBC Typewriter Alpha die set. Die cut each letter 3 times from white cardstock, once from cardstock coloring with the SBC gold pigment ink, and once from red cardstock.
- Adhere the letters with liquid glue.
- After the panel has dried, adhere red cardstock strips to either side and adhere the sentiment. Add the sub-sentiment from the SBC Sticker Book, Peppermint Christmas with foam tape.
- Tie twine around the inked panel.
- Die cut a panel of white cardstock with the Pinkfresh Studio, Diagonal Stitched Plaid die. Adhere behind the inked panel.
- Die cut the bottom with Pinkfresh Studio, Slimline Edger dies for a decorative edge.
- Adhere to an A2-sized card base.
- Add final embellishments – gold sequins and several drops of SBC Pops of color, champagne glitter around the panel.


Fa La La La La
For my third card, I focused on using the sentiment from the SBC Slimline Christmas Foliage stamp set to make a clean and simple holiday card.

STEP BY STEP INSTRUCTIONS:
- Choose a variety of cardstock from your stash and trim into 1/4 inch strips with your paper trimmer or a die.
- Adhere strips to a scrap piece of copy paper, trimming off excess cardstock.
- Adhere strips to a card front with SBC foam sheet for dimension. (These foam sheets are one of my favorite craft supplies!) Add the card front to an A2-sized card base.
- Stamp and heat emboss the sentiment from SBC Slimline Christmas Foliage stamp in white.
- Fussy cut the sentiment with the SBC Small Precision Scissors.
- Add foam tape behind the sentiment and adhere to the striped panel.
- Die cut several pieces from the Spellbinders Sunday Drive with Santa die set using glitter paper from the SBC Mixed Metals glitter paper pad and the SBC Rainbow glitter paper pad.
- Glue die cuts around the sentiment, adding Pops of Color, silver glitter to the flower centers and around the panel.
- Add white gel pen details to finish the card.


Hope you enjoyed these cards and are inspired to try something from the new release! Happy crafting!
*Affiliate disclosure: I only use, review, and blog about products/companies I actually like and will continue to use. Some of the products shown on my blog use affiliate links. These affiliate links allow me to earn a small commission when products are purchased through those links. *This is at no cost to you!* Please do not feel obligated to use my affiliate links. If you choose to use these links, thank you so much! It helps support my blog and bring new content to you. Read the full disclosure on the about page.

I love these cards….I keep forgetting to use my alphabet dies. This blog post gave me ideas on how to use them.
LikeLike
Love that! Thanks for stopping by!
LikeLike
Oh wow, all these cards are absolutely beautiful!! Wow!!
LikeLike
Thanks so much!
LikeLike
This is such an elegant and beautifully crafted card.
LikeLike
Thanks!!
LikeLike