
(*Affiliate links used whenever possible at no extra cost to you.)
Confession – I used to have a love/hate relationship with shaker cards. I loved the idea of shaker cards and the final look, but I could never get my shaker to well, shake! The bits always got stuck. With time and more practice, I think it’s safe to say that I love making shaker cards! It’s such fun way to jazz up any card. Today, I’m sharing a fun, Halloween-themed shaker card using Scrapbook.com exclusive products.

STEP BY STEP INSTRUCTIONS:
- Stencil Pops of Color, Gloss Black through the SBC Bats stencil on SBC acetate, and set it aside to dry.
- Using the Spellbinders Glimmer Machine, hot foil a panel of gray cardstock with the Skinny Stripe Background with black foil.
- Stencil more bats with the SBC Bats stencil on the foiled panel with hickory smoke distress oxide ink.
- Create a frame for the shaker card using the Spellbinders Essential Rectangles die.
- Behind the frame, back it with black glitter paper from the SBC Mixed Metals Glitter paper pad. Cut thin strips of the glitter paper and glue it behind the frame.
- Adhere the dried acetate panel behind the frame with SBC double sided adhesive.
- Using the witch hat, skull, and bats dies from Spellbinders Halloween Sunday Drive, die cut several from white, silver glitter, black, and black glitter cardstock. These small die cuts will help fill the shaker. The black and silver glitter paper was from the SBC Mixed Metals paper pad.
- Build the walls of the shaker with SBC foam tape. This is genuinely my favorite foam tape!
- Add orange and clean sequins to the shaker bits and close the shaker window.
- Stamp and white heat emboss ‘happy days’ from the SBC Memories stamp set. Fussy cut the words out, removing the ‘s’ from ‘days’.
- Die cut ‘BOO’ from the Downtown Alpha die set from orange and black glitter cardstock.
- Die cut the skeleton and bowler hat from Spellbinders Halloween Sunday Drive.
- Adhere the sentiments with foam tape to the card front, and add the waving skeleton.
- Spread a little liquid glue in the card corners with you finger and sprinkle Distress Mica Flakes over the glue.
- Adhere the finished card front to an A2-sized, top folding card base.


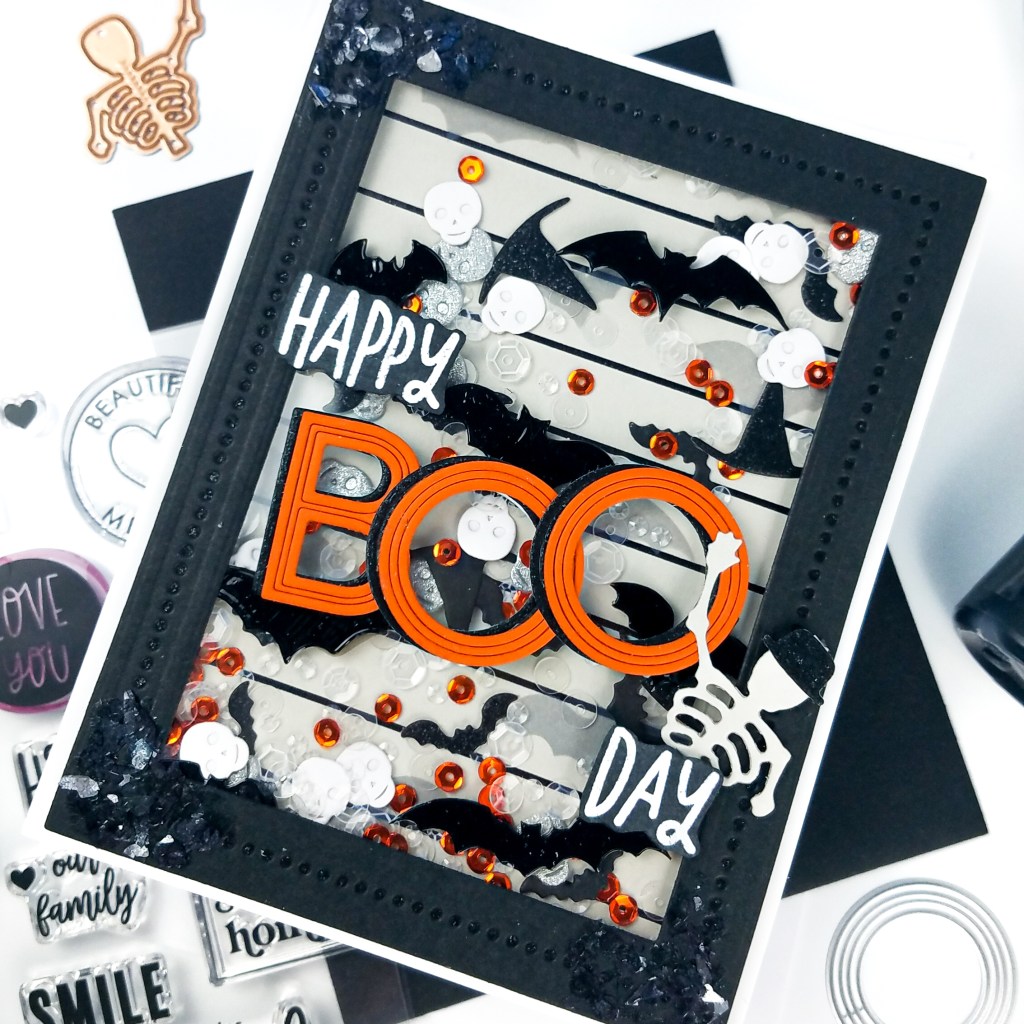

Isn’t Halloween such a fun occasion to make for? I really like how this one turned out. Happy crafting, friends!
*Affiliate disclosure: I only use, review, and blog about products/companies I actually like and will continue to use. Some of the products shown on my blog use affiliate links. These affiliate links allow me to earn a small commission when products are purchased through those links. *This is at no cost to you!* Please do not feel obligated to use my affiliate links. If you choose to use these links, thank you so much! It helps support my blog and bring new content to you. Read the full disclosure on the about page.
