(*Affiliate links used whenever possible at no extra cost to you.)
Hi friends! I’m part of the Spellbinders Club Kits team for the Glimmer of the Month (GOM) and Clear Stamp of the Month (CSOM). Today, I am showcasing makes using these Spellbinders kits for October. As always, they are gorgeous products, and I know you won’t regret subscribing if you are interested. The Spellbinders Club is a subscription program, and there are 7 Clubs to choose from, including several value options which combines clubs for a discount. By popular request, there is a new club where you get the Clear Stamp of the Month with the coordinating dies. The Total Package Club includes ALL 7 Clubs and has the best value. But feel free to try one or two out to get a feel for the products. There is no minimum commitment, you can join and cancel at any time. Club members also get a perk of an additional 10% off all Spellbinders products.
October Glimmer of the Month
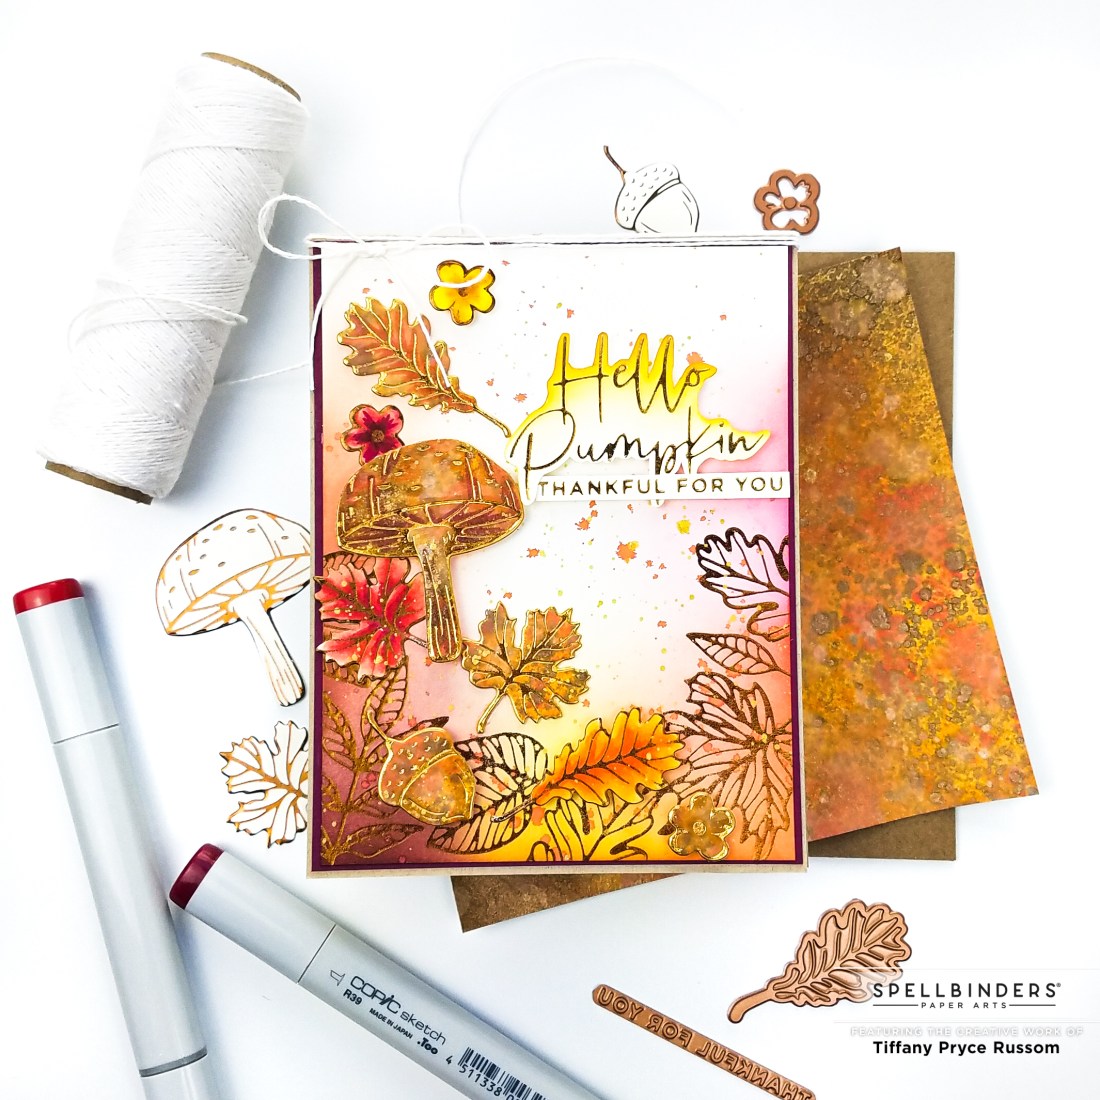
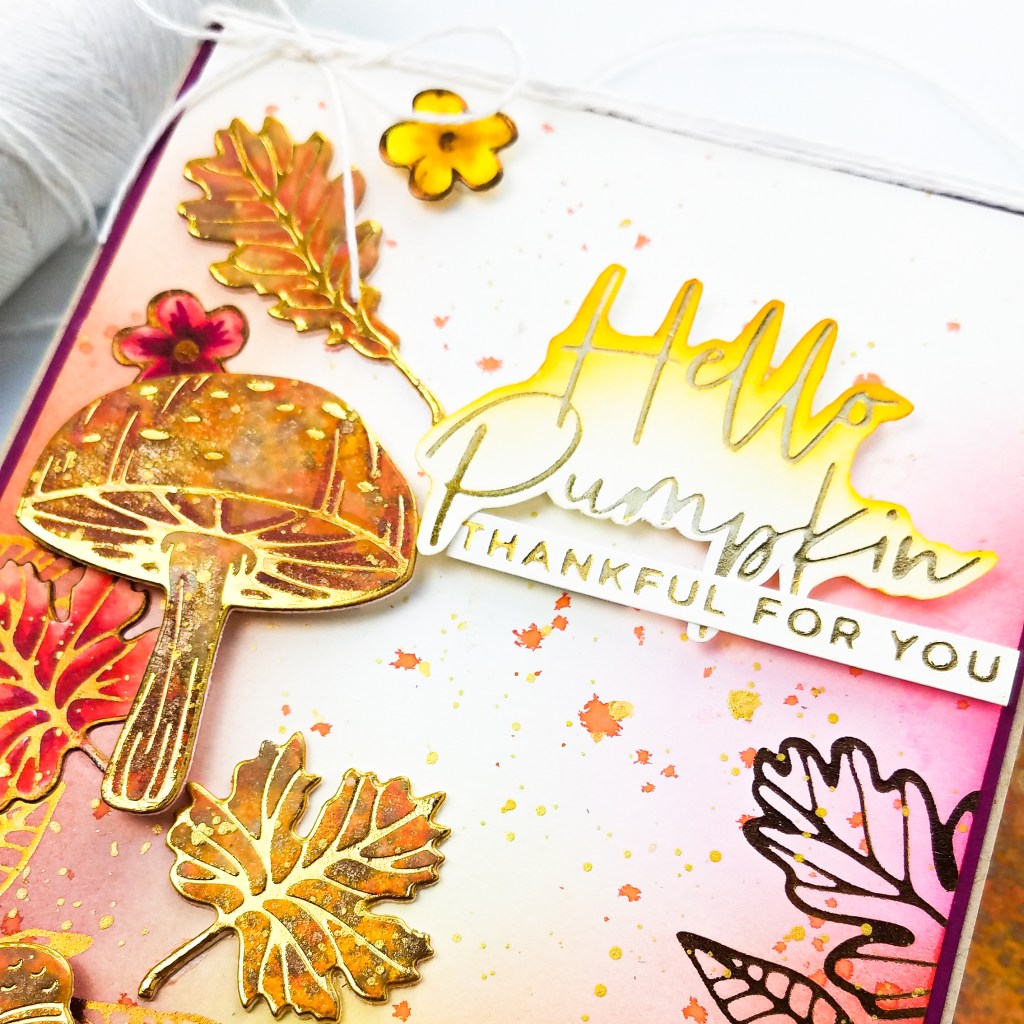
This month’s GOM is perfect for all of your autumn cards (my favorite season!). It features a number of autumnal foliage and a sentiment. It includes the hot foil plates and the coordinating dies. I think you could use some of these images for spring too, just change up the colors. Something new about these glimmer plates is the way they foil. Unlike previous designs with coordinating dies, these plates foil all the way up to the edge, leaving no white border when you die cut. This gave me a little trouble because I wasn’t sure how to position the die. But even if it isn’t perfect, it still looks great.
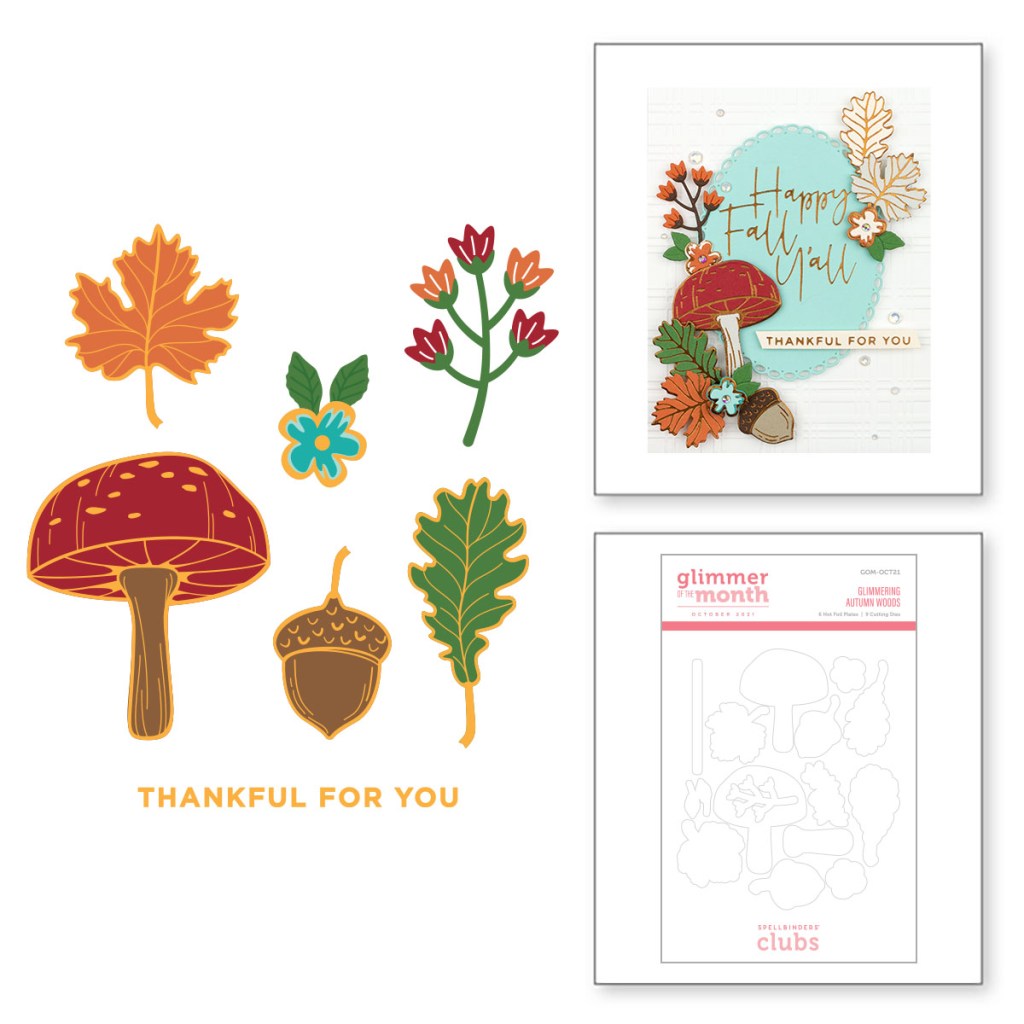
For my project, I decided to combine this month’s kit with the GOM from October 2020, Crimson Fall. They pair perfectly together.

STEP BY STEP INSTRUCTIONS:
- Using Crimson Fall plate, foil the background on a piece of cream cardstock using copper hot foil.
- Lightly blend a variety of Catherine Pooler dye inks around the perimeter.
- Splatter the panel with the same inks you used to ink blend and gold watercolor.
- Foil all of the images from the Oct 2021 GOM kit using polished brass hot foil. I foiled the images on a mixed media panel that I made and had in my stash. I used a variety of Tim Holtz mica sprays and distress oxide inks to create the panel. I also foiled all of the images on cream cardstock.
- Foil the sentiments on cream cardstock.
- Color the cream colored images with Copic markers, and add details to the images on the mixed media panel.
- Ink the larger sentiment for an ombre look.
- Adhere the images and sentiment with foam tape around the panel.
- Matte the panel with coordinating colored cardstock and add to an A2 card base.
- Add white twine to the card.


October Clear Stamp of the Month + Die
This month’s clear stamp and coordinating is a great craft room basic. The sentiments range a variety of occasions and can be used on any project. The coordinating dies die cut the large sentiments ‘Sending’, ‘For’, and ‘You’. Unfortunately, I believe as I am writing this that the club kit with the stamp and die is sold out. But you can still purchase the clear stamp kit alone.

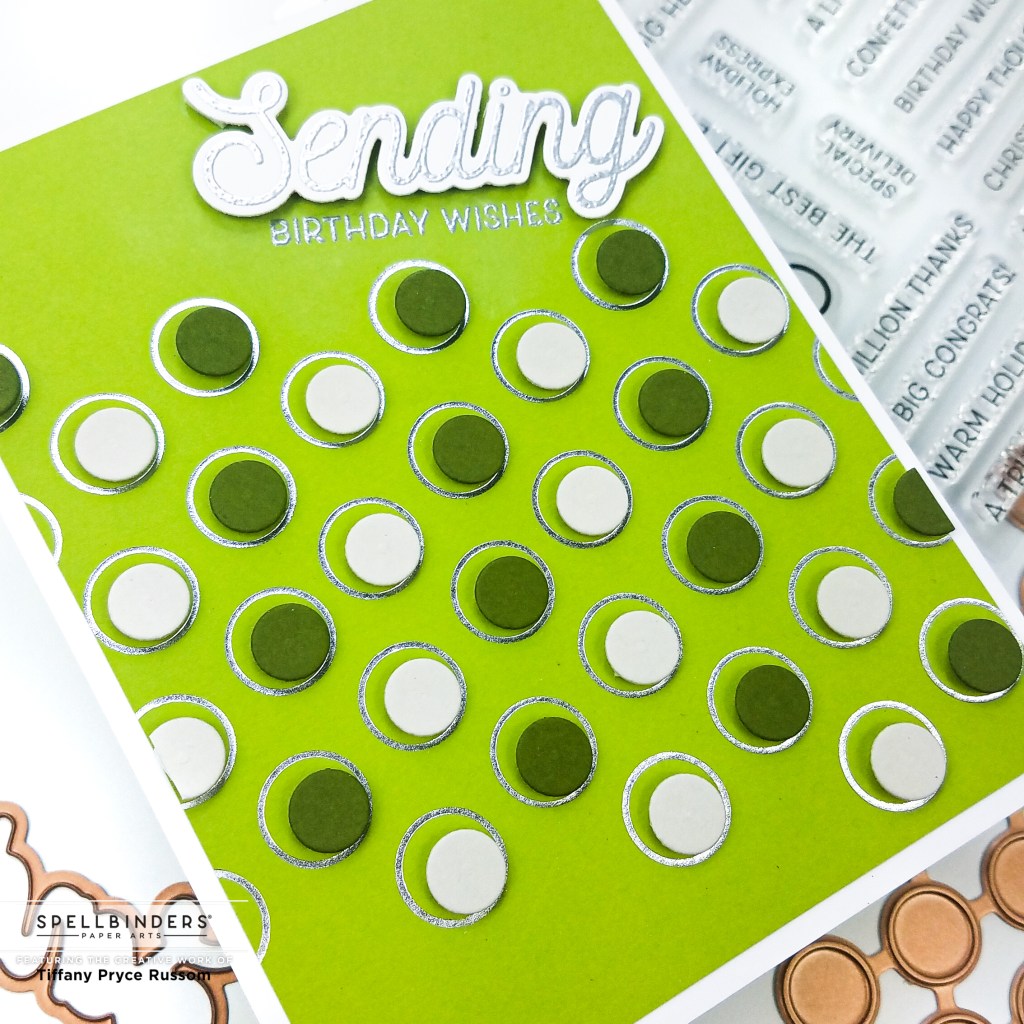
For my samples, I decided to make two CAS cards. For the first one, I paired it with the GOM from May 2021. I needed to make a birthday card for my brother so I kept it minimal. and gender-neutral.

STEP BY STEP INSTRUCTIONS:
- Using the Spot On Background, foil the background on a piece of peridot cardstock using silver hot foil.
- Using the coordinating dies, die cut circles from a dark green cardstock and silver fox cardstock.
- Adhere the dots with small pieces of foam tape.
- Heat emboss the sentiment from October’s CSOM in silver embossing powder. Die cut with the coordinating die.
- Heat emboss the sub sentiment from October’s CSOM directly onto the card front.
- Adhere die cut sentiment with foam tape.
- Adhere card front to an A2-sized card base.

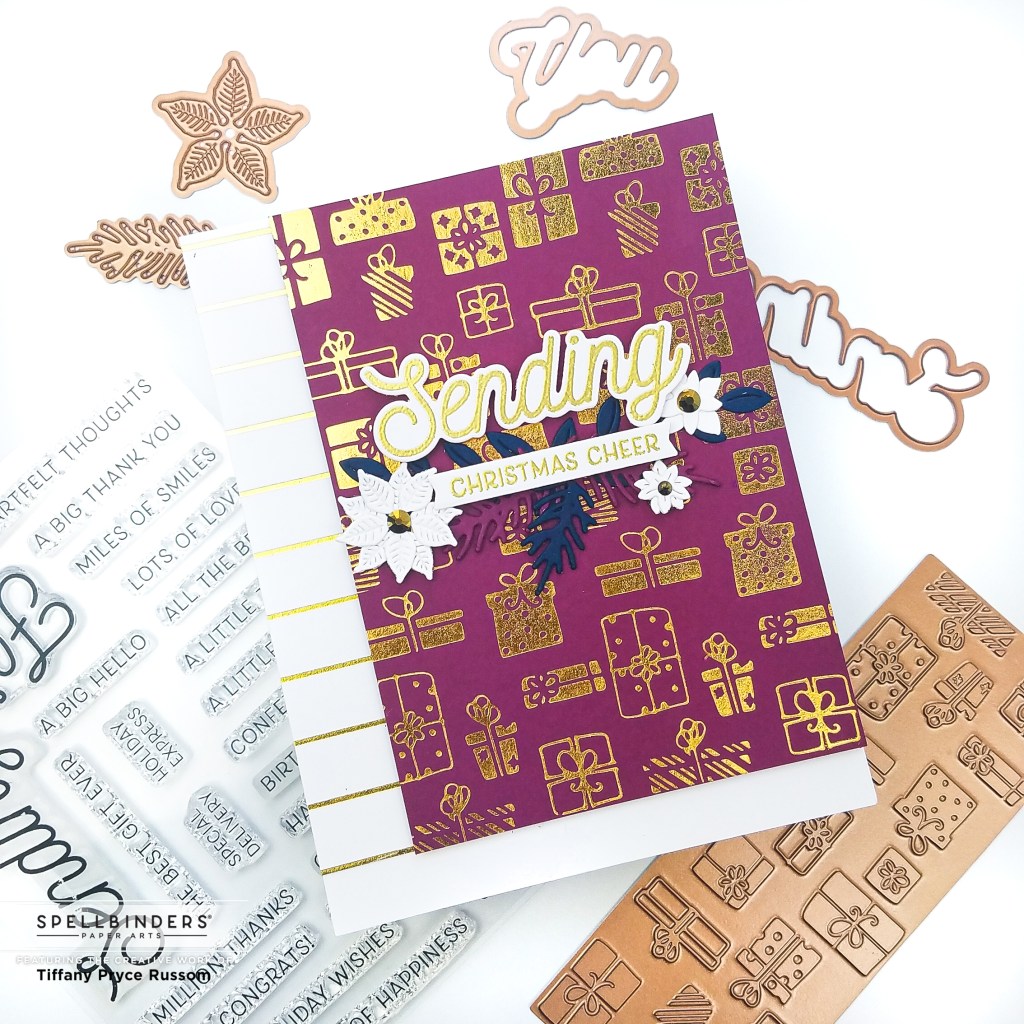
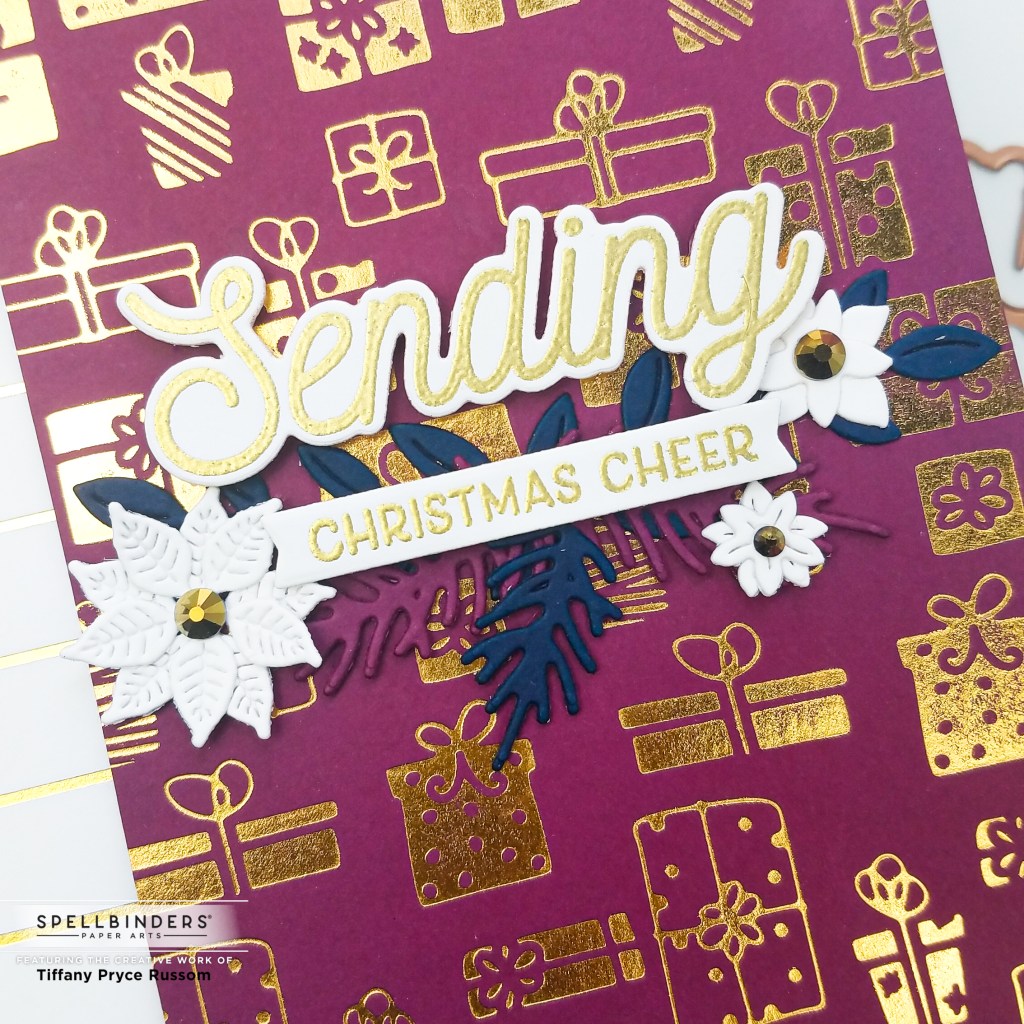
The second one, I made a holiday card for my stash. I have a long list this year so I’ve already started my cards!
STEP BY STEP INSTRUCTIONS:
- Using the Skinny Stripe Background, foil the background on to white cardstock using gold hot foil.
- Using the Gift Border Plate, foil the background twice onto plum cardstock using gold hot foil.
- Trim a piece of the striped background and trim the gift background so both fit on an A2-sized card panel.
- Heat emboss the sentiment from October’s CSOM in gold embossing powder. Die cut with the coordinating die.
- Heat emboss the sub sentiment from October’s CSOM and die cut it with a sentiment strip die from Spot On Background.
- Die cut several pieces from various cardstock using the Christmas Blooms die set. Arrange and adhere on the card front.
- Adhere the sentiments with foam tape.

*Affiliate disclosure: I only use, review, and blog about products/companies I actually like and will continue to use. Some of the products shown on my blog use affiliate links. These affiliate links allow me to earn a small commission when products are purchased through those links. *This is at no cost to you!* Please do not feel obligated to use my affiliate links. If you choose to use these links, thank you so much! It helps support my blog and bring new content to you. Read the full disclosure on the about page.
