
Project Overview
- Technique(s): dry embossing, heat embossing, ink pad “stamping”
- Product list:

Hi friends! Did you see that there is a new sketch challenge #576 on the MFT blog? Pull out your craft supplies and play along! Sketch challenges are great ways to jumpstart your creativity when you are feeling in a creative slump. Please head over to the MFT blog for all the details on eligibility and how to enter. You have until January 18, 2022 at Noon EST to add your link and be eligible for the prize of a $50 MFT gift card.

For this sketch, I wanted to go the CAS route and use a couple old and new (to me) techniques to play with texture and geometric shapes.
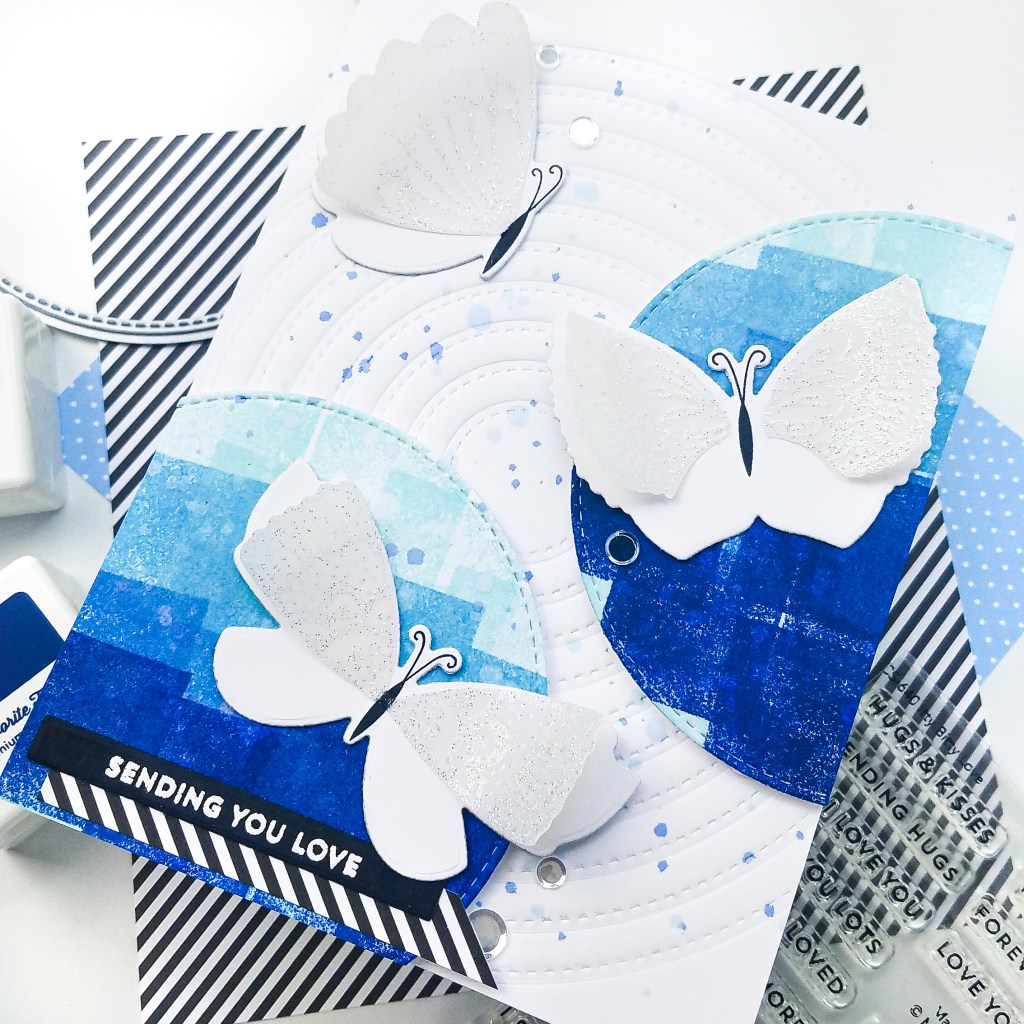
- On an A2 panel of white cardstock, tape several A2 Stitched Circle STAX Die-namics dies down. Use your die cutting machine’s instructions to dry emboss, dry emboss the dies into the paper to create a textured background.
- Using the sketch as guidance, die cut two circles using the Circle STAX Die-namics, temporarily tape the circles to the card panel, and trim the excess.
- Remove the trimmed circles, and using the MFT ink cubes, “stamp” the ink across the die cut. I used 4 ink cube colors to create an ombre effect – Sno Cone, Lazy Day, Something Blue, and Blue Beyond. Press the ink pad directly on the die cuts in rows, staggering the “stamps” for interest.
- Once the die cuts were dry, adhere the trimmed circles in position with foam tape for dimension.
- Splatter the background with clean water and diluted dye ink in two different shades of blue.
- Using the Brilliant Butterflies Die-namics, die cut three butterflies. Using the stamp set, stamp the butterfly bodies in MFT Extreme Black ink, and stamp the coordinating wings on vellum with embossing ink. Heat emboss the wings with sparkly embossing powder.
- Fussy cut the heat embossed wings out and adhere with liquid glue on the butterflies.
- Adhere the butterflies on the card front with liquid glue.
- White heat emboss the sentiment from Itty Bitty Love and die cut the sentiment strip with the coordinating Die-namics.
- Trim a thin piece of pattern paper from the Black & White Stripes Paper Pad and adhere behind the sentiment with liquid glue.


Hope you will try dry embossing for texture and doing direct-to-paper with your ink cubes. Thanks for reading! For even more ideas and inspiration, please visit the My Favorite Things YouTube channel.
Happy crafting,
Tiffany
I’d love to connect with you! Please follow me on IG and my blog, and reach out and say hi!
@ink.therapy.designs
