
(*Affiliate links used whenever possible at no extra cost to you.)
Hey friends! Want to save time lining up sentiment dies with a hot foil plate that foils multiple sentiments at once? I might have an idea that will help! I also have a card project to share so please keep reading. 🙂
The Ellen Hutson Casual Greetings Hot Foil Plate foils 10 sentiments at once, but the coordinating dies are all separate. Sometimes, I have a little trouble finding the right die for the right sentiment, so creating a die template has been a time saver for me! I’ve created a reel to walk you through the easy steps, but you can also read more details below. Head over to my IG to see the reel!

- Foil sentiments. When I am in the mood to foil, I foil many things in one craft session. So I pulled out multiple A2 panels of cardstock to foil several sentiment sets. I mix up the color cardstock and the color glimmer foil to get a variety of options for future projects. Tip: Ensure your panels are all the same size and try to position the hot foil plate in roughly the same spot on each panel. This will help later in the process. Tip: Ever get a little overfoiling? It’s ok! Take a polymer eraser or your mono sand eraser to carefully remove any overfoiling.
- Align & die cut the sentiments. With your foiling complete, take one panel and line up each Casual Greetings Die with the coordinating sentiment. Since you will be using this as a template, it is best to start with any panels of heavyweight cardstock. You will only have to do this once so I recommend taking your time with this step and ensuring the dies are perfectly placed. Tip: Ensure you tape down your dies on the edges only. The adhesive on the tape can pick up the foil from your sentiments so use thin strips of tape to secure the dies only onto the cardstock and not the sentiment area. This also makes it easy to pop out your die cut sentiments without removing the tape.
- Repeat as many times as you would like! After you pop out all of the die cut sentiments, leave all of the dies and the craft tape in place. Use this as a template to line up to the next foiled panel and die cut your next batch of sentiments. Depending on the positioning of the foil plate, you may need to adjust the template slightly to fit the sentiments perfectly.
- Rejoice! Bask in all of the foiled, die cut sentiments you have to use on future projects!
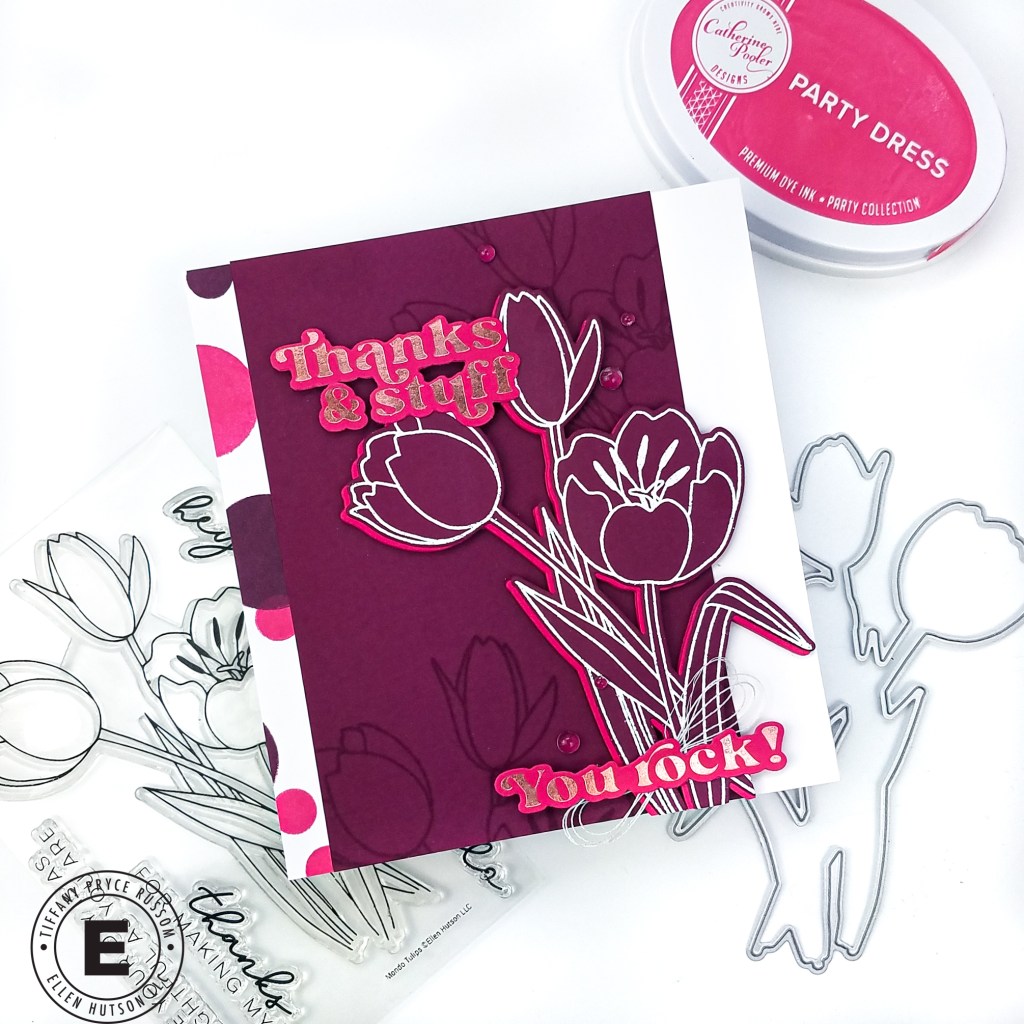
I couldn’t do all that foiling and die cutting without making a card, right?! I kept this card pretty clean and simple, and I was inspired by a technique Julie recently shared. I made a mistake while making this which resulted in me creating a 5 x 5.5 inch card. It is an unusual size for me, but I was happy in the end and I tried something new – win-win!
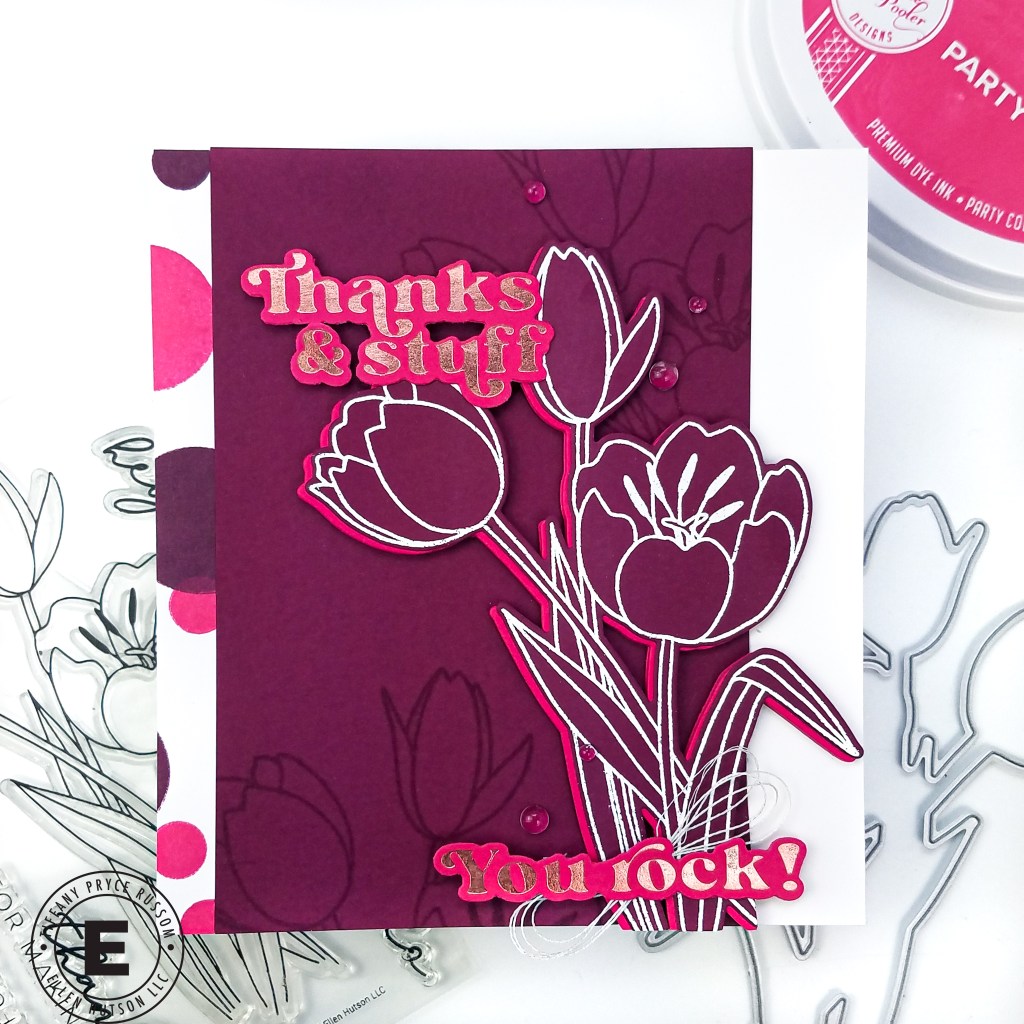
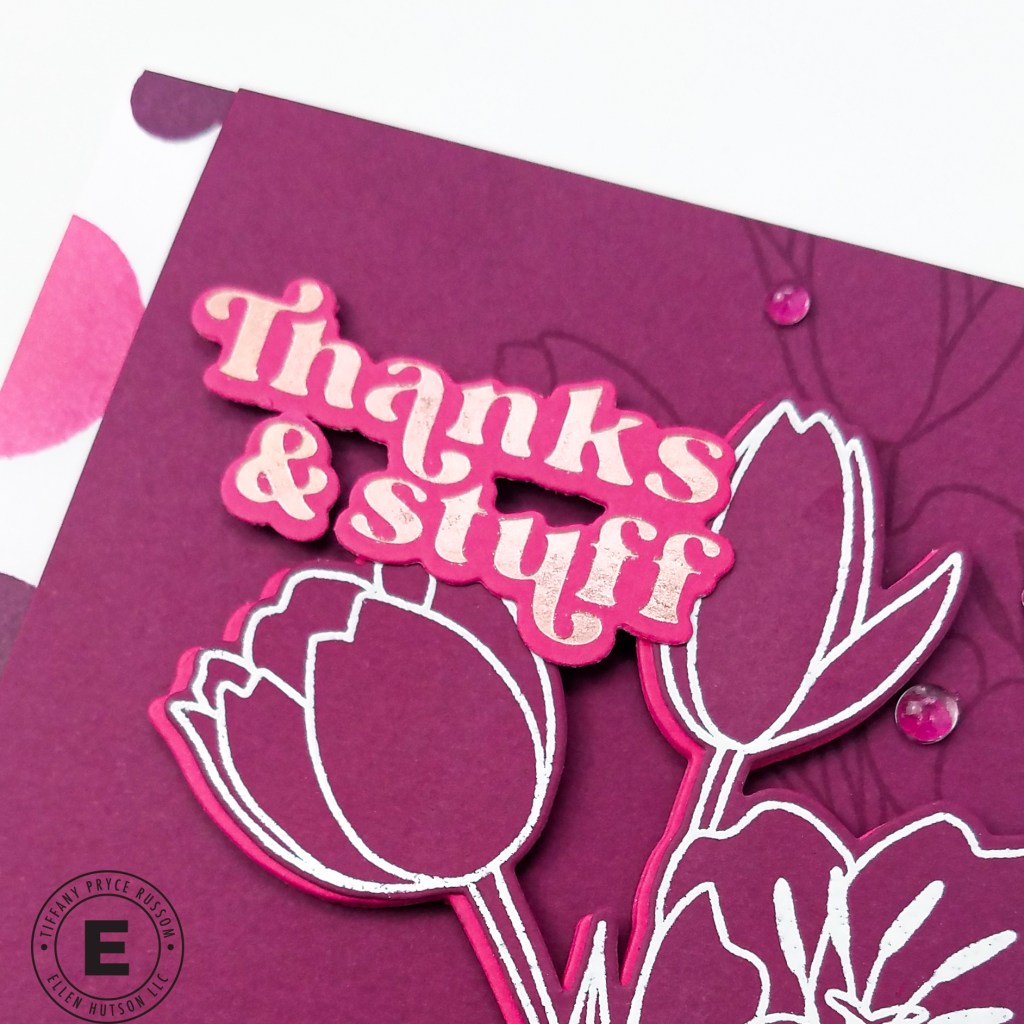
I started by stamping the EBE Mondo Tulip in embossing ink on a panel of Hero Arts Plum cardstock. Next, I white heat embossed the Mondo Tulip on another piece of Plum cardstock. I used the coordinating die to die cut the tulip. I wanted to do a faux eclipse technique so I die cut 5 more layers from Hero Arts Azalea cardstock. I adhered the layers together and offset the top layer slightly. This is where I made a mistake – I wanted to trim the parts of the flower hanging off the edge, but I already had 6 layers of cardstock glued together. So instead of trimming the flower, I just made a larger card, hence the 5 x 5.5 inch size.
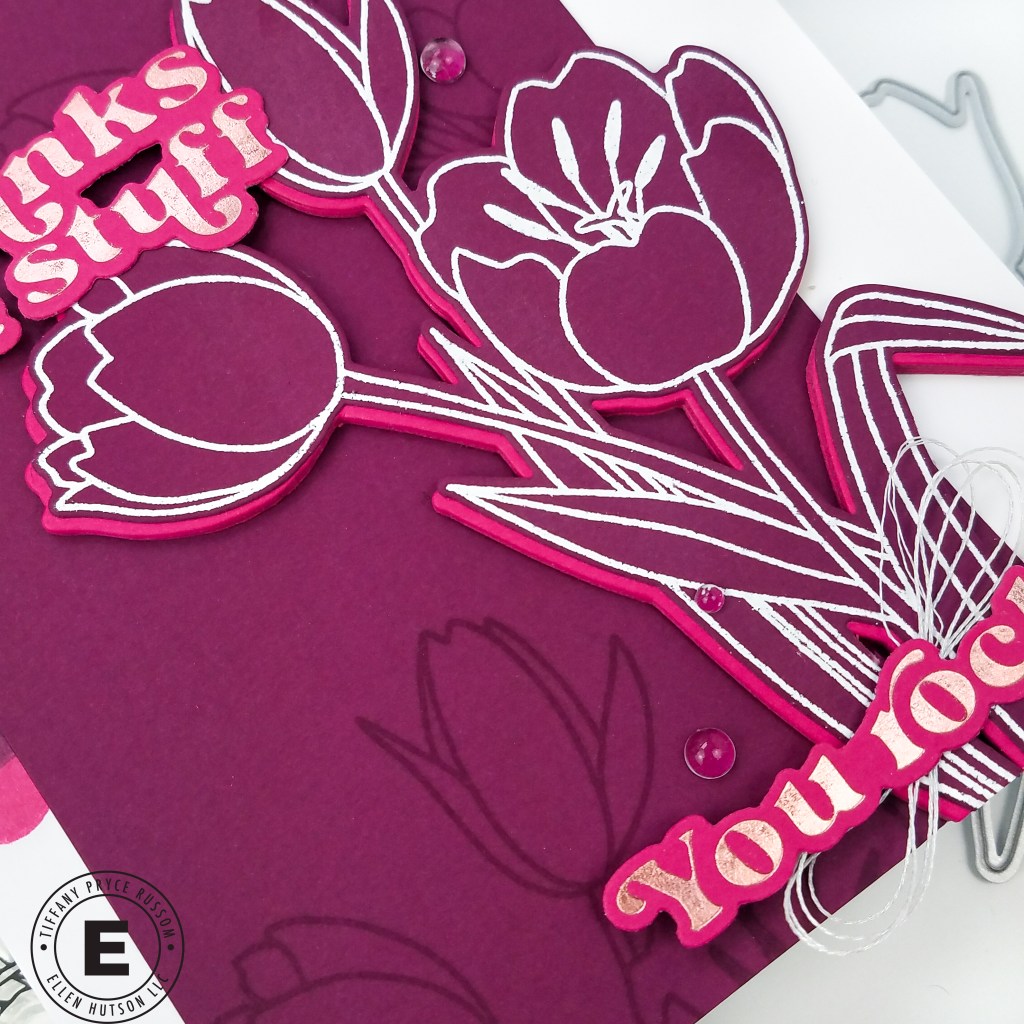
I adhered the flower to the card front with liquid glue, and adhered that to the card base. To create the trim on the left, I repeatedly stamped two circles from EBE Stay Cool in Catherine Pooler Party Dress and Sangria dye inks.

I finished the card by adding two foiled sentiments, some clear drops for a little more shine, and white twine behind the second sentiment. I just love this color combo and the mix of the florals with the geometric circles.

What do you think? Will you try this technique? Did you like the card? Let me know in the comments! And follow me, @ink.therapy.designs and Ellen Hutson for more cardmaking inspiration. We love seeing what you create!
As a bonus, for National Craft Month, the Design Ambassadors are sharing a piece of their craft room. I am not the one to follow for organization tips lol. I craft in my dining room and have quickly outgrown my space so it’s usually pretty untidy. But I made a reel in the past of how I store my Catherine Pooler inks that you can check out. This was just after the coordinating labels were released. My storage has not changed since then. What you see in the video is the neatest portion of my craft space. If I were to pan down to the floor, it would tell a completely different story. #keepingitreal 🙂
Product list:


Happy crafting,
Tiffany
I’d love to connect with you! Please follow me on IG and my blog, and reach out and say hi!
@ink.therapy.designs
*Affiliate disclosure: I only use, review, and blog about products/companies I actually like and will continue to use. Some of the products shown on my blog use affiliate links. These affiliate links allow me to earn a small commission when products are purchased through those links. *This is at no cost to you!* Please do not feel obligated to use my affiliate links. If you choose to use these links, thank you so much! It helps support my blog and bring new content to you. Read the full disclosure on the about page.
