


Hey friends! We’re halfway there! One technique that I come back to again and again is creating my own patterned paper using stamps. It is a great way to get more use from your stamps, and it is also a great way to use those tiny stamps that oftentimes come in stamp sets. In this design, I stepped up the “DIY patterned paper” by adding in another layer of texture/color with my ink cubes. Fun! Imagine how many patterned papers in various color combos, patterns, or designs you could create with these two staples in any craft room – ink cubes and stamps.
STEP-BY-STEP INSTRUCTIONS
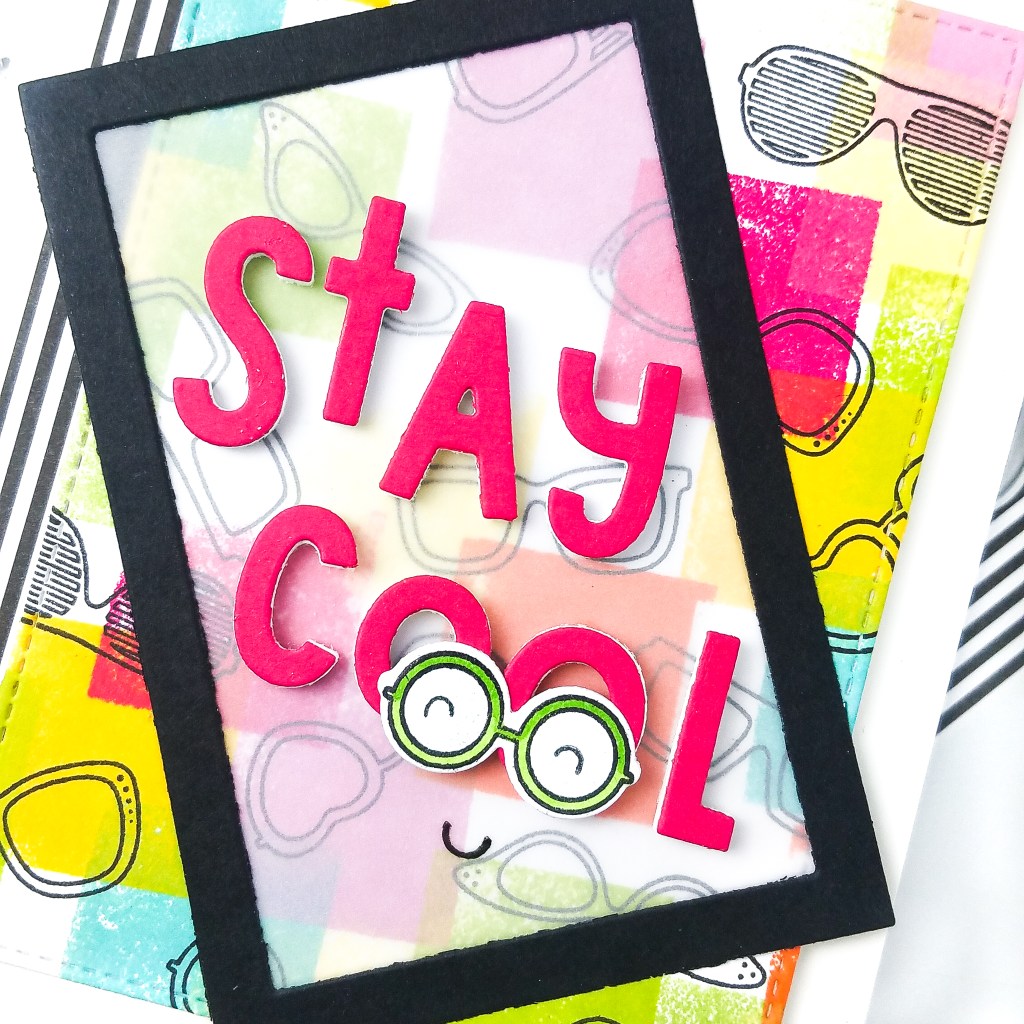
- Using your MFT ink cubes, repeatedly “stamp” the ink cubes over white cardstock. Use whatever color combination you would like.
- Once the ink is dry, place the panel in your MISTI, and arrange several glasses from the SPECtacular stamp set over the panel. Stamp in MFT Extreme Black and repeat stamping until the entire panel is covered. You may have to move around the stamps or the paper in order to fit all of the stamping properly.
- Die cut the panel with the A2 Stitched Rectangle STAX Die-namics.
- Create a frame from black cardstock using the A2 Rectangle Frames Die-namics.
- Trim a piece of vellum to fit behind the frame and adhere it with liquid glue. The vellum helped soften the pattern so the die cut letters would stand out.
- Adhere the frame to the inked panel, and then adhere both to the card base. Add a strip of patterned paper from Black & White Stripes to the side.
- Die cut the Stay Cool Die-namics from pink cardstock and fun foam. Adhere the layers together, and then adhere to the card front on top of the vellum window.
- Embellish with a stamped, colored, and die cut image from SPECtacular.

Thanks for stopping by! Come back tomorrow for Day 2. For even more ideas and inspiration, please visit the My Favorite Things YouTube channel.
Happy crafting,
Tiffany
I’d love to connect with you! Please follow me on IG and my blog, and reach out and say hi!
@ink.therapy.designs
