
Happy Wednesday! Hope you enjoyed the cards I made for MFT’s April release. If you are new to my blog, hello and welcome! So happy you are here. I wanted to share why I write so many blogs for MFT each month as the question came up. Short answer – there are a ton of amazing products and happenings with MFT each month that I love participating in! I truly love all of my design teams and MFT is no exception. Long answer – MFT has a new release towards the beginning of every month and design team members make a card for each countdown day and for release day (6 cards). MFT releases a new card kit towards the middle of the month. There’s one card on the countdown day and then one on release day. MFT also hosts weekly sketch challenges, biweekly color challenges, slimline challenges and out of the box challenges. Phew! On any given week, there is always something fun to inspire you to create! Not everything is mandatory so I participate in extras as I can. For each card we post, there needs to be an accompanying blog which is why you will see so many MFT blogs each month. I am happy to do it because I love the company, but yes, blogging is my least favorite part of crafting LOL. I am grateful for all of you who subscribe and read my blog. But I totally understand if you get too many emails 🙂 🙂
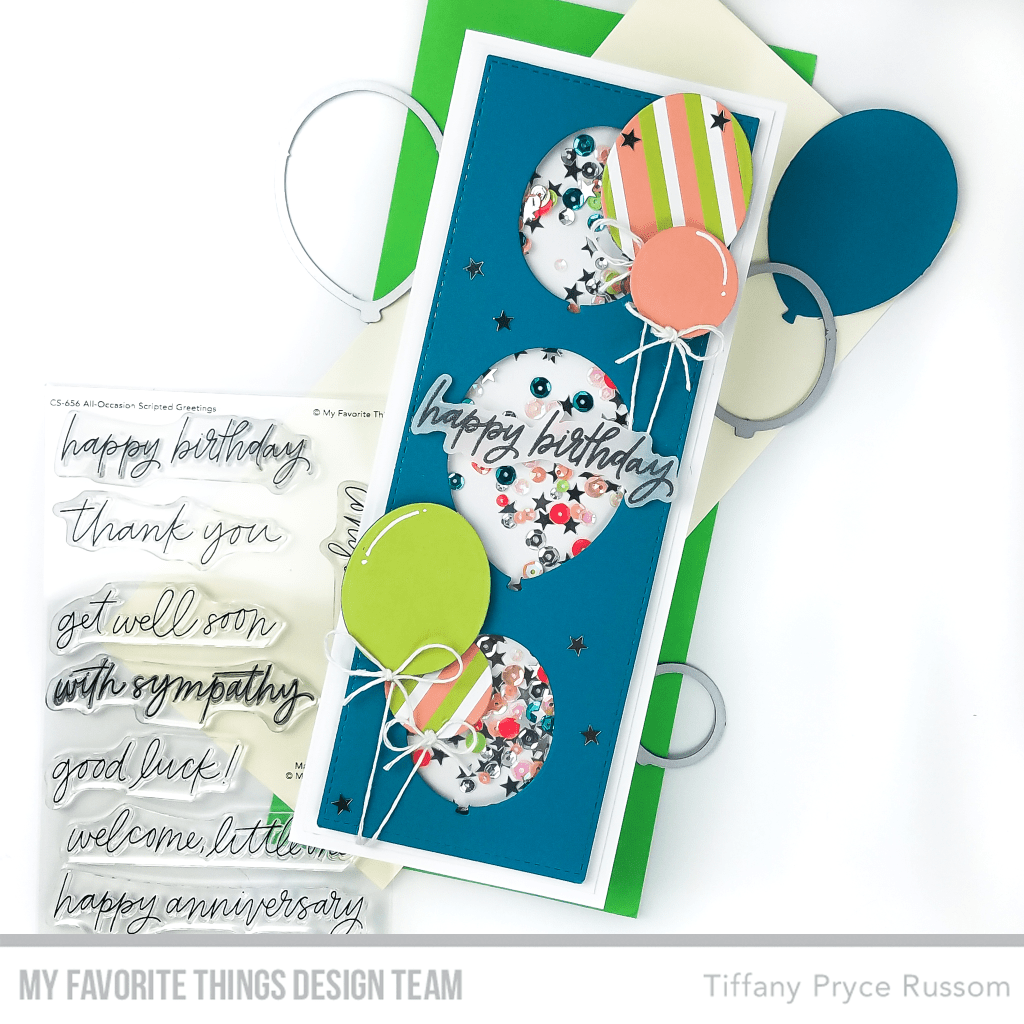
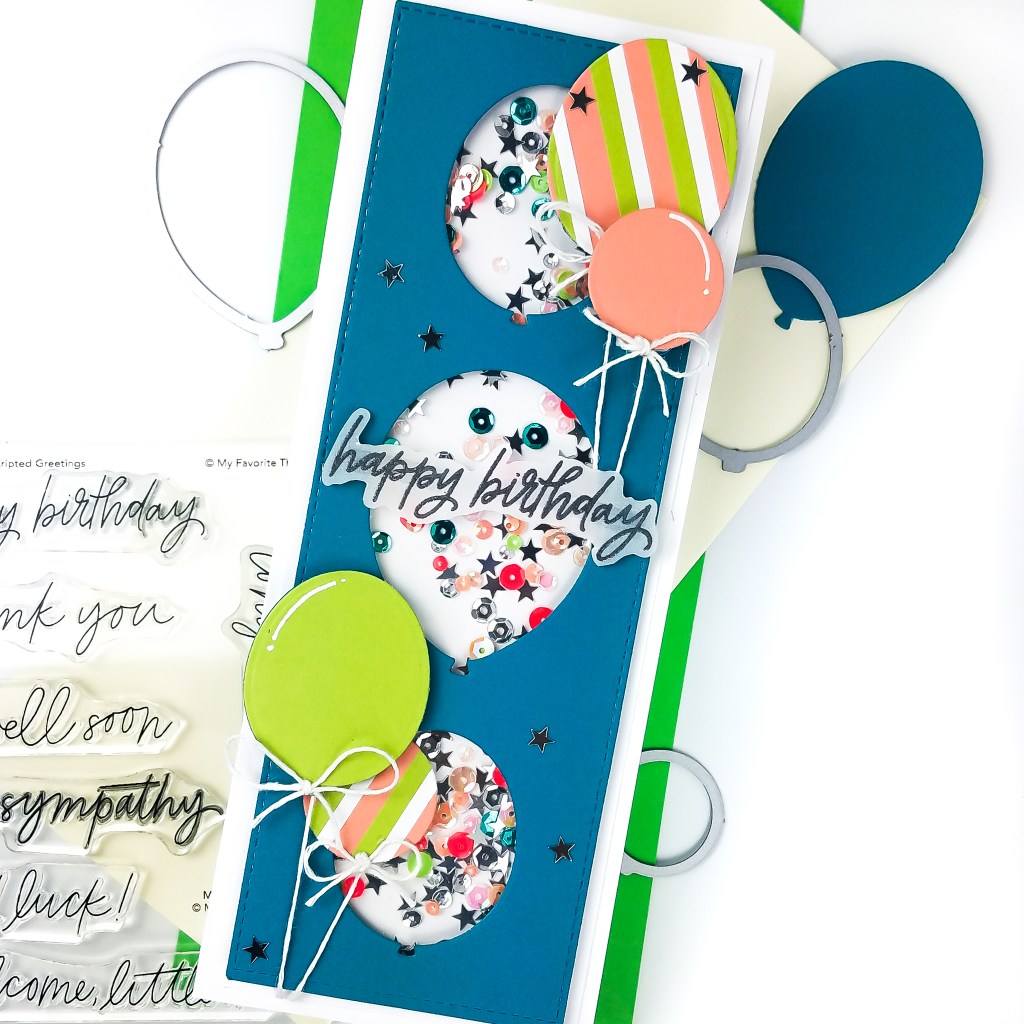
Now that that question is answered, let’s get to today’s post! I’m sharing inspiration for this week’s sketch challenge #589. Please head over to the MFT blog for all the details on eligibility and how to enter. MFT products are encouraged, but not required to enter. And you have a chance to win a $50 MFT gift card! The sketches are up to your interpretation and is a general guideline, not a hard and fast rule. In my card, you’ll see that I interpreted the three circles as three balloons instead for a fun birthday card.

STEP-BY-STEP INSTRUCTIONS
- From Tropical Teal cardstock, die cut a slimline panel with the Slimline Slide-In Die-namics. Before running through the die cut machine, line up two of the balloons from the Balloon STAX Die-namics. Use two different size balloons. After die cutting the first time, line up the smaller of the two balloons and die cut again to create three openings on the panel to mimic the sketch. The final die cut panel measures 2.75 x 7.75 inches.
- Add double-sided tape on the back of the panel and adhere a panel of acetate to create the shake window.
- Cover with foam tape and set aside while you complete the other card elements.
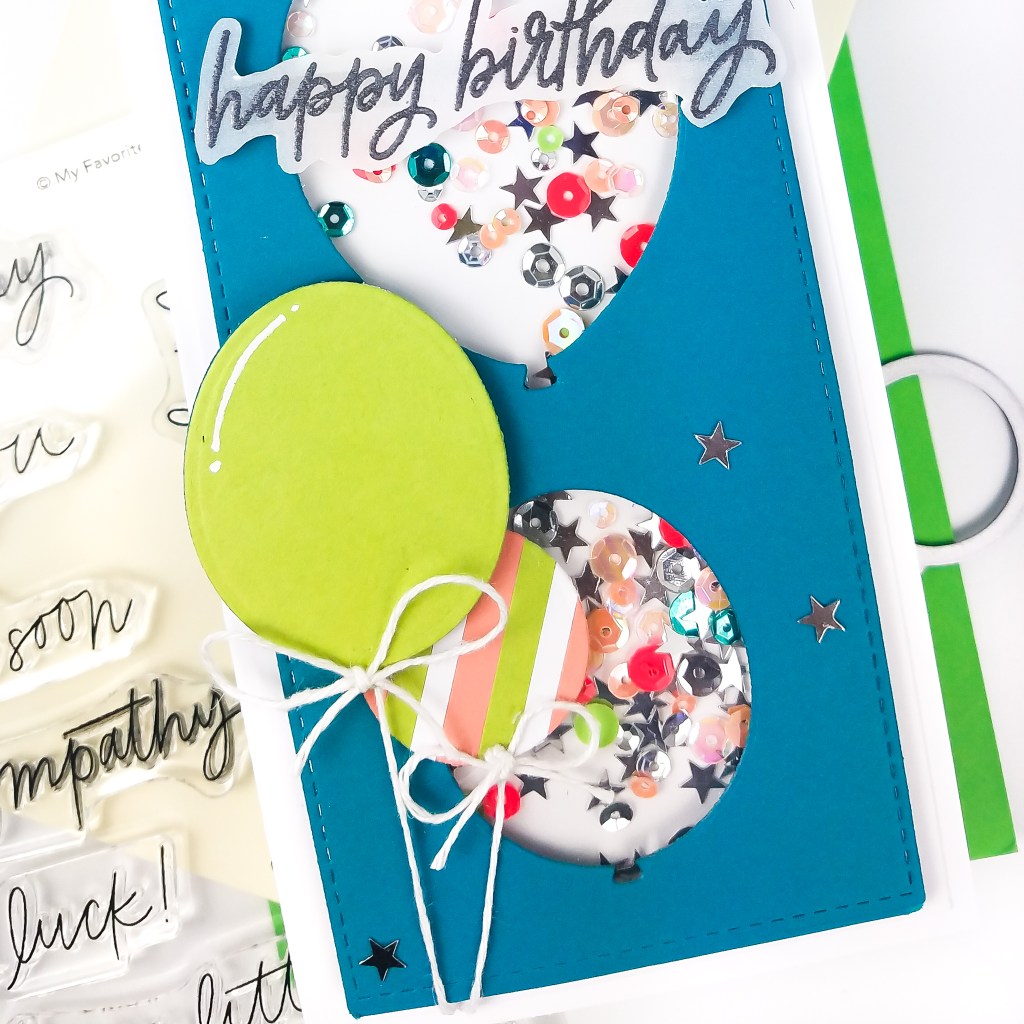
- Die cut several other balloons to adhere to the front from various sizes of balloons. I used peach and lime green to die cut balloons. I also trimmed thin strips of paper to create a striped panel and die cut a couple more balloons for variety.
- Secure white twine to the back of the balloons. Create bows from the twine and individually glue them on to each balloon.
- Adhere the balloons with foam tape and double-side tape for varied dimension to the card front.
- Trim a white cardstock panel to 3 x 8 inches for the back of the shaker.
- Remove the foam tape from the shaker front.
- For the bottom balloons, pull the strings taut and adhere the strings behind the panel, sticking the string to the foam adhesive.
- Add three piles of sequins and adhere the shaker front on top, closing the shaker.
- Stamp and silver heat emboss the sentiment from the All-Occasion Scripted Greetings stamp set on vellum. Fussy cut the sentiment out.
- Add clear foam adhesive behind the heat embossing on the sentiment. Pull the strings on the top balloons taut and adhere behind the sentiment. Trim any excess string. Adhere the sentiment.
- Embellish with some silver, star confetti.
- Add the completed shaker to a card base measuring 3.25 x 8.25 inches.

Hope you liked the card and are inspired to join in the fun! For even more ideas and inspiration, please visit the My Favorite Things YouTube channel.
Happy crafting,
Tiffany
I’d love to connect with you! Please follow me on IG and my blog, and reach out and say hi!
@ink.therapy.designs
