
(*Affiliate links used whenever possible at no extra cost to you.)
If you’re like me, you love layering stencils! The possibilities are endless and you can make beautiful designs quickly! Do you ever struggle lining up layered stencils? If so, I have some tips for you! There are so many different kinds of layering stencils so all of these tips may not be applicable to all of them. But I’m hopeful one or two of these tips will help you achieve perfect placement each time. For this post, I’ll share tips using two types of Altenew layering stencils as reference, the Meadow Bush stencil set and the Meadow Burst stencil set. More on the card I created with the Meadow Bush stencil later; first let’s dive into the tips!
- Ensure your stencils are oriented properly. Look for the etching in the stencil to ensure they are in the correct order and are right-side up. The Meadow Burst stencils have labels and numbers etched into the stencils near the top left; the Meadow Bush stencils did not. In this case, I recommend using a sharpie to label your stencils yourself.
- Your packaging is your North Star. When stenciling, make sure that you orient your stencils in the same position as you see on the packaging instruction and follow where the packaging indicates are key places to line up each stencil. Oftentimes, this is rather small on packaging, so consider buying a pair of magnifying readers from the store. I’m near sighted and wear glasses normally and I find value in the extra magnification readers can provide. If it helps my layers line up perfectly, there is no shame at all! 🙂
- Look at the size of your stencils. Are your stencil layers all the same size?
- If so, odds are that you can use your MISTI, the Waffle Flower Media Mat, or some other tool with a rigid corner to line up each layer before inking. Using the corner as a guide ensures your stencils are in the exact same spot each time.
- If you do not have or use a tool with corners, create your own placement guide. Use your stencils on a larger piece of paper and ink blend on all four corners so you know exactly where to place each layer.
- Make sure to review the product packaging before using this method. Sometimes layering stencils can be the same size, but still require some shifting in order to line up.
- Check to see if your stencils have placement guides built in. The Meadow Burst stencils have little holes that you are meant to line up for each layer. For stencils without a coordinating die, simply use some pencil to trace the circle so you know where to line them up, and erase once you’ve finished ink blending.
- Ensure your stencils are properly secured. Nothing can ruin a beautiful ink blend like a stencil that shifts, lol! I usually use Pixie Spray or my Make Art Station to secure my stencils. But you can use masking tape, a sticky mat, or even just your hands, depending on the intricacy of the stencil, as alternatives.
- Stencil on a larger panel than needed for your card. This tip is good for not only aligning layers, but also determining where on a card front you’d like your stenciled piece. If you stencil on a larger panel, you can move an A2 die like the Essentials by Ellen Essential Rectangle dies around the panel until you find the perfect place to die cut.
- Have fun and practice! Do a couple practice runs with your stencils before working on a final project. The more you use your layering stencils, the more comfortable you will be with placement. And even if the layers aren’t absolutely perfect, no worries! Many stencils are pretty forgiving. And always remember, your card is #handmadenothallmark, just have fun and experiment!
Now that I’ve given you some of my tips, let’s put them into practice with a new card design! Mother’s Day is around the corner so I wanted to make a card for the occasion, but this design could be used for any special person in your life. See a full product list below.

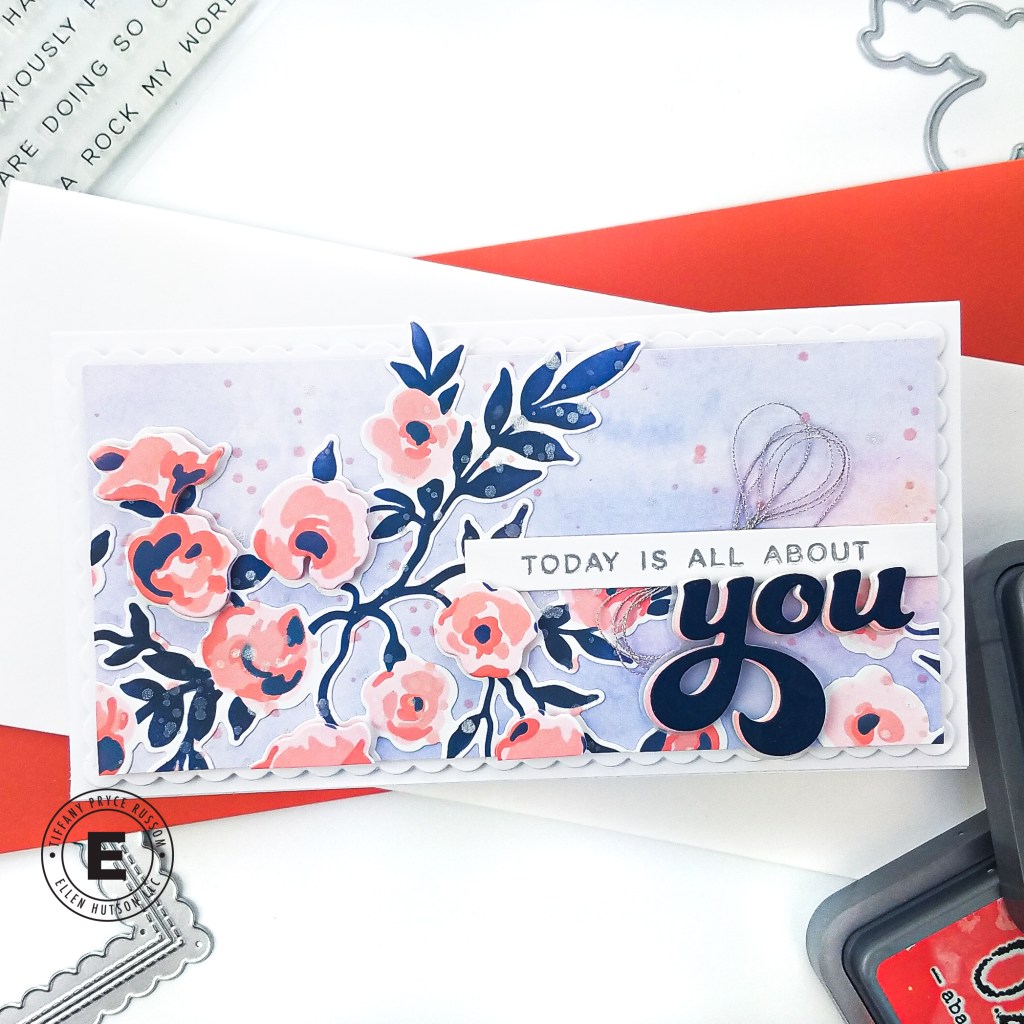
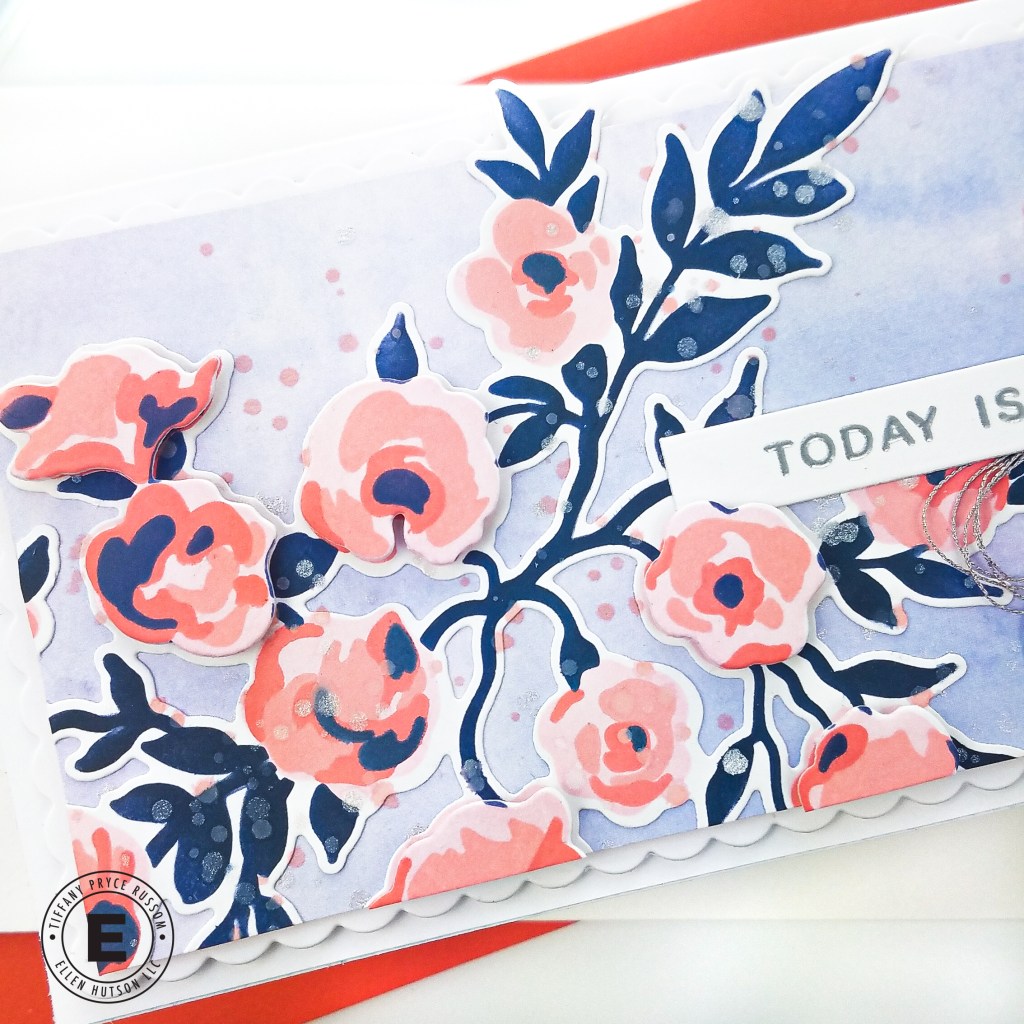
First, I chose my color palette. I knew I wanted to use a piece of patterned paper from the Altenew Gel Printing: Soft Washes paper pack, so I choose colors for the florals that coordinated. If you need help with color inspiration, check the packaging of the layering stencils to start, and branch out from there. It’s all about experimenting (tip 7) so don’t be afraid to combine unique colors. Be mindful of the type of ink you use. Dye ink is translucent so layering complementary colors may make mud. Because of this fact, I used distress oxide inks that are opaque when layered. I used spun sugar, saltwater taffy, abandoned coral, and chipped sapphire.

To order my stencils properly, I labeled them with a sharpie so I knew which was was right-side up (tip 1). This stencil was a little tricky to line up properly. I had to use the packaging (tip 2) and the alignment guide on the Altenew website to get perfect placement. Even with those tools, it was still a little tricky. Thankfully, these abstract flowers are forgiving so you won’t notice if it is not absolutely perfect.
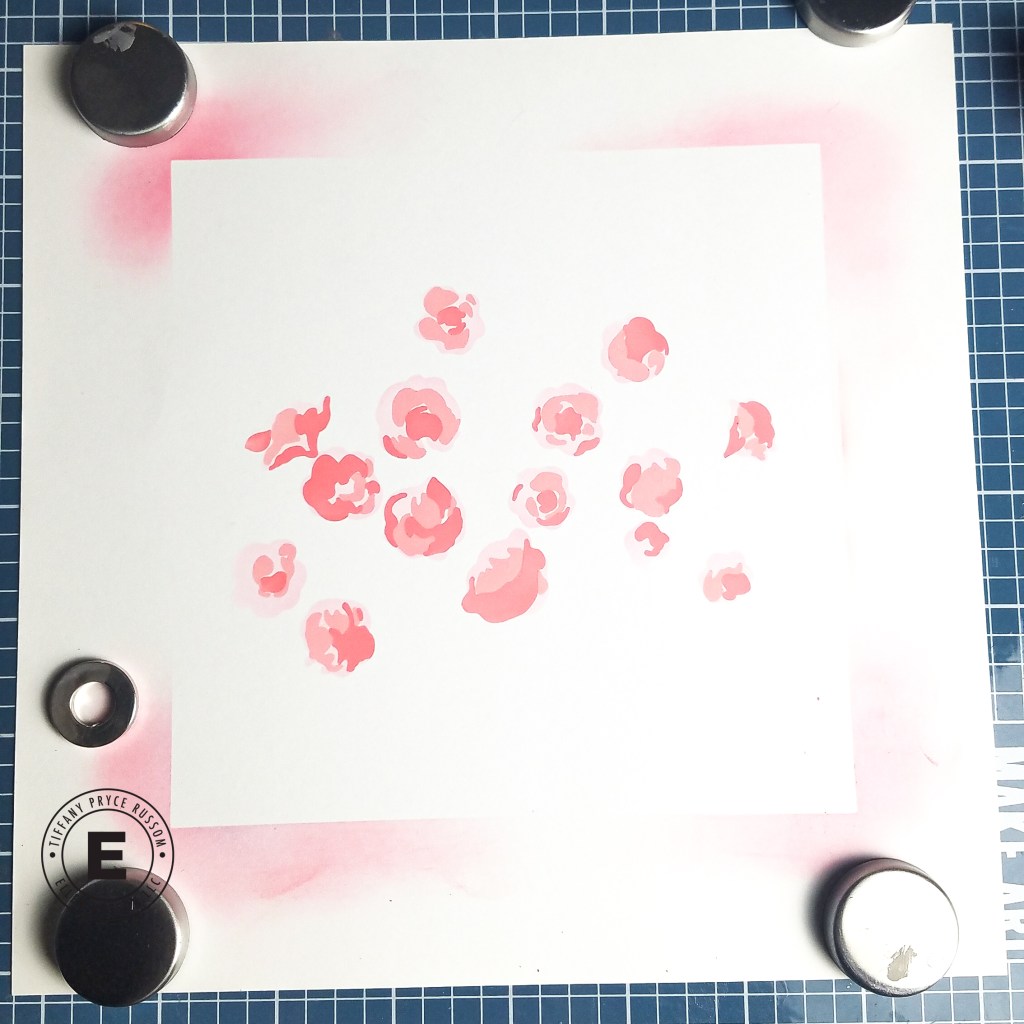
I stenciled the full image twice on a panel of white cardstock that was larger than I intended (tip 6). With one stenciled image, I die cut the whole thing with the leaves to use as a base on my final mini slimline card. On the other stenciled image, I only die cut the flowers to layer on top for added dimension. The background is a piece of patterned paper I trimmed to a little less than 3 x 6 inches. I popped up the floral panel on another panel of white cardstock that I die cut with the Pinkfresh Mini Slimline Stitched Scallop Rectangle. For added texture, I splattered diluted saltwater taffy ink and silver metallic watercolor. Once the panel was dry, I adhered to a card base measuring 6.25 x 3.25 inches.

For the sentiment, I die cut the EBE All About You die set several times from cardstock and die cutting foam. The top layer was die cut from navy blue cardstock and layered slightly offset on top of white cardstock that I ink blended with saltwater taffy. The shadow layer was die cut from vellum. For the sentiment strip, I stamped and silver heat embossed the All About You stamp set. I used the Nice Of You die to cut all of the sentiments out at once so I have several for future cards. I adhered the sentiment strip with liquid glue and metallic twine for a little extra shine. Head over to the Ellen Hutson IG or my IG to see a reel of this card too.

Thanks for stopping by the blog today! Do you have additional tips and tricks to lining up your layering stencils? Please leave a comment below or on Instagram. Have a great day!
Product list:


Happy crafting,
Tiffany
I’d love to connect with you! Please follow me on IG and my blog, and reach out and say hi!
@ink.therapy.designs
*Affiliate disclosure: I only use, review, and blog about products/companies I actually like and will continue to use. Some of the products shown on my blog use affiliate links. These affiliate links allow me to earn a small commission when products are purchased through those links. *This is at no cost to you!* Please do not feel obligated to use my affiliate links. If you choose to use these links, thank you so much! It helps support my blog and bring new content to you. Read the full disclosure on the about page.
