
(*Affiliate links used whenever possible at no extra cost to you.)

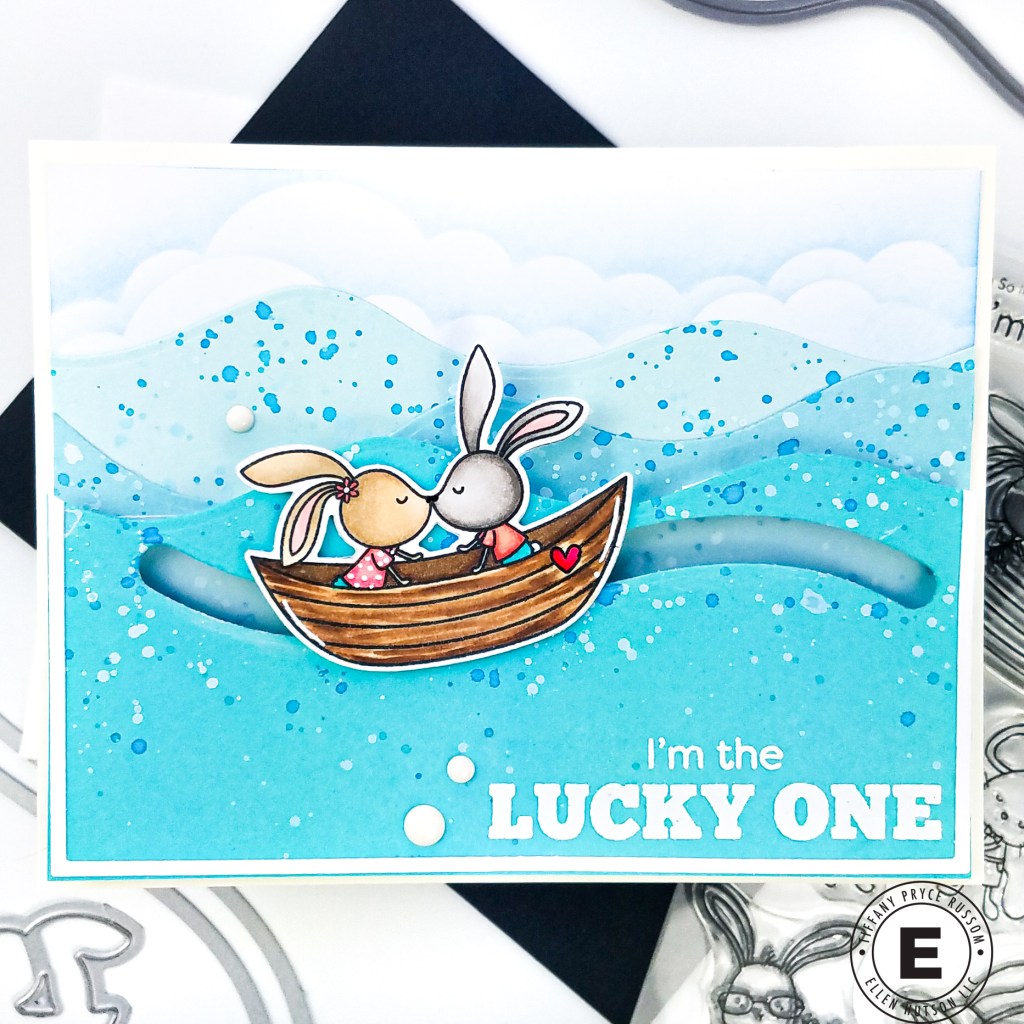
One of my crafty resolutions is to try new fun folds and make different interactive cards, and this card ticks the interactive box! I used a combo of Ellen Hutson products and MFT to create this sweet Valentine’s Day card. See the full product list below.
When I first got the MFT I’m So In Love With You, Still stamp set, I knew I wanted to try to make the boat image with the cute, snuggling bunnies look like it’s floating across my card on water. The Essentials by Ellen (EBE) Swing N Slide die set was perfect for this effect. Let’s dive in!
- Trim a panel of white cardstock to 5.25 x 4 inches. And with a light hand, ink blend mermaid lagoon distress oxide ink at the top with the MFT Rolling Clouds stencil.
- Adhere to an A2-sized card base.
- Select three different colors of blue cardstock from your stash and trim them down to 5.25 x 4 inches.
- Using the Landscapes die set, take the die that looks like rolling waves and die cut each panel fo blue cardstock. Vary the position of the die to vary the position of the “waves” and the length of the panel.
- On each panel, splatter white acrylic ink and a mermaid lagoon distress oxide ink mixed with water.
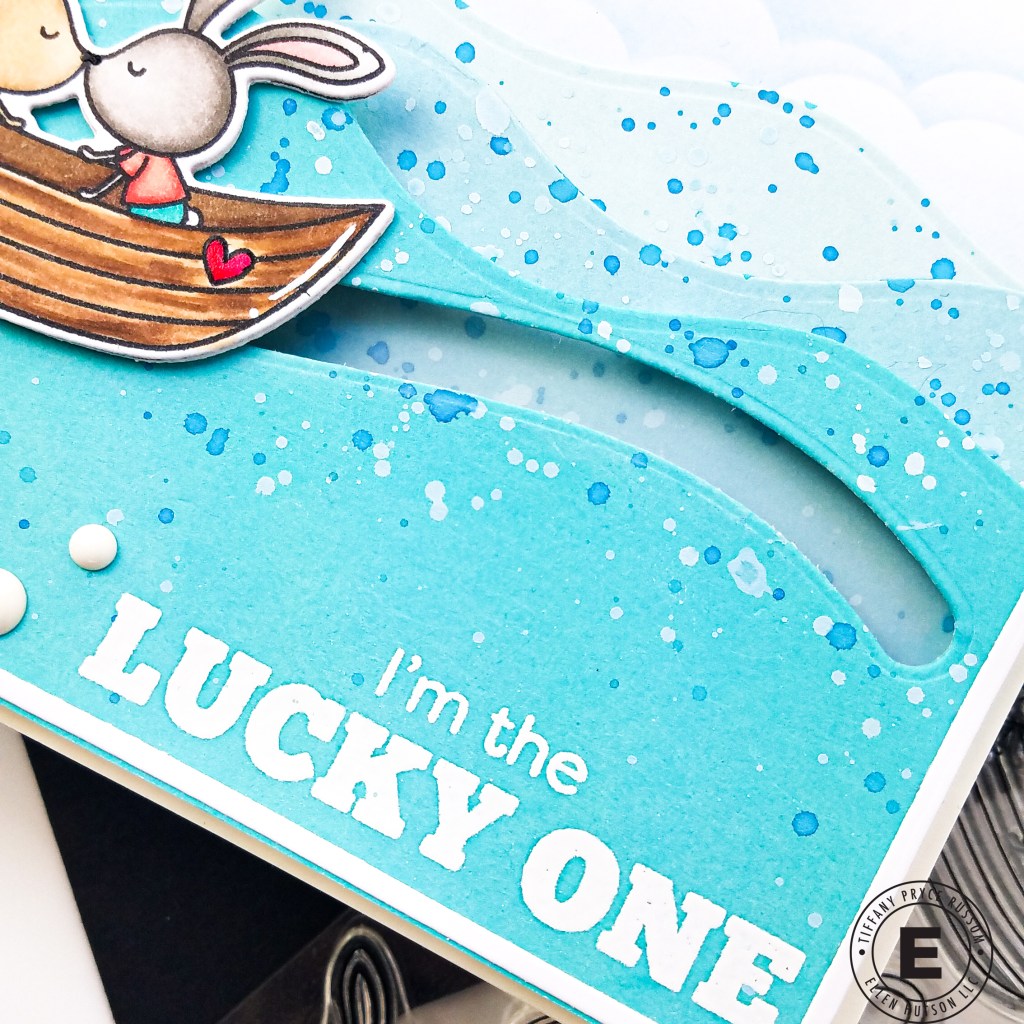
- On the lowest panel of waves, die cut a slider opening with the Swing N Slide die set.
- Stamp and white heat emboss a sentiment from the MFT Straight from the Heart at the bottom.
- Adhere the first two panels of waves directly to the background. And add two layers of foam tape to the lowest panel of waves, making sure to leave clearance around the slider opening.
- Stamp and copic color the image from the I’m So in Love With You, Still stamp set. Die cut the image with the coordinating die. I die cut an extra layer for stability.
- For the slider mechanism, first die cut two half inch circles. I used the Hero Arts Infinity Circles die. Between the two circles, glue one MFT Slider Elements replenishment piece. Pro tip: dust with an anti-static powder tool to unstick any exposed adhesive and make sure it is dry before moving to the next step.
- Glue the stamped and colored image on top of one circle and insert the piece into the slider opening on the card. One circle is behind the opening and one in front. Move the image back and forth to test the mechanism.
- Adhere a piece of vellum behind the slider opening just to soften the look. You could skip this step if you choose.
- Adhere the lowest panel of waves with the completed image and slider mechanism to the card front.
- Add white enamel dots for embellishment.


Product List:


Hope you liked the card and are inspired to try an interactive card with the Swing N Slide EBE die set. Thanks for stopping by!
Happy crafting,
Tiffany
I’d love to connect with you! Please follow me on IG and my blog, and reach out and say hi!
@ink.therapy.designs
*Affiliate disclosure: I only use, review, and blog about products/companies I actually like and will continue to use. Some of the products shown on my blog use affiliate links. These affiliate links allow me to earn a small commission when products are purchased through those links. *This is at no cost to you!* Please do not feel obligated to use my affiliate links. If you choose to use these links, thank you so much! It helps support my blog and bring new content to you. Read the full disclosure on the about page.
