Project Overview
- Technique(s): copic coloring, die cutting, paper strips
- Product list:
It’s release day! Head over to the MFT shop to add your favorites to your cart! It is truly a great release with so many very cute products. If I had to pick a few favorites, it would be this one that I used on this card, Abracadabra (that I showcased yesterday), or Playtime Pals. I also love the new alpha set to make custom sentiments (Hip Hip Yay) and Barnyard Birthday, ha! It is hard to choose a single favorite.
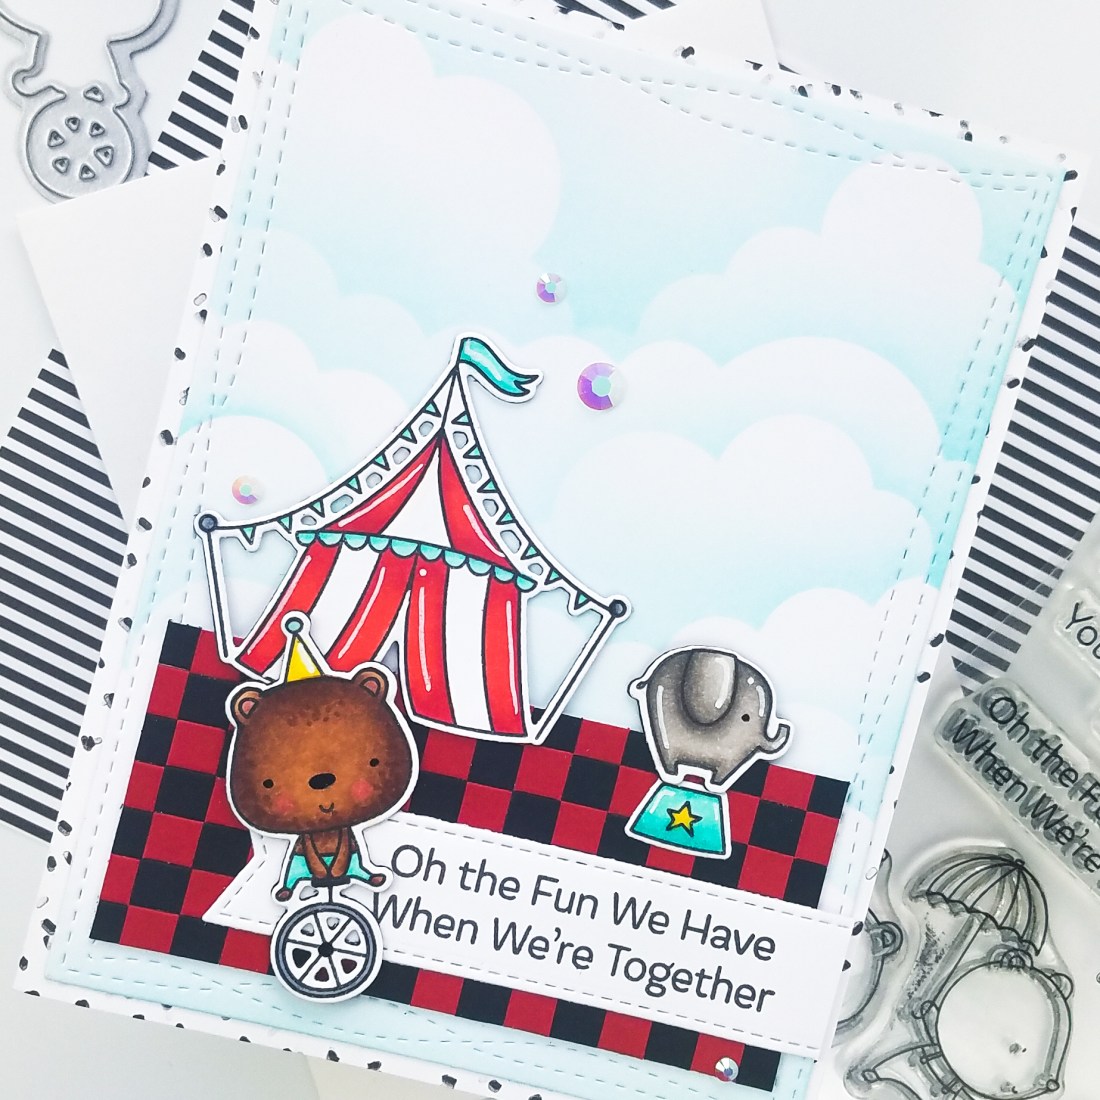
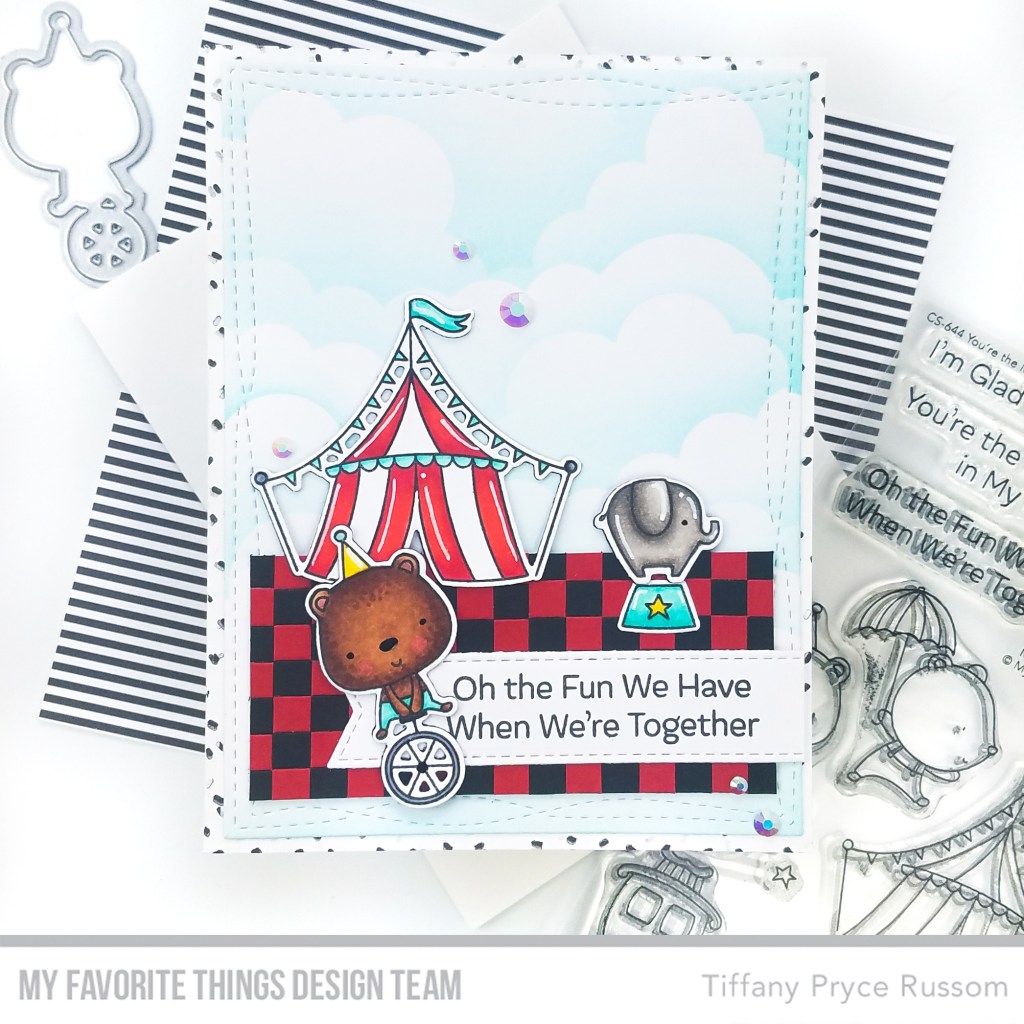
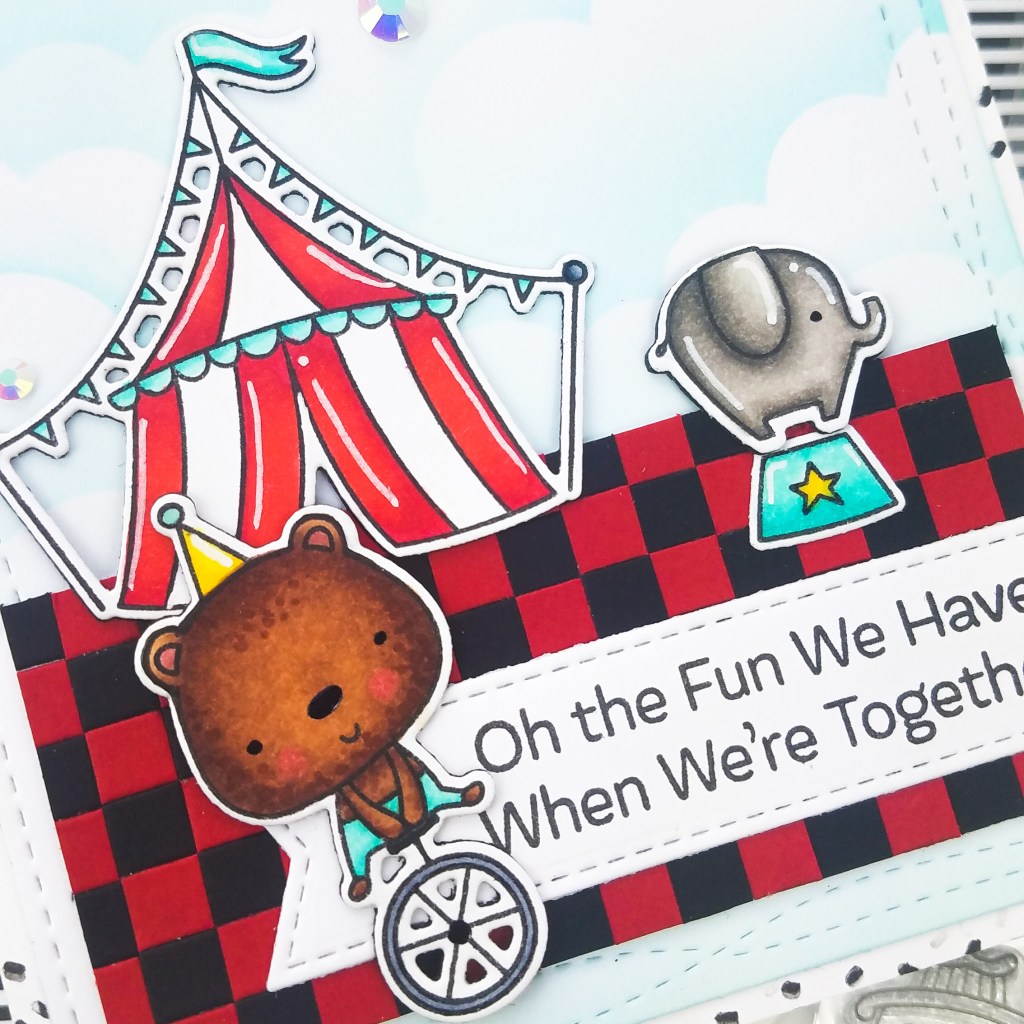
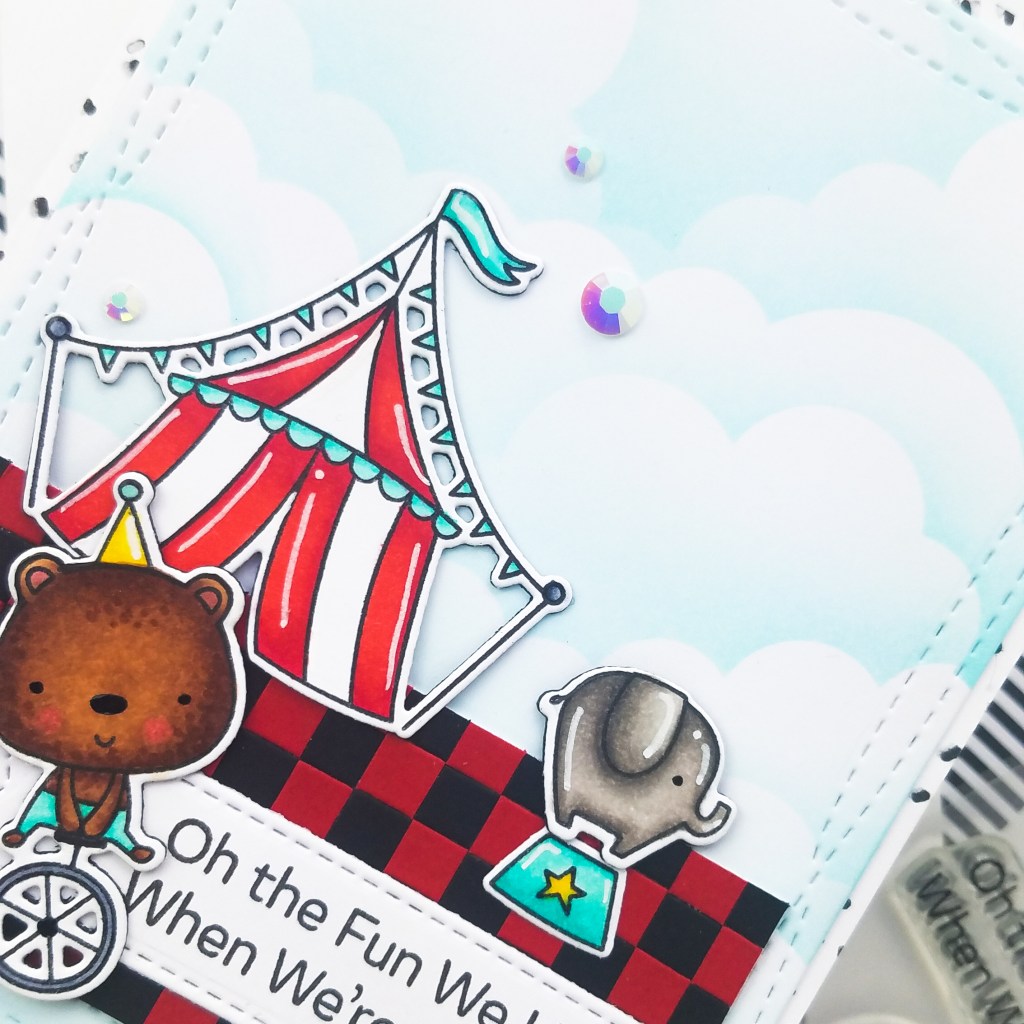
For this card, I decided to create a checkerboard background using paper strips. To me, a checkerboard pattern and the circus pair well together. You could do this technique with different colors and get different looks – the possibilities are only limited to your imagination. And it is way easier than it may seem.

- Create the red and black checkerboard panel. Cut each cardstock color into 0.25 inch strips with a trimmer or a die (if you have it). Glue these strips to a piece of copy paper alternating colors. Trim any excess paper. Next, with the stripes laying horizontally on your trimmer, cut the striped panel into 0.25 inch strips. This will leave you with strips made of tiny squares of each color of your cardstock. Next, glue these new strips to another piece of copy paper making sure to offset the colors to get that checkered look. Trim to your desired size. For a large panel, make sure you are covering at least a full A2 panel with the paper strips from the start. This technique is a great way to whittle your scrap collection down.
- Stamp and copic color the images. Die cut with the coordinating die-namics. Use the dies to cut additional layers for dimension.
- On a background panel die cut with the Wonky Stitched Rectangle, ink blend salvaged patina distress ink with the Rolling Clouds stencil.
- Adhere the checkerboard panel.
- Stamp, die cut, and adhere the sentiment.
- Adhere the die cut images and embellish with jewels.
- To the card base, stamp the Cue the Confetti stamp once in MFT Extreme black ink, and then rotate the panel and do a second generation stamping.
- Adhere the completed card front to the card base.
Hope you’re inspired to try this paper strips technique. Thanks for reading! For even more ideas and inspiration, please visit the My Favorite Things YouTube channel.
Happy crafting,
Tiffany
I’d love to connect with you! Please follow me on IG and my blog, and reach out and say hi!
@ink.therapy.designs

The card is so sweet and that floor looks amazing! I also love the design of your blog! Hugs Laura
LikeLike
You are so sweet, Laura! So happy to be on the MFT team with you!
LikeLike