(*Affiliate links used whenever possible at no extra cost to you.)

Hey crafty friends! The new Reverse Confetti release is live and the design team and friends are sharing a bunch of amazing inspiration to get your creative juices flowing! This release is another great one with perfect products for spring, Easter, and Mother’s Day. Please be sure to check out the full hop list at the end of this post. I was inspired to make 2 cards featuring different products. Both are pretty clean and simple to put together.
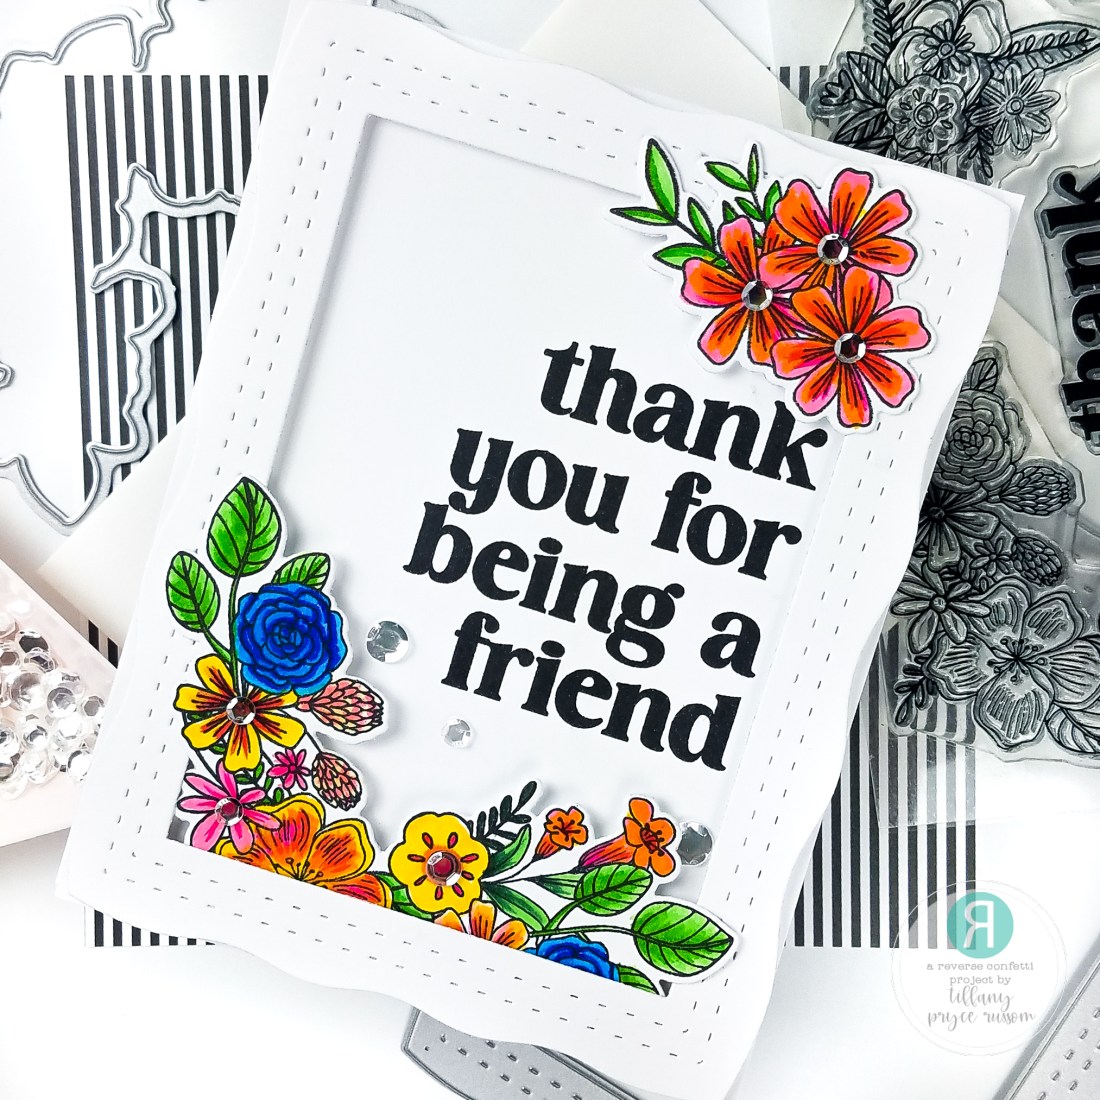
Card 1: Thank you for being a friend

- Stamp the Friendly Florals stamp set in waterproof ink. Once the ink is dry, color the florals with zig clean clear brush markers. Since I did not use watercolor paper, I was careful not to add too much color so the paper would not pill. I also was not too picky about blending. I love the bright colors of the zigs markers. Die cut with the coordinating Confetti Cuts.
- Die cut a frame from the Layered Mom w/ Frame die set out of white cardstock, and add foam tape for dimension.
- On an A2 panel, stamp the sentiment towards the right side.
- Adhere the frame and the florals tucked in the corners, using foam tape in certain places for even dimension.
- Embellish with sparkling sequins and adhere to an A2 card base.


Product list:


Card 2: Mom, Hello Beautiful

- With an A2-sized piece of white cardstock, die cut using the Diagonal Stitches Cover Panel. Adhere the panel to an A2 card base.
- Ink blend Catherine Pooler Samba ink on the corner and fade it out to white. Splatter some clean water on the ink blending for some additional texture.
- Stamp and die cut several flowers and leaves from the Sending Smiles stamp set with Catherine Pooler Samba, Minted, and Lemongrass inks. Stamp the details in a darker ink. Die cut with the coordinating confetti cuts.
- Arrange the flowers and adhere with liquid glue and foam tape.
- Die cut the sentiment 3 times from white cardstock and the shadow layer from vellum.
- On the top two layers of the die cut sentiment, lightly ink blend lemongrass ink and the minted ink each on one layer. Glue the layers together and adhere to the card front.
- Stamp the sub-sentiment from Sentimentally Yours and trim the strip into a banner. Stamp an interior sentiment from the Script Sentiments set.
- Embellish with a few sparkling sequins.


Product list:
– Sentimentally Yours
– Scripty Sentiments
– Diagonal Stitches Cover Plate


Hope you enjoyed my cards! Please continue on the blog hop with the listing below. I’m sure the rest of the designers have something amazing to share with you.
Full hop list:
Tiffany Pryce Russom (*you’re here*)
Happy crafting,
Tiffany
I’d love to connect with you! Please follow me on IG and my blog, and reach out and say hi!
@ink.therapy.designs
*Affiliate disclosure: I only use, review, and blog about products/companies I actually like and will continue to use. Some of the products shown on my blog use affiliate links. These affiliate links allow me to earn a small commission when products are purchased through those links. *This is at no cost to you!* Please do not feel obligated to use my affiliate links. If you choose to use these links, thank you so much! It helps support my blog and bring new content to you. Read the full disclosure on the about page.

Beautiful cards! Love the nice and bright colors!
LikeLike
Thanks very much!
LikeLike
these are beautiful Tiffany!
LikeLike
Thanks so much, Amy!
LikeLike