
(*Affiliate links used whenever possible at no extra cost to you.)
Hi SCT friends! I’m Tiffany, @ink.therapy.designs, and I am SO excited to be a guest on the SCT blog today!! I know it is only early March, but I wanted to get a jump start on Mother’s Day and make my mom’s card. I had some products from The Stamp Market in my stash that I hadn’t used yet so this was the perfect occasion. I am definitely guilty of purchasing more than I make. Please tell me in the comments that I am not alone, ha! With Mother’s Day on my mind, I have two cards for inspiration. The first is for my amazing mom, and the second came later. My friend requested a sympathy card for a childhood friend who recently lost his mother. Both cards use the same color palette and roughly the same products. I love finding ways to stretch my supplies so I hope you pick up some tips to do that along the way.
Product list:
The Stamp Market – Book Die, True Story Stamp Set, True Story Dies, Mom Layering Die, Cardstock: Wisteria, Lilac, Island, Jade, Diamond Glitter
Card 1: One of a Kind

I started by assembling The Stamp Market Book Die from Lilac, Wisteria, and white cardstock. It is easy to put together, and there is a YouTube video on the assembly on The Stamp Market’s channel. This die is so versatile! Imagine adding any of your floral or pattern stamps to create designs for anyone and for any occasion! Books are universal and gender neutral. My mom’s favorite color is lilac so I wanted to do a tone on tone look with lilac being the dominant color. I chose tones of teal as accent colors.
From the True Story stamp set, I white heat embossed the sub-sentiments and the detail on the book spine. On the book cover, I stamped one of the vine stamps twice in embossing ink. It’s a great way to get subtle detail without distracting from the focal point. For the top sentiment, I masked off a portion of the stamp so I would only get ‘you’re’. This is a good tip to ensure your stamps are working for you. Snip your clear stamps apart or mask certain sections to get more from your stamps.

Next, I die cut the Mom Layering Die several times from various colors of cardstock and Diamond Glitter cardstock. I adhered the layers together with liquid glue offsetting each layer slightly. I adhered the sentiment with foam tape for dimension. I also die cut several flowers from the Book Die set from white cardstock and the detail layer from Diamond Glitter cardstock. I embellished the flowers and the front of the book with clear jewels.

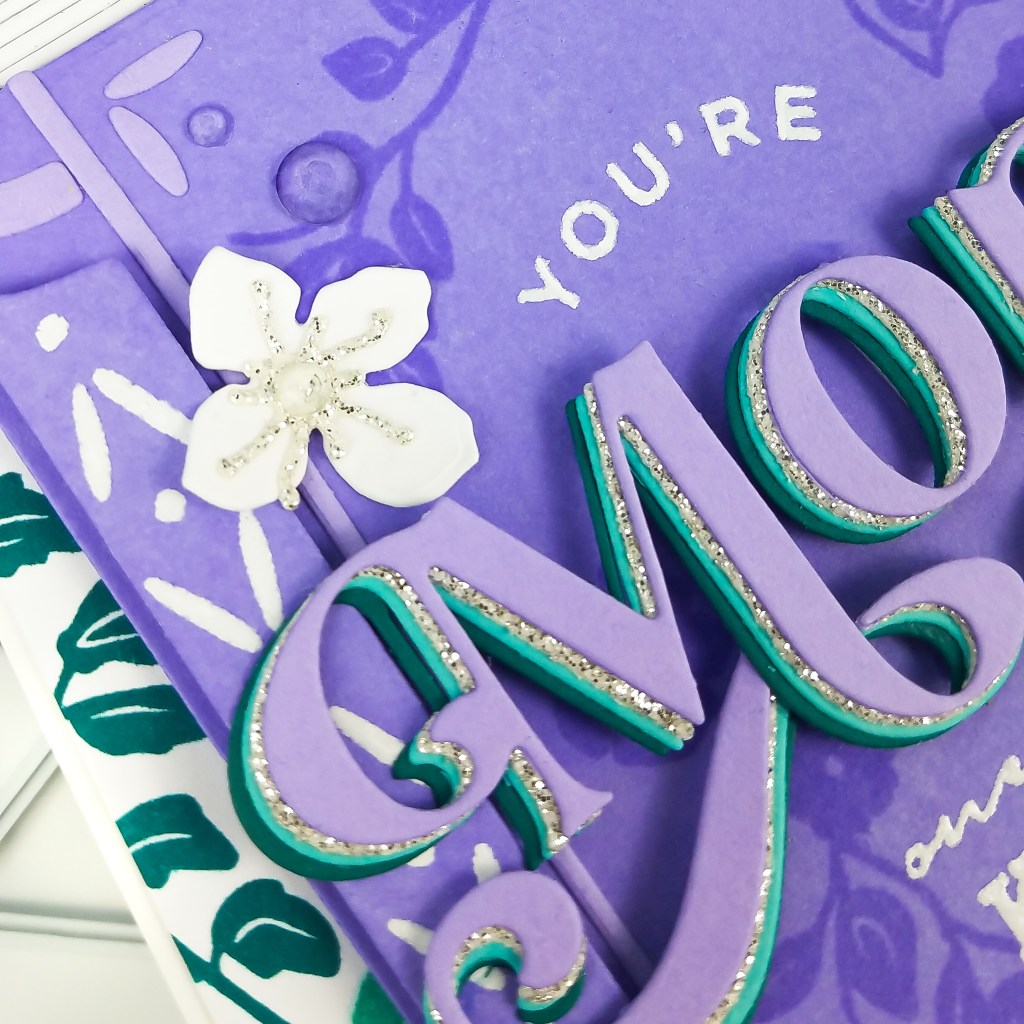
To finish the card, I made a background by repeatedly stamping a tall vine image from True Story in various tones of teal dye ink. I love how the background picks up the colors in the sentiment and ties the color story together. To finish, I adhered everything together on a top-folding, A2 card base.

Card 2: On My Mind and Heart

This card was inspired by one of the SCT Winter 2021 sketches – Vertical 3. I love card layouts because if I am ever stuck or need a jumping off point, I find a sketch I like and work from that. Composition is half the battle, so with a card sketch you aren’t starting from scratch.
I started by using one of the dies in the Book Die set to create a window in an A2 panel of white cardstock. On another piece of cardstock, I used the book spine detail stamp from True Story to create a pattern. Using my MISTI, I repeatedly stamped in rows and silver heat embossed. Look through your stamp sets and see if any stamps can be turned into patterns with repeat stamping. It’s another great way to stretch your stamps. I adhered the completed pattern behind the window opening.
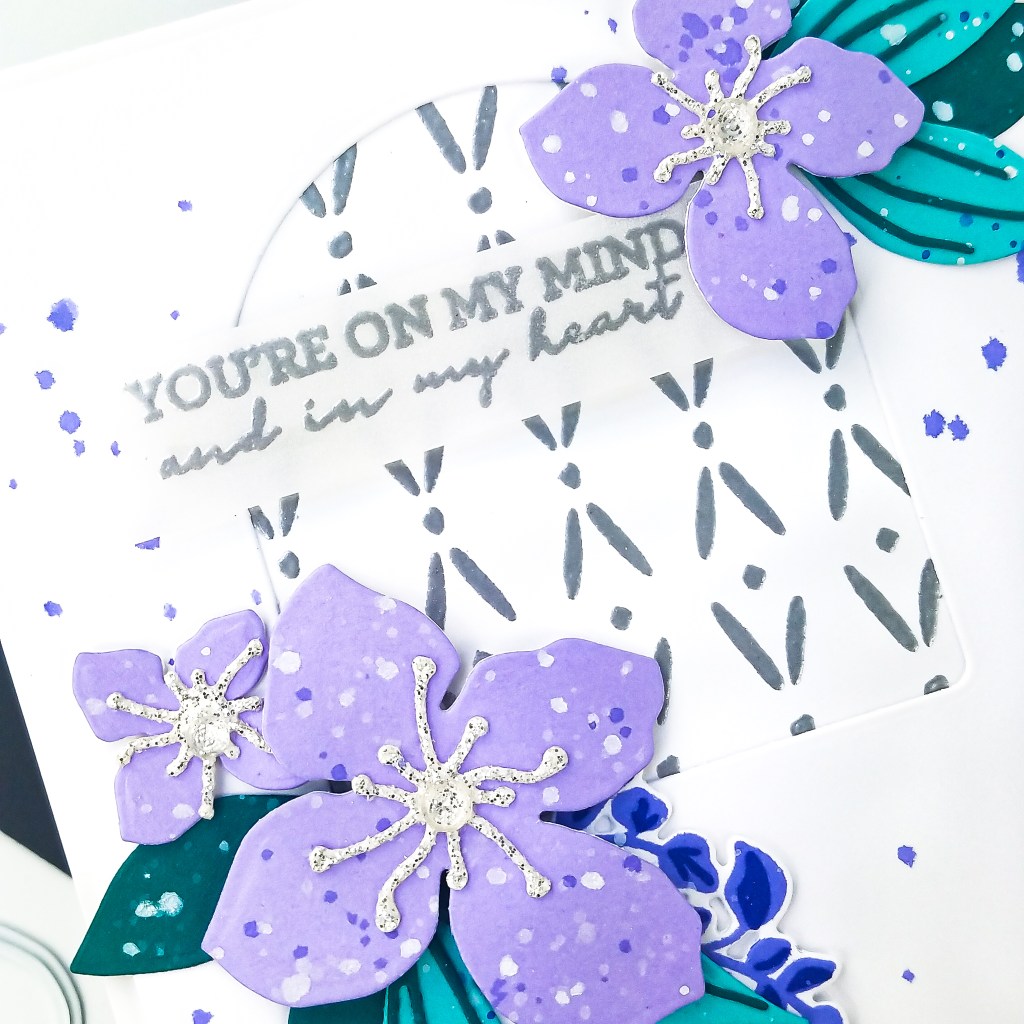
Next, I die cut the flowers and leaves from the Book Die set in the same cardstock colors as the first card. I arranged the flowers around the window opening similar to the sketch. To add a little filler, I stamped one of the vines from Love Story in two tones of purple and die cut with the coordinating die. I snipped the resulting die cut apart for more flexibility in placement.

I silver heat embossed the sentiment on vellum and trimmed it into a banner with scissors. I adhered the sentiment with clear foam tape hidden behind the heat embossing. On camera and in person, you can’t see the foam tape. I think it’s a fabulous option if you ever have trouble adhering vellum or want that extra dimension. Finally, I embellished the card front with clear jewels and splatters of matching, diluted dye ink. I adhered the completed card front to an A2 card base.

Tips recap:
1. Make your stamps work for you – Snip your clear stamps apart or mask certain sections to get more from your stamps.
2. Stamp in embossing ink for subtle detail on colored cardstock.
3. Look to see if any stamps can be turned into patterns with repeat stamping.
4. Cut your stamped die cut images apart for more versatility
5. Add clear foam tape behind heat embossed stamping on vellum for no show dimension
I hope you enjoyed the cards and learned a couple tips on stretching your supplies. I loved that I could get two completely different cards with the same set of supplies. I encourage you to pull out a stamp set, some dies, and cardstock and see how creative you can get with a limited supply list. Thank you for reading and have a wonderful day!
Happy crafting,
Tiffany
I’d love to connect with you! Please follow me on IG and my blog, and reach out and say hi!
@ink.therapy.designs
*Affiliate disclosure: I only use, review, and blog about products/companies I actually like and will continue to use. Some of the products shown on my blog use affiliate links. These affiliate links allow me to earn a small commission when products are purchased through those links. *This is at no cost to you!* Please do not feel obligated to use my affiliate links. If you choose to use these links, thank you so much! It helps support my blog and bring new content to you. Read the full disclosure on the about page.

These are gorgeous, Tiffany!
LikeLiked by 1 person
Thanks so very much!! 🙂
LikeLike