
Hey friends! It’s time for a new MFT card kit release!

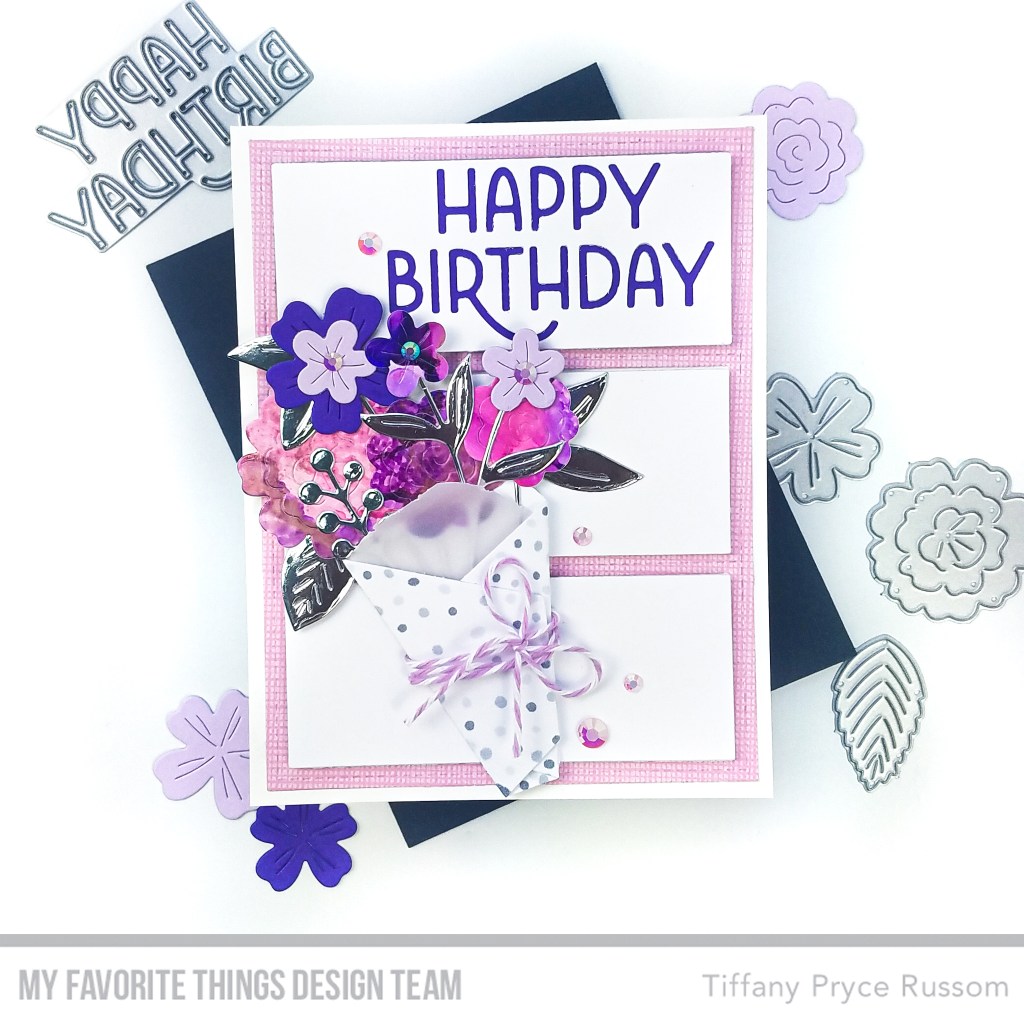
Today is Countdown Day 1, and I’m sharing a card made entirely of die cuts. This month’s kit is called Stylish Bouquet, and it is another fabulous kit with products of great versatility. A beautiful bouquet of flowers is appropriate for so many occasions! This CAS card was fairly easy to put together and I have a lot of leftovers for other cards using these same colors. I love the look of the fun florals with alcohol ink.
Product links:
Stylish Happy Birthday Die-namics
Flower Bouquet Die-namics
Bouquet Wrap Die-namics
Colorful Canvas Paper Pad
Tri-Frame Cover Up Die-namics
STEP-BY-STEP INSTRUCTIONS
- From a purple and pink alcohol ink panel in my stash, I die cut several flowers. I also die cut flowers from MFT Boysenberry and Grapesicle cardstock.
- I die cut several leaves and stems from silver foil cardstock, and I assembled the flowers.
- From white cardstock, I die cut the Bouquet Wrap and adhered a piece of vellum inside. To decorate the outside, I used C5, C3, and C1 copic markers to draw a polka dot pattern.
- I arranged the flowers and glued them inside of the wrap. Finally, I wrapped twine around the bouquet and added jewels to the flower centers.
- For the background, I die cut the frame using the Tri-Frame Cover Up Die-namics from patterned paper from the Colorful Canvas paper pad and white cardstock. I popped up the white, negative, die cut pieces with foam tape and adhered to the card front.
- Before adhering the top panel with foam tape, I die cut Stylist Happy Birthday from it and backed it with Boysenberry cardstock for my sentiment.
- After all of the panels were in place, I glued the bouquet onto the card front and finished with a few more pink jewels.


Thanks for stopping by! For even more ideas and inspiration, please visit the My Favorite Things YouTube channel.
Happy crafting,
Tiffany
I’d love to connect with you! Please follow me on IG and my blog, and reach out and say hi!
@ink.therapy.designs

Beautiful bouquet of flowers! Love how you use the velum also for added “touch!”
LikeLike
Thanks so much! I really appreciate your kind comment and that you stopped by my blog!! 🙂 It is such a fun kit.
LikeLike