

Welcome to day 4! Today, I made some sweet holiday tags using the Surprise Stitched Tag Die-namics. There are multiple ways to use this die set which makes it very versatile and a good supply for your stash. I’m showing you three versions in my inspiration below.


STEP-BY-STEP INSTRUCTIONS
- Snowman shaker tag:
- Create a shaker frame from red cardstock using the largest and middle size tag in the set. Create the backer from the largest die in the set.
- Adhere a layer of acetate with double-sided scor tape.
- Die cut and assemble the snowman from the Snow Buddy Die-namics. Adhere on top.
- Inside the shaker, add a layer of patterned paper from the Colorful Christmas paper pad. On top, add shaker bits – glitter, silver sequins, and snowflakes from my stash. Close the shaker tag up.
- Stamp and white heat emboss a sentiment from Cool Christmas Greetings. Die cut with a banner die and layer with a piece of plaid pattern paper.
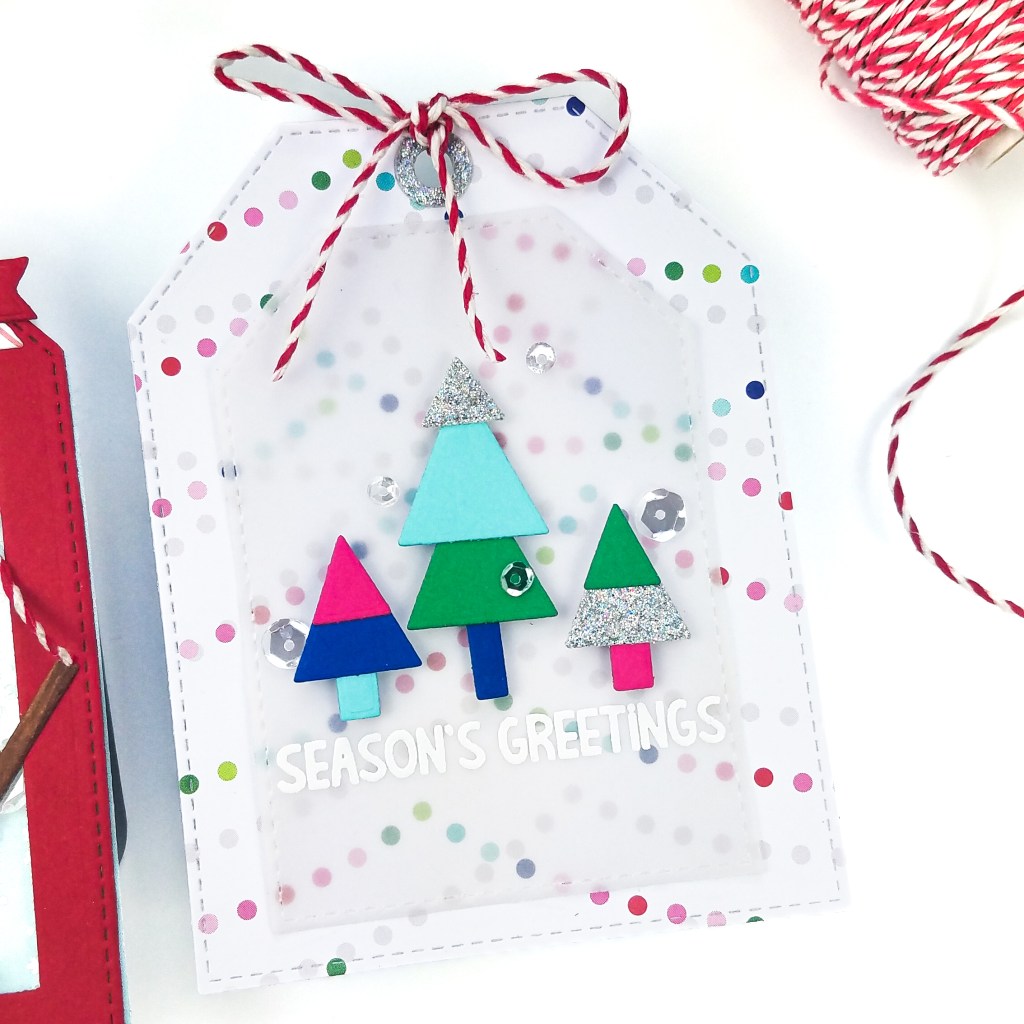
- Christmas Tree tag:
- Die cut a piece of patterned paper from the Colorful Christmas paper pad. Adhere to another layer of scrap cardstock for additional sturdiness.
- Die cut the middle layer from vellum.
- Die cut the trees from various cardstock. Assemble the trees on top of the vellum layer.
- Hide glue behind the trees to adhere the vellum to the tag.
- White heat emboss a sentiment from Cool Christmas Greetings underneath the trees and embellish with sparkling sequins.
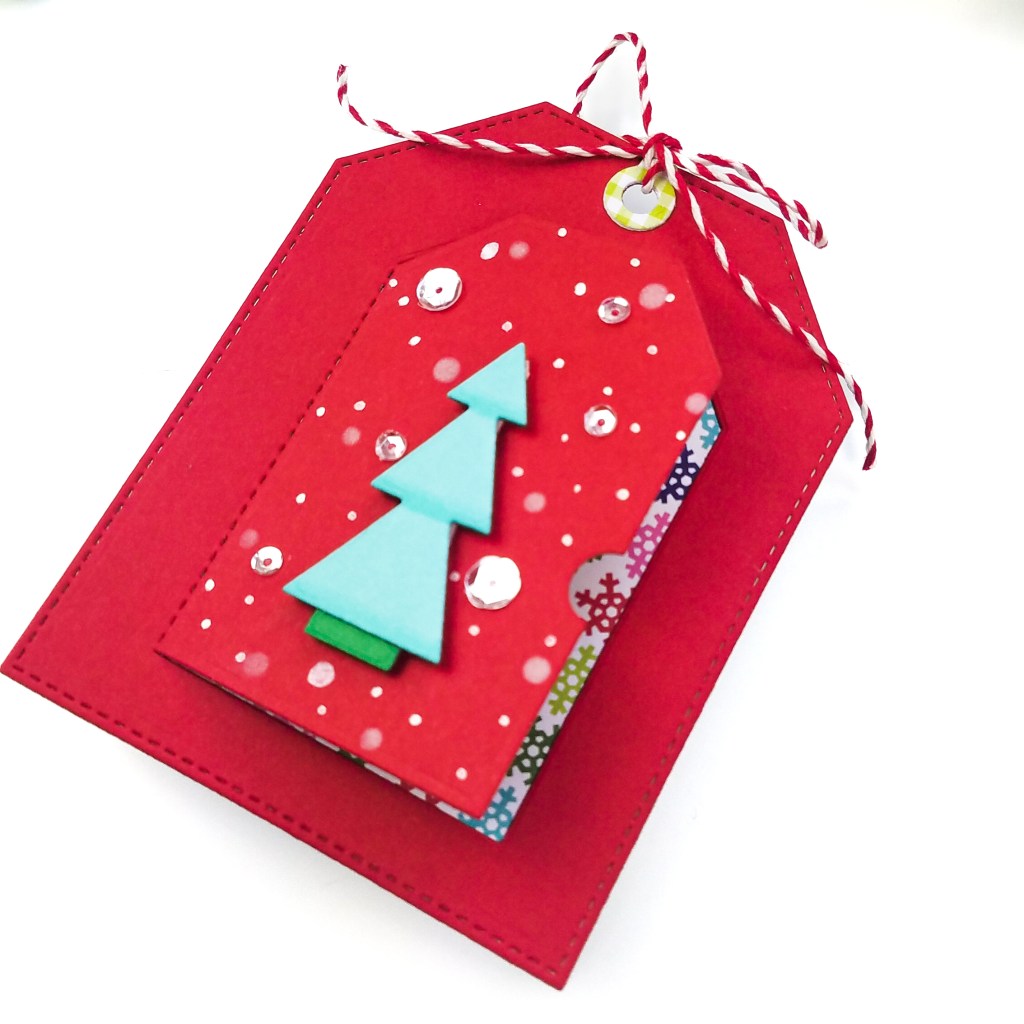
- Tree tag:
- Die cut red cardstock with the largest tag die and the smallest die. The smallest die doesn’t cut all the way through, but creates a little door where you can hide a sentiment or critter inside of your tag.
- Back the tag with another piece of patterned paper from the Colorful Christmas paper pad.
- On top, adhere a tree and add some dimension with copic markers.
- Embellish with a white paint pen for snow and sequins.

Isn’t that surprise tag fun?! Thanks for reading! Stop by tomorrow for day 3. See more inspiration on the MFT YouTube channel.
Happy crafting,
Tiffany
I’d love to connect with you! Please follow me on IG and my blog, and reach out and say hi!
@ink.therapy.designs
