
(*Affiliate links used whenever possible at no extra cost to you.)
Happy November crafty friends! It’s my favorite month for so many reasons – like my birthday is in a little over a week 🙂 – and it’s time for new Spellbinders kits. This month’s kits are so fun and coordinate beautifully.
The Spellbinders Club is a subscription program, and there are 7 Clubs to choose from, including several value options which combines clubs for a discount. By popular request, there is a new club where you get the Clear Stamp of the Month with the coordinating dies. The Total Package Club includes ALL 7 Clubs and has the best value. But feel free to try one or two out to get a feel for the products. There is no minimum commitment, you can join and cancel at any time. Club members also get a perk of an additional 10% off all Spellbinders products.
November Glimmer of the Month


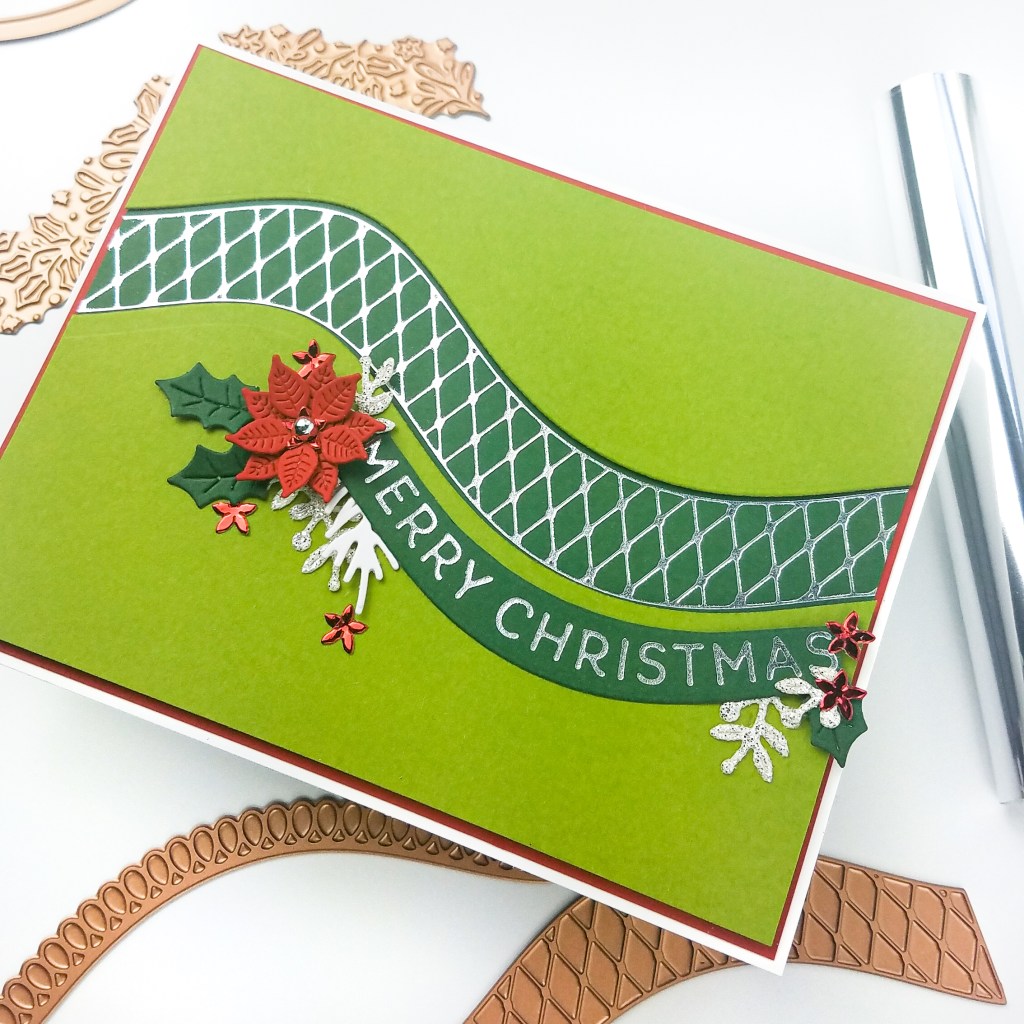
This month’s GOM kit is perfect for holiday cards or all year round. It comes with three border foil plates in different patterns, two coordinating border dies, and two foil sentiment plates – “Merry Christmas” and “A Gift For You”. I decided to make two CAS samples with the GOM. Both samples use the color inspiration from this week’s CAS Colours & Sketches challenge.

STEP BY STEP INSTRUCTIONS:
- Foil the diamond foil plate in silver glimmer foil on dark green cardstock.
- Die cut a panel of olive green cardstock with the curved border die. Trim the olive green pieces down to fit an A2 panel.
- Adhere the pieces together on a piece of red cardstock and pop up the bottom panel with foam tape.
- Foil the sentiment on dark green cardstock in silver glimmer foil. Adhere it to the card front.
- Die cut several flowers and leaves from the Christmas Blooms die set.
- Adhere the flowers and leaves around the panel and add a silver jewel to the flower center.


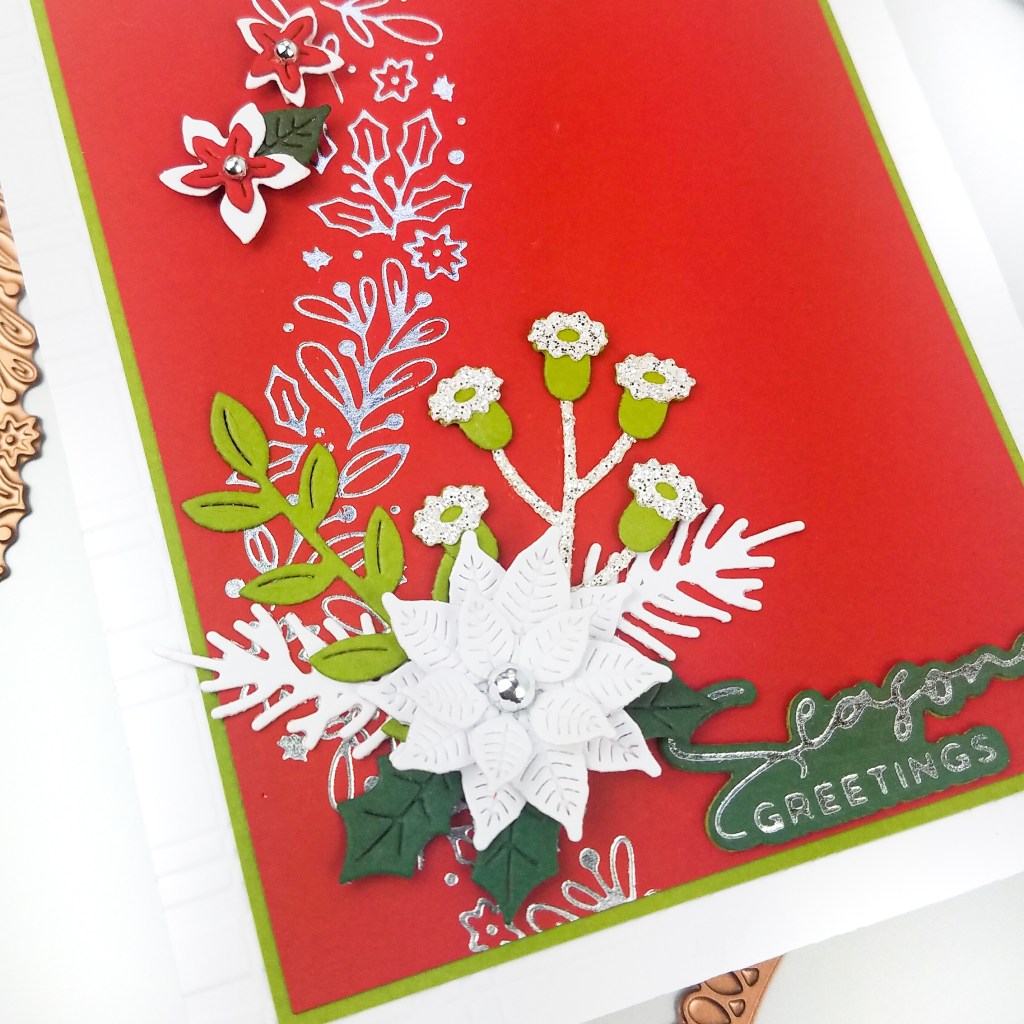
For my next card, I used the floral border glimmer plate.

STEP BY STEP INSTRUCTIONS:
- Foil the floral border on red cardstock.
- Matte with green cardstock.
- Die cut several flowers and leaves from the Christmas Blooms die set.
- Foil a sentiment from Yana’s Christmas Sentiments set on dark green cardstock and die cut the sentiment with the coordinating die.
- Adhere the flowers and sentiment with liquid glue and foam tape for dimension.
- Adhere the card front to a panel embossed with the Plaid embossing folder and add to an A2 card base.


November Clear Stamp of the Month
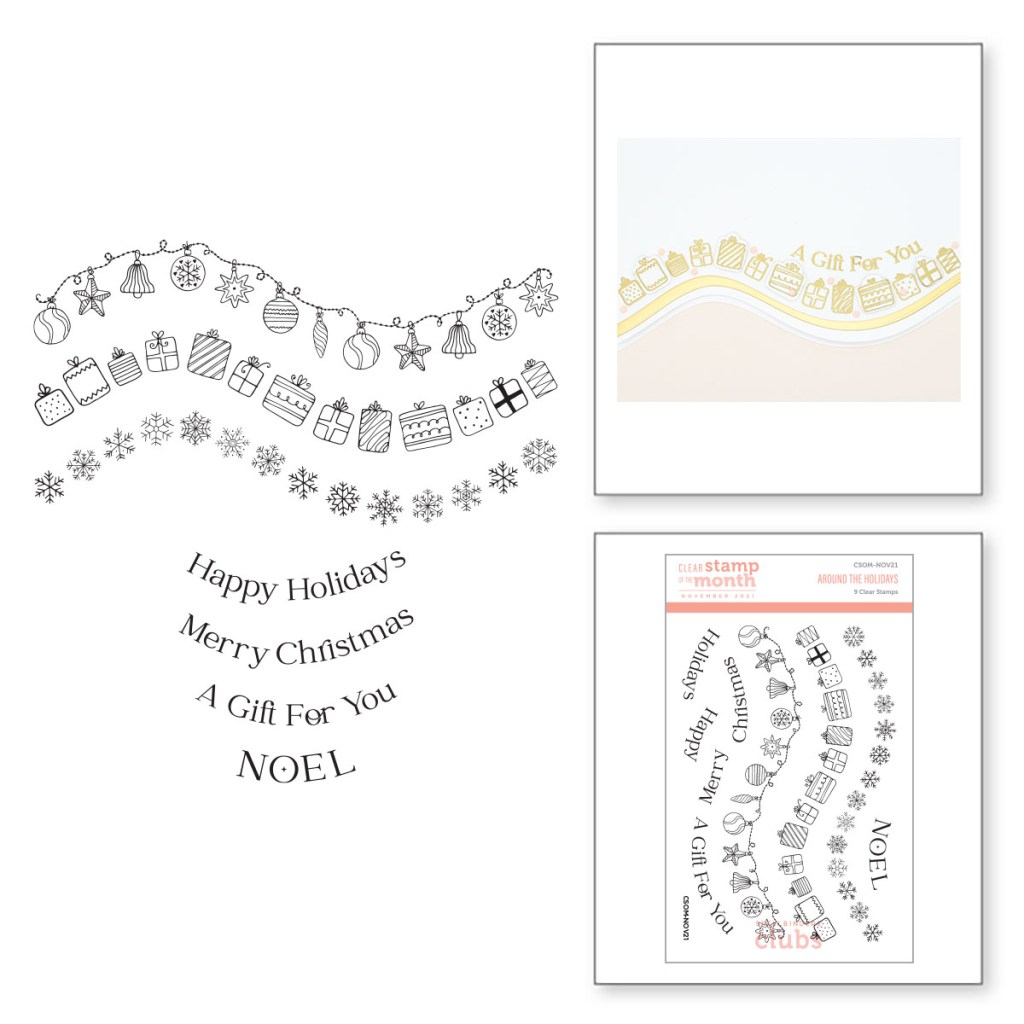

The CSOM comes with several border stamps and sentiments. If you get the coordinating dies (I did not get these dies this month), it comes with a curved border die and dies for individual presents. The curved border die in the GOM kit matches perfectly. For my samples, I made a couple, cute Christmas tags.

STEP BY STEP INSTRUCTIONS:
- Using the A2 Matting Basics A dies, die cut two rectangles – one from kraft and one from white cardstock.
- Trim both rectangles into the tag shape using your paper trimmer.
- Kraft tag
- Stamp and white heat emboss the gifts border stamp three times.
- Die cut the presents from the Shopping Spree Etched dies. Adhere the presents at the bottom of the tag.
- Die cut a smaller rectangle from red cardstock.
- Stamp and white heat emboss the sentiment, Noel.
- Punch a hole in both the tag and the sentiment label and tie together with red baker’s twine.
- White tag
- Stamp the snowflake border stamp four times in two different red inks. I used Catherine Pooler dye ink in Cranberry Fizz and Rockin’ Red.
- Die cut the tree from Oh Christmas Tree Etched dies out of kraft and white shimmer cardstock. Adhere the tree layers together with liquid glue.
- Adhere the tree on top of the tag with foam tape, offsetting it a little.
- Stamp and white heat emboss the sentiment on red cardstock.
- Die cut the sentiment with a circle die from Just a Tweet, September 2021’s large die of the month.
- Adhere the sentiment with foam tape on top of the tree.
- Punch a hole at the top and add red baker’s twine. Embellish with gems.


Hope you enjoyed these projects and are inspired to try one or more of the club kits from Spellbinders! Happy crafting!
*Affiliate disclosure: I only use, review, and blog about products/companies I actually like and will continue to use. Some of the products shown on my blog use affiliate links. These affiliate links allow me to earn a small commission when products are purchased through those links. *This is at no cost to you!* Please do not feel obligated to use my affiliate links. If you choose to use these links, thank you so much! It helps support my blog and bring new content to you. Read the full disclosure on the about page.

What a wonderful way to showcase these dies Tiffany – I love both of your fabulously festive cards! Thanks for sharing with us over at CAS Colours & Sketches this week!
LikeLike
Thank you for stopping by, Joanne!!
LikeLike
Wow! Wow! Wow! I love your bold approach to our color trio and the addition of the glimmer just kicks it up that much more. Thanks so much for playing with us at the CC&S challenge blog Tiffany! (Thank you for the wonderful instructions as well.)
LikeLike
Thank you so much for your kind comments! What a perfect color combo for holiday cards 🙂
LikeLike